struct tms {
	clock_t tms_utime;      /* [XSI] User CPU time */
	clock_t tms_stime;      /* [XSI] System CPU time */
	clock_t tms_cutime;     /* [XSI] Terminated children user CPU time */
	clock_t tms_cstime;     /* [XSI] Terminated children System CPU time */
};
#include <sys/types.h>
#include <grp.h>

struct group *getgrname(const char *name);
struct group *getgrgid(gid_t gid);

struct group *getgrent(void);
void setgrent(void);
void endgrent(void);
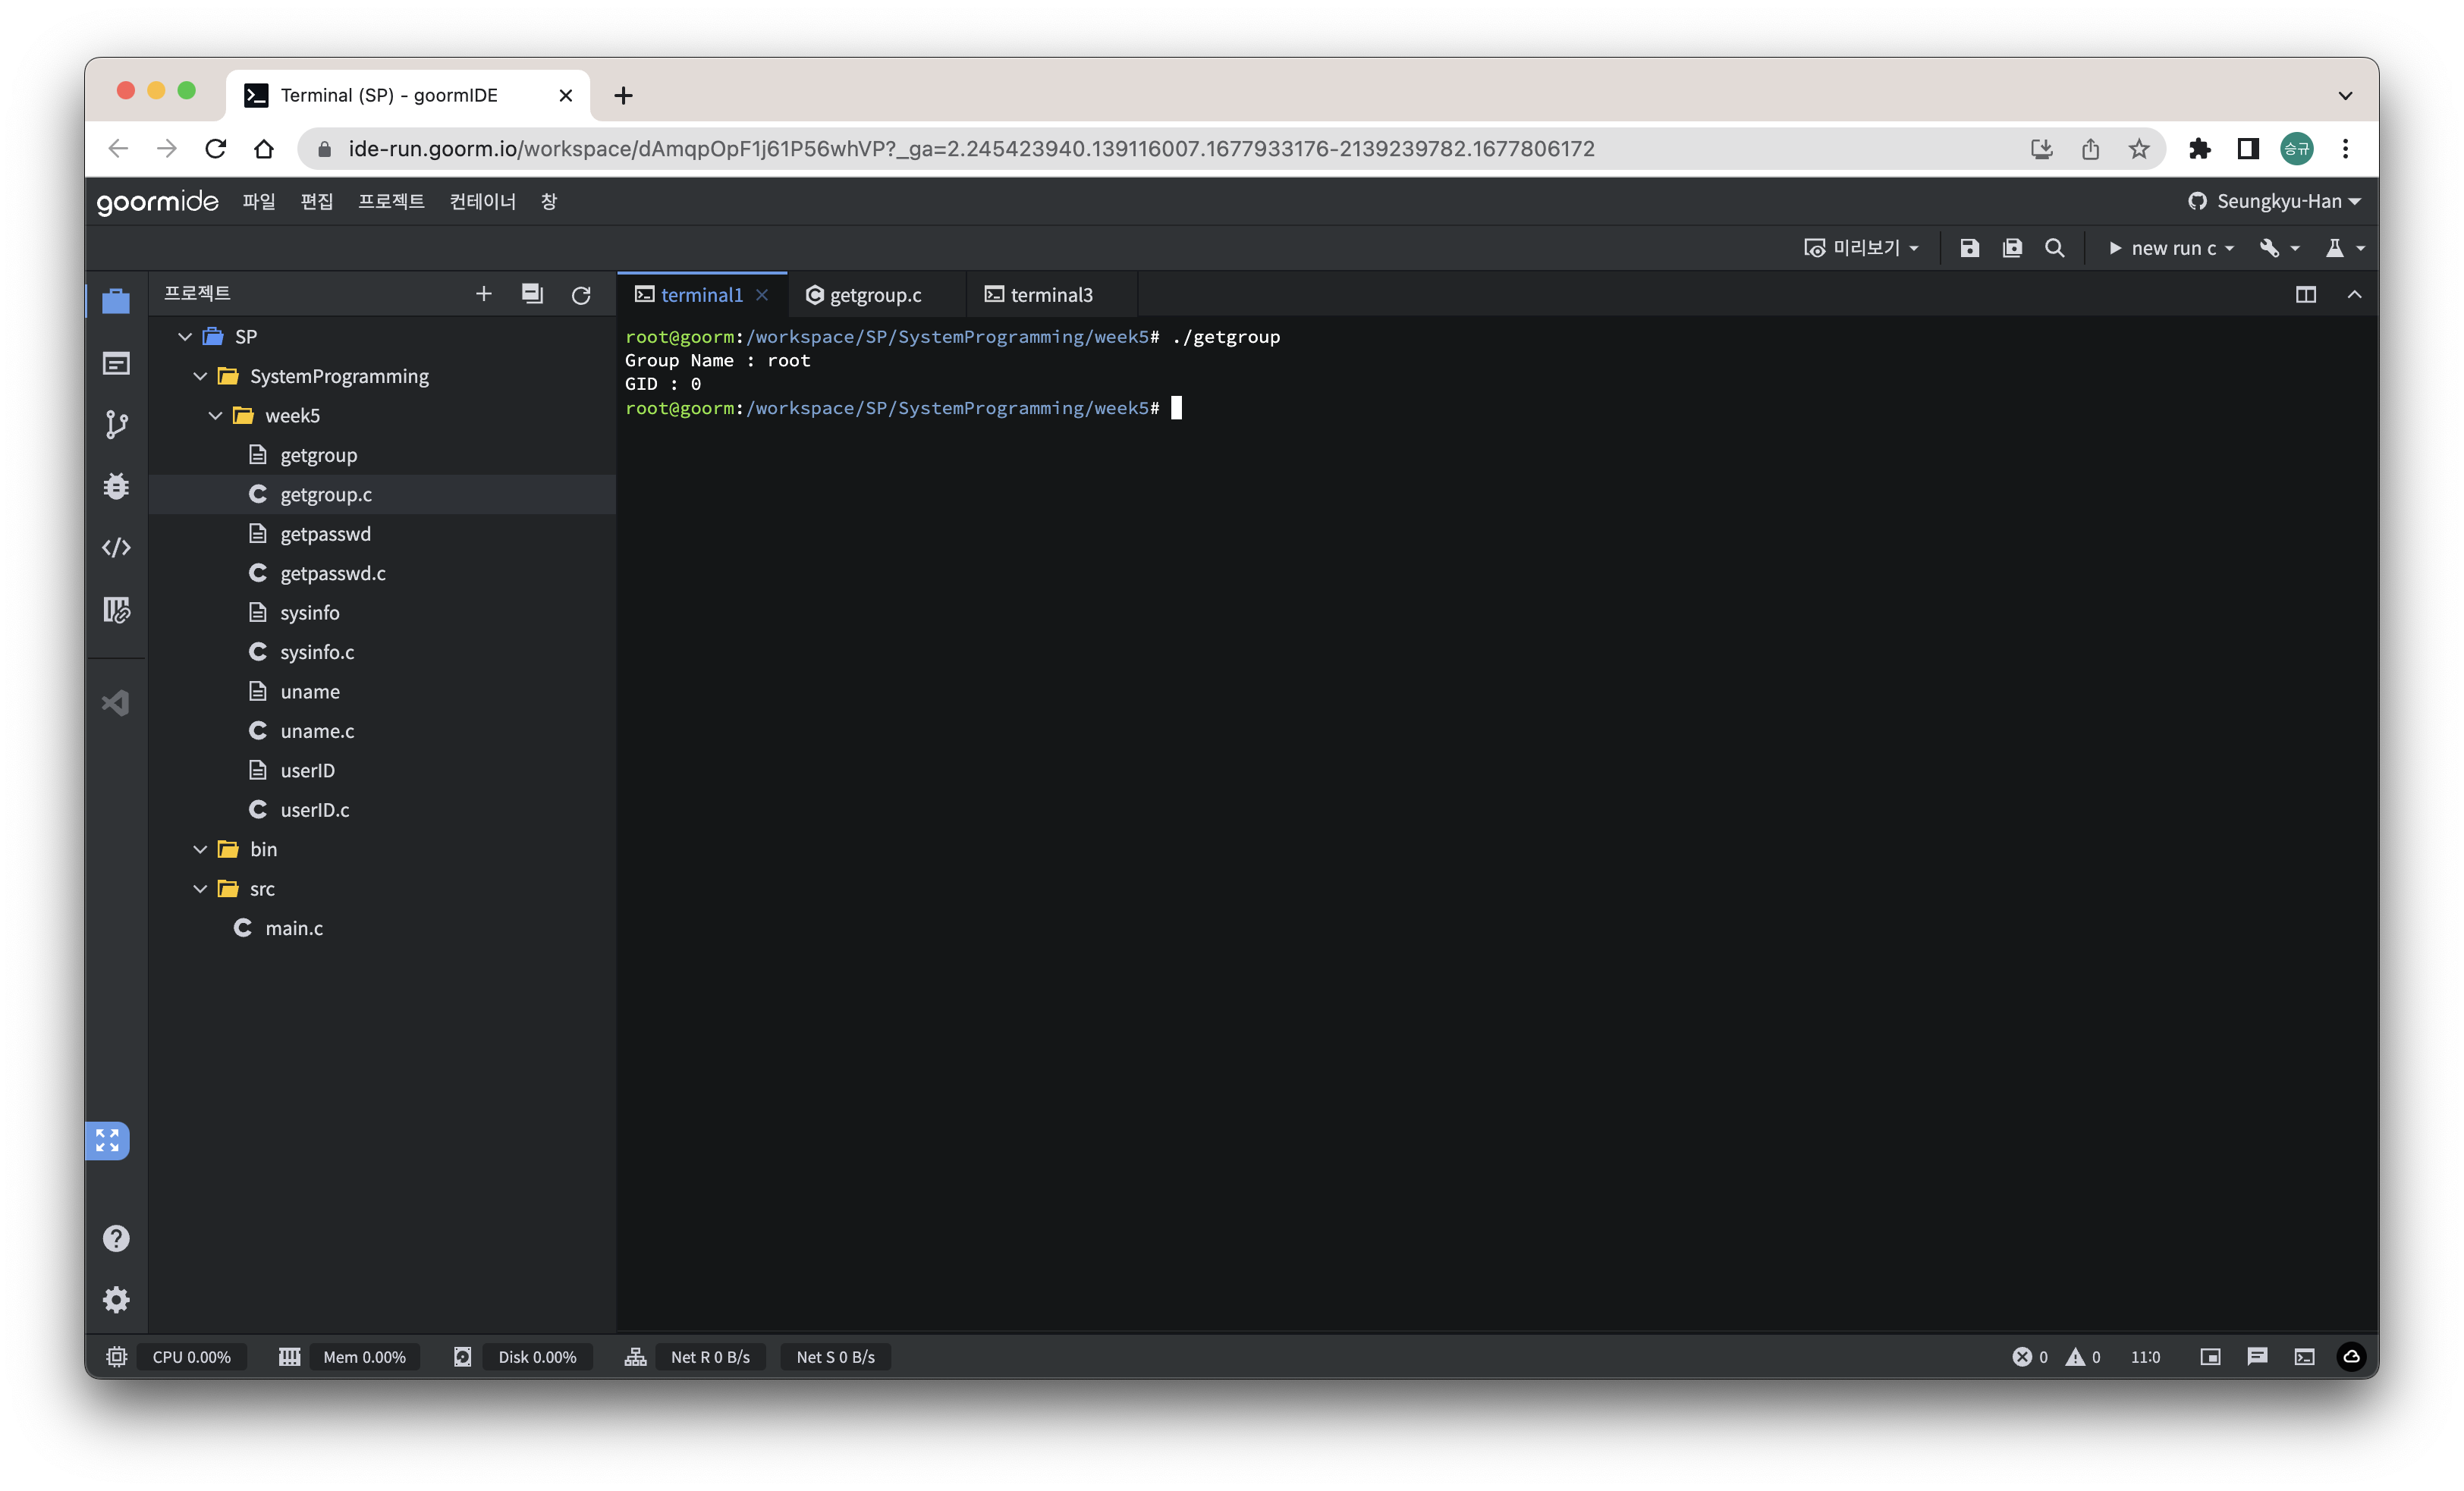
사용자 뿐만 아니라 그룹에 대한 정보도 가져올 수 있다.
위와 비슷하고 그룹이란 것만 변경이 되었기 때문에 바로 실습으로 가보도록 하겠다.
group의 구조체는 아래와 같다.
struct group {
	char	*gr_name;		/* [XBD] group name */
	char	*gr_passwd;		/* [???] group password */
	gid_t	gr_gid;			/* [XBD] group id */
	char	**gr_mem;		/* [XBD] group members */
};
그룹에 대한 정보를 읽어오는 프로그램을 만들어보자.
#include <stdio.h>
#include <stdlib.h>
#include <grp.h>

int main(void){
	struct group *grp;

	grp = getgrnam("root");
	printf("Group Name : %s\n", grp->gr_name);
	printf("GID : %d\n", (int)grp->gr_gid);


	return 0;
}
그룹의 이름을 이용해 정보를 가져왔다.
시간 정보
리눅스의 시간은 1970년 1월 1일 0시 0분 0초를 기준으로 흘러가며 현재까지 경과한 시간을 초 단위로 저장한다.
Getting time
#include <sys/time.h>

time_t time(time_t *tloc);
-tloc
얻어올 초를 저장할 주소
return: 얻어온 초, -1(error)
하지만 이렇게 얻어온 시간은 흘러간 초로 표현이 되기 때문에 읽기가 매우 힘들다.
그래서 이 time_t를 우리가 보기 편한 시간으로 보여주는 함수가 있고 그 시간을 저장하는 구조체가 있다.
우선 해당 구조체부터 살펴보자면
struct tm {
	int	tm_sec;		/* seconds after the minute [0-60] */
	int	tm_min;		/* minutes after the hour [0-59] */
	int	tm_hour;	/* hours since midnight [0-23] */
	int	tm_mday;	/* day of the month [1-31] */
	int	tm_mon;		/* months since January [0-11] */
	int	tm_year;	/* years since 1900 */
	int	tm_wday;	/* days since Sunday [0-6] */
	int	tm_yday;	/* days since January 1 [0-365] */
	int	tm_isdst;	/* Daylight Savings Time flag */
};
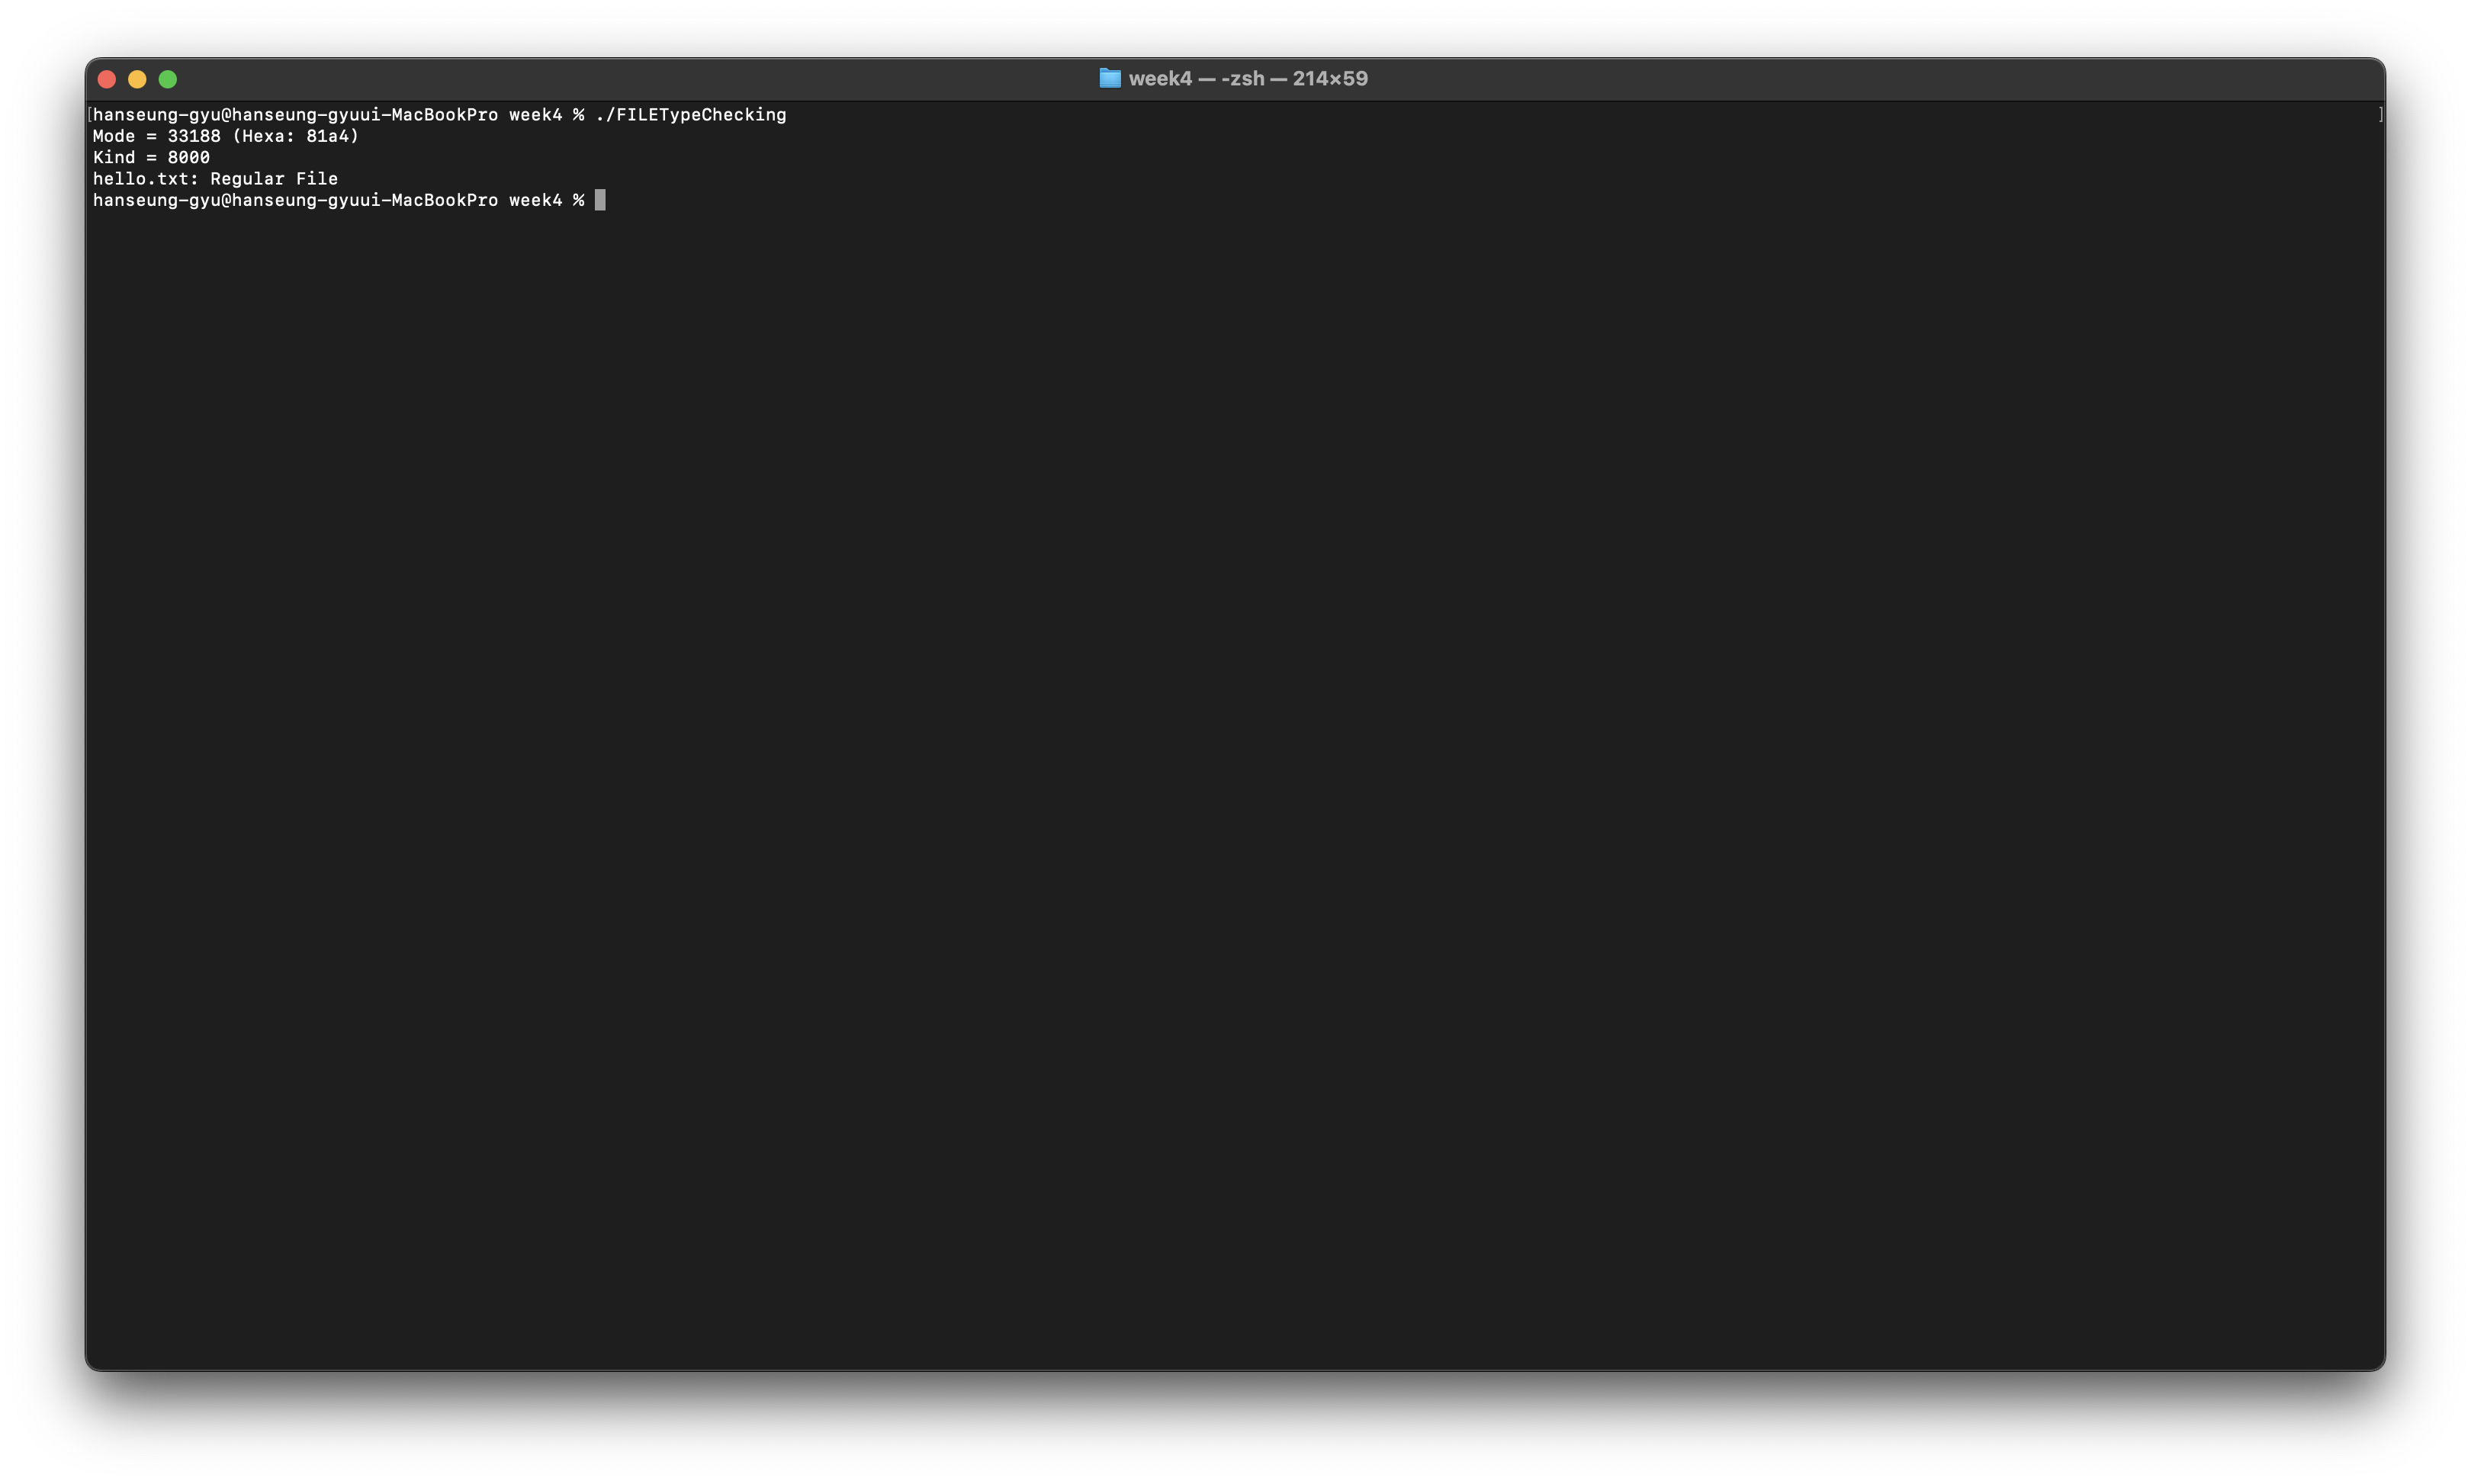
리눅스는 모두 파일로 저장이 되고 종류로는 Regular file, Special file, Directory, Symbolic link file... 등이 있다.
파일의 종류를 확인하고 싶으면 ls -l 명령어를 사용하면 된다.
정보 가장 앞에 나온 문자로 확인을 한다.
문자
파일의 종류
-
일반 파일
d
디렉토리
b
블록 장치 특수 파일
c
문자 장치 특수 파일
l
심볼릭 링크
Types of file
- Special file
장치와 데이터를 주고 받는 통로이다, 데이터 블록이 없으며 장치 번호를 inode에 저장한다.
단위에 따라 Character device file, Block device file로 나뉜다.
- Regular file
Text or binary data file이다.
- Directory(윈도우의 파일)
파일의 목록을 저장한 파일이다.
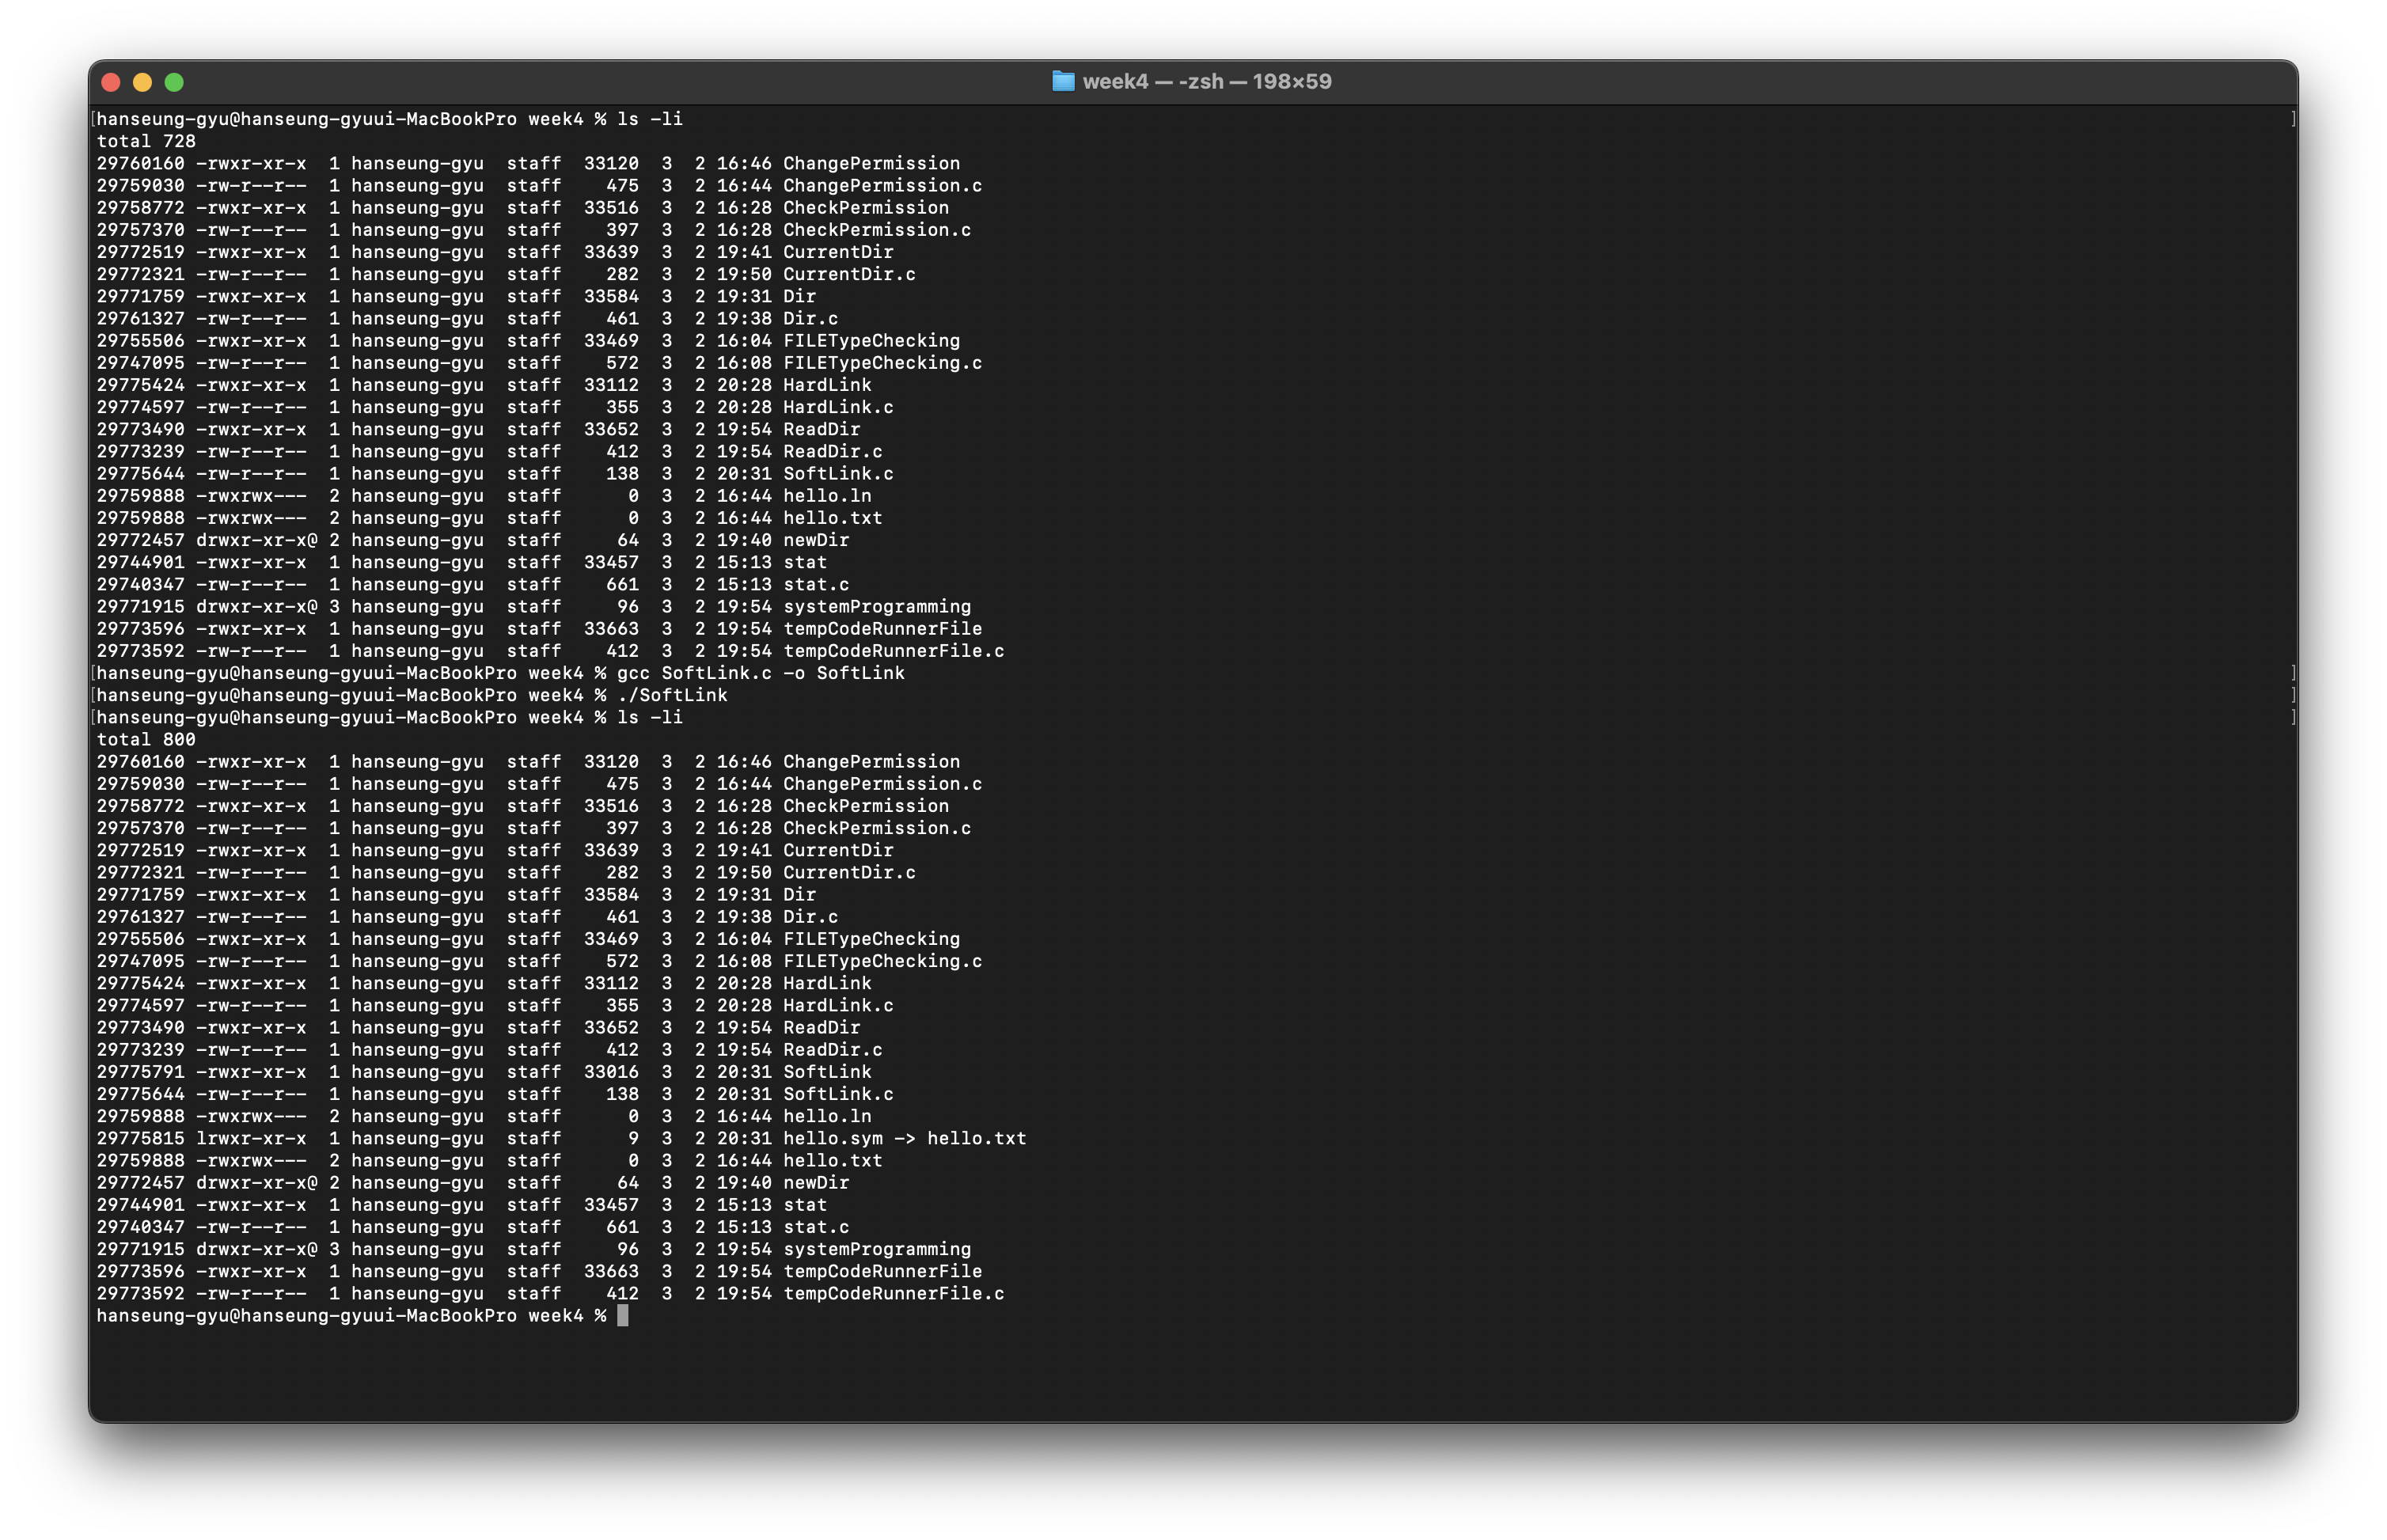
- Symbolic link file
이미 존재하는 파일이나 디렉토리에 접근 할 수 있는 새로운 이름이다.
File organization
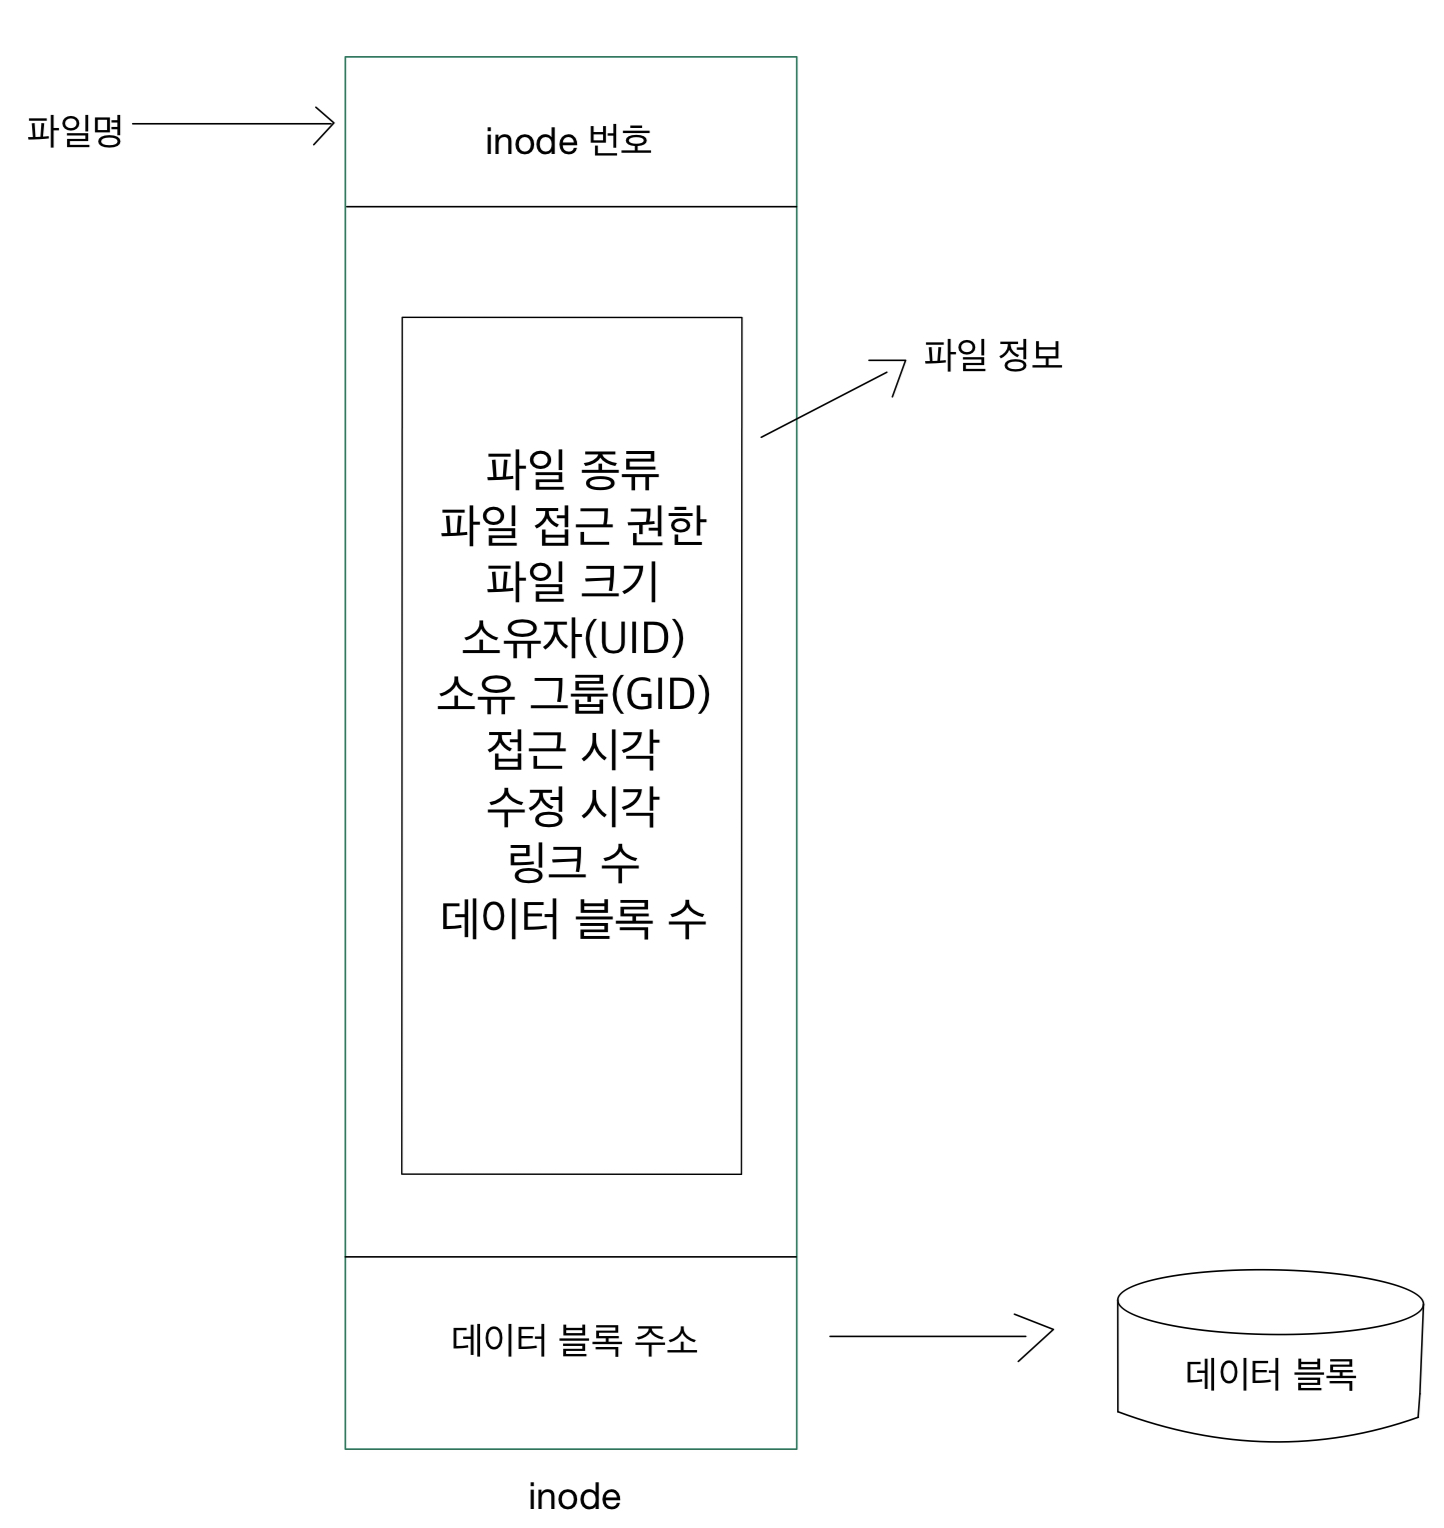
파일을 구성하는 요소는 3가지이다.
- File name
파일의 이름으로 사용자가 파일에 접근할 때 사용한다.
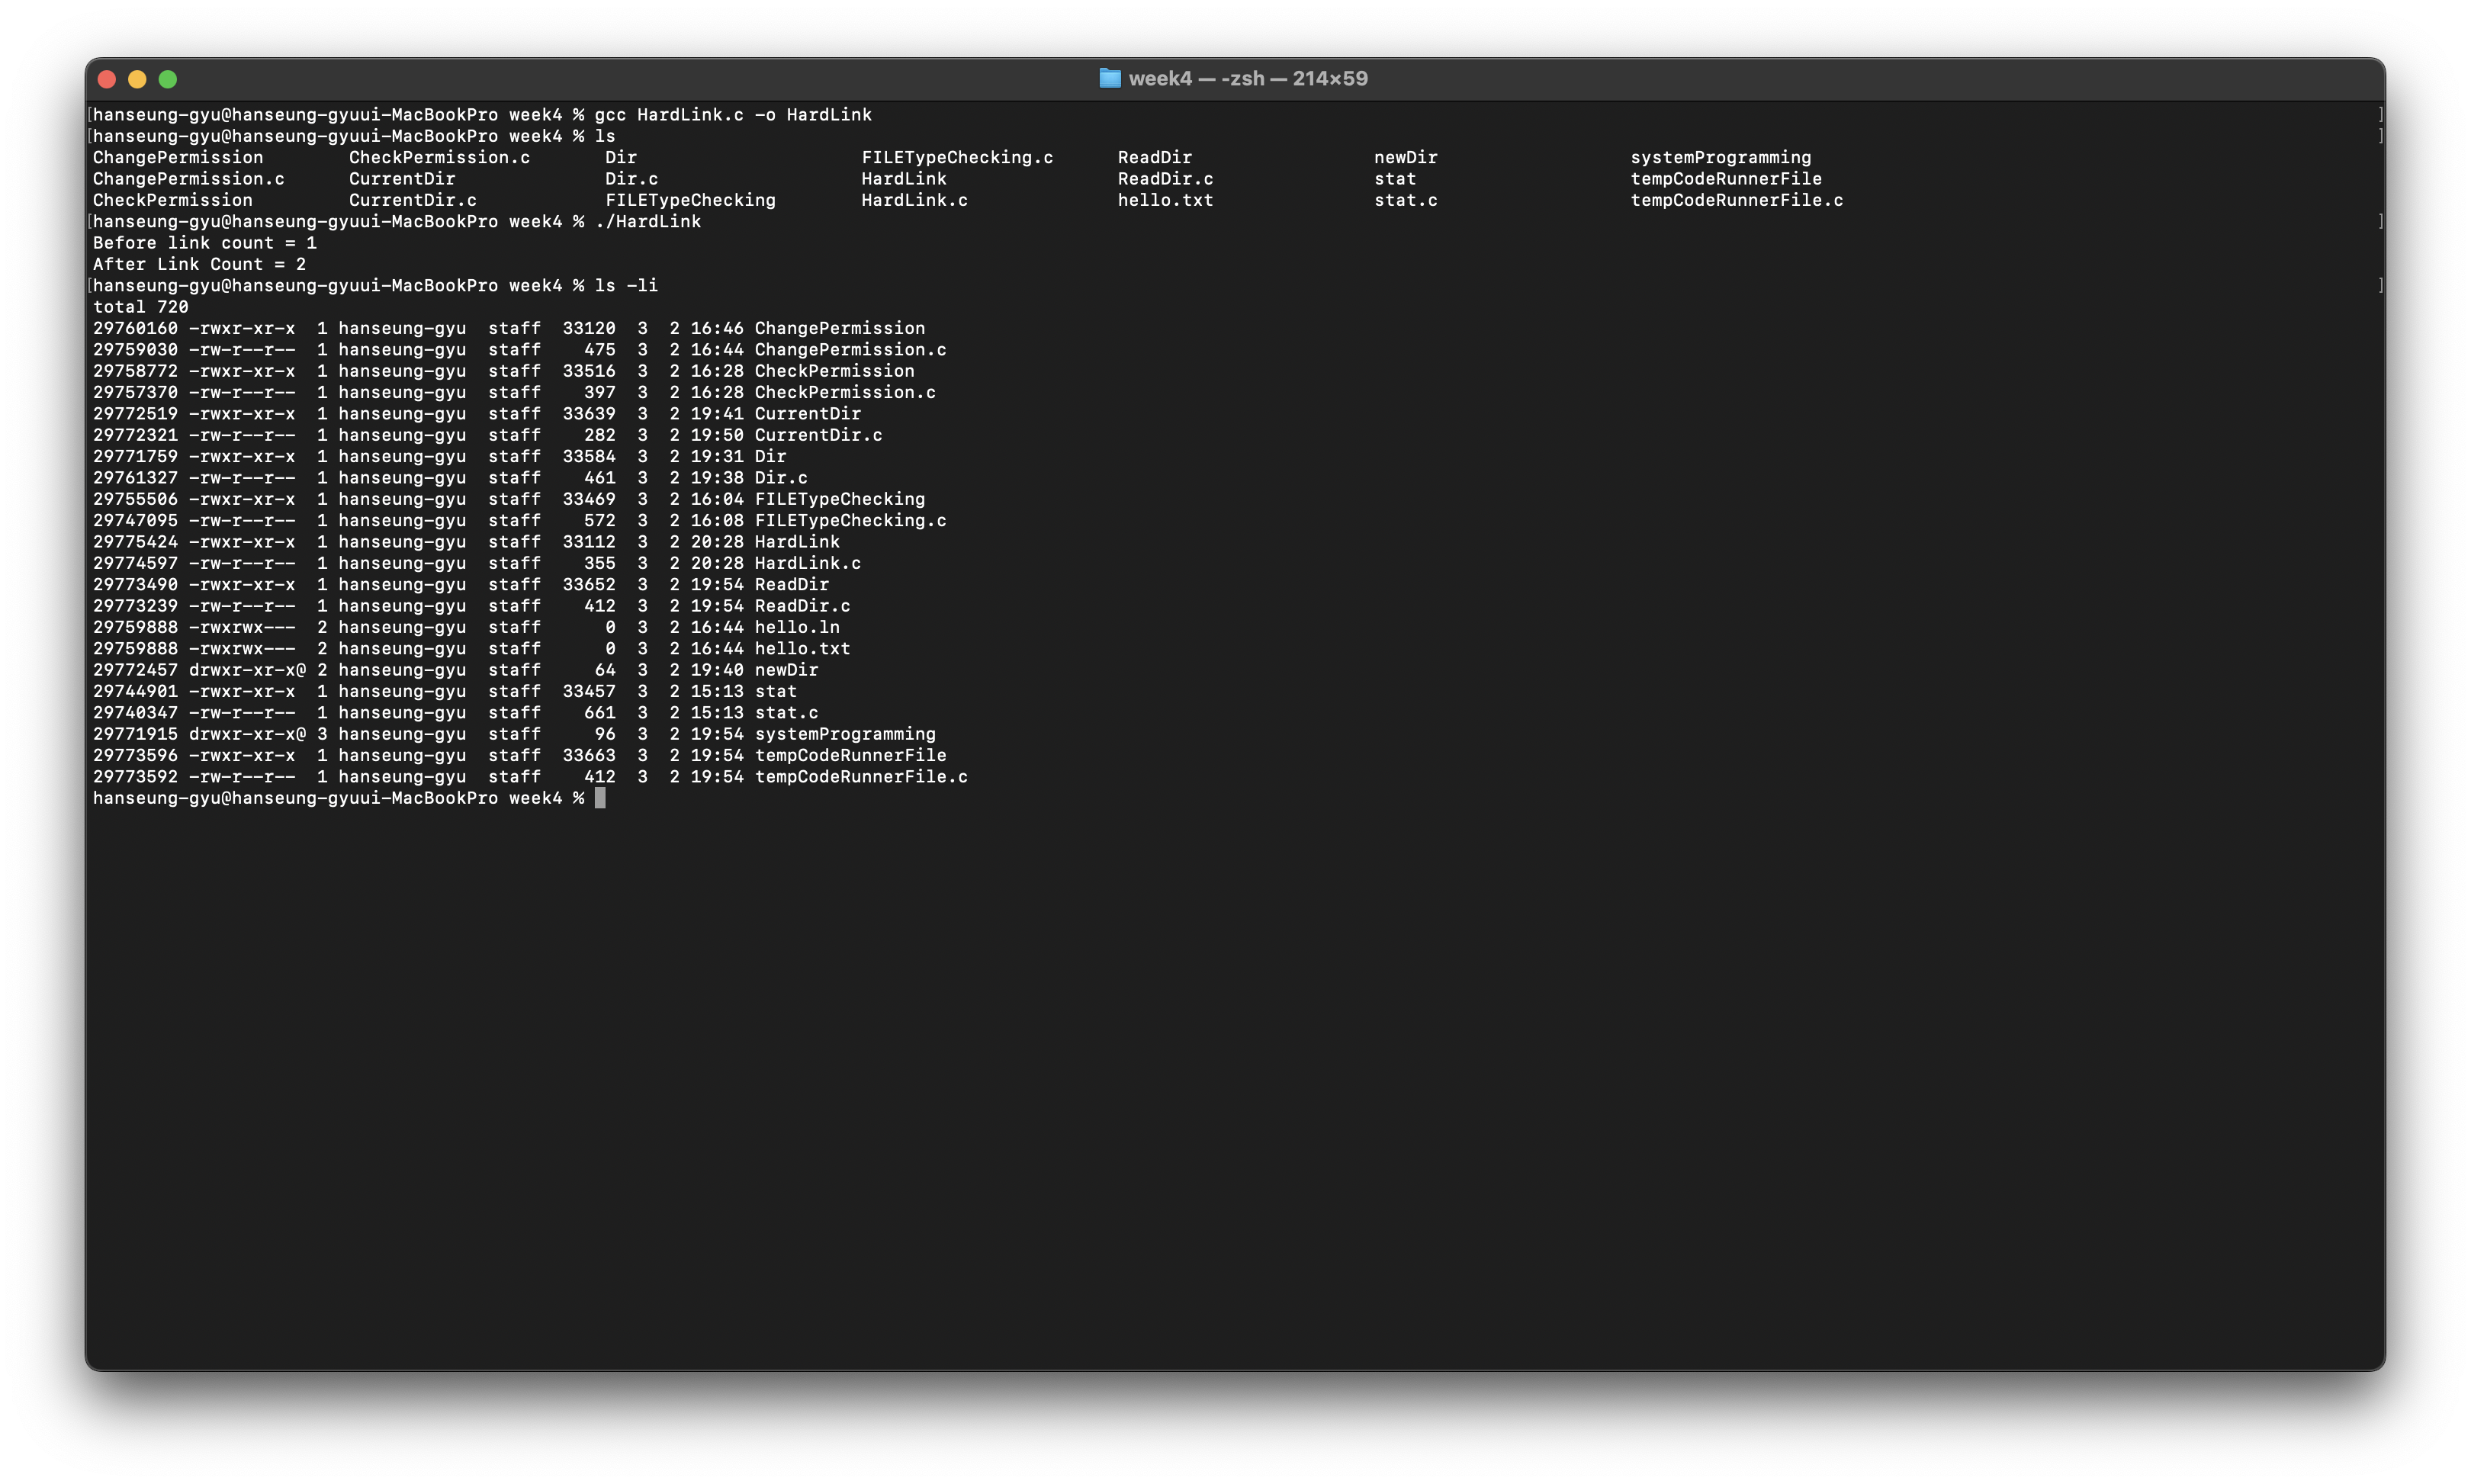
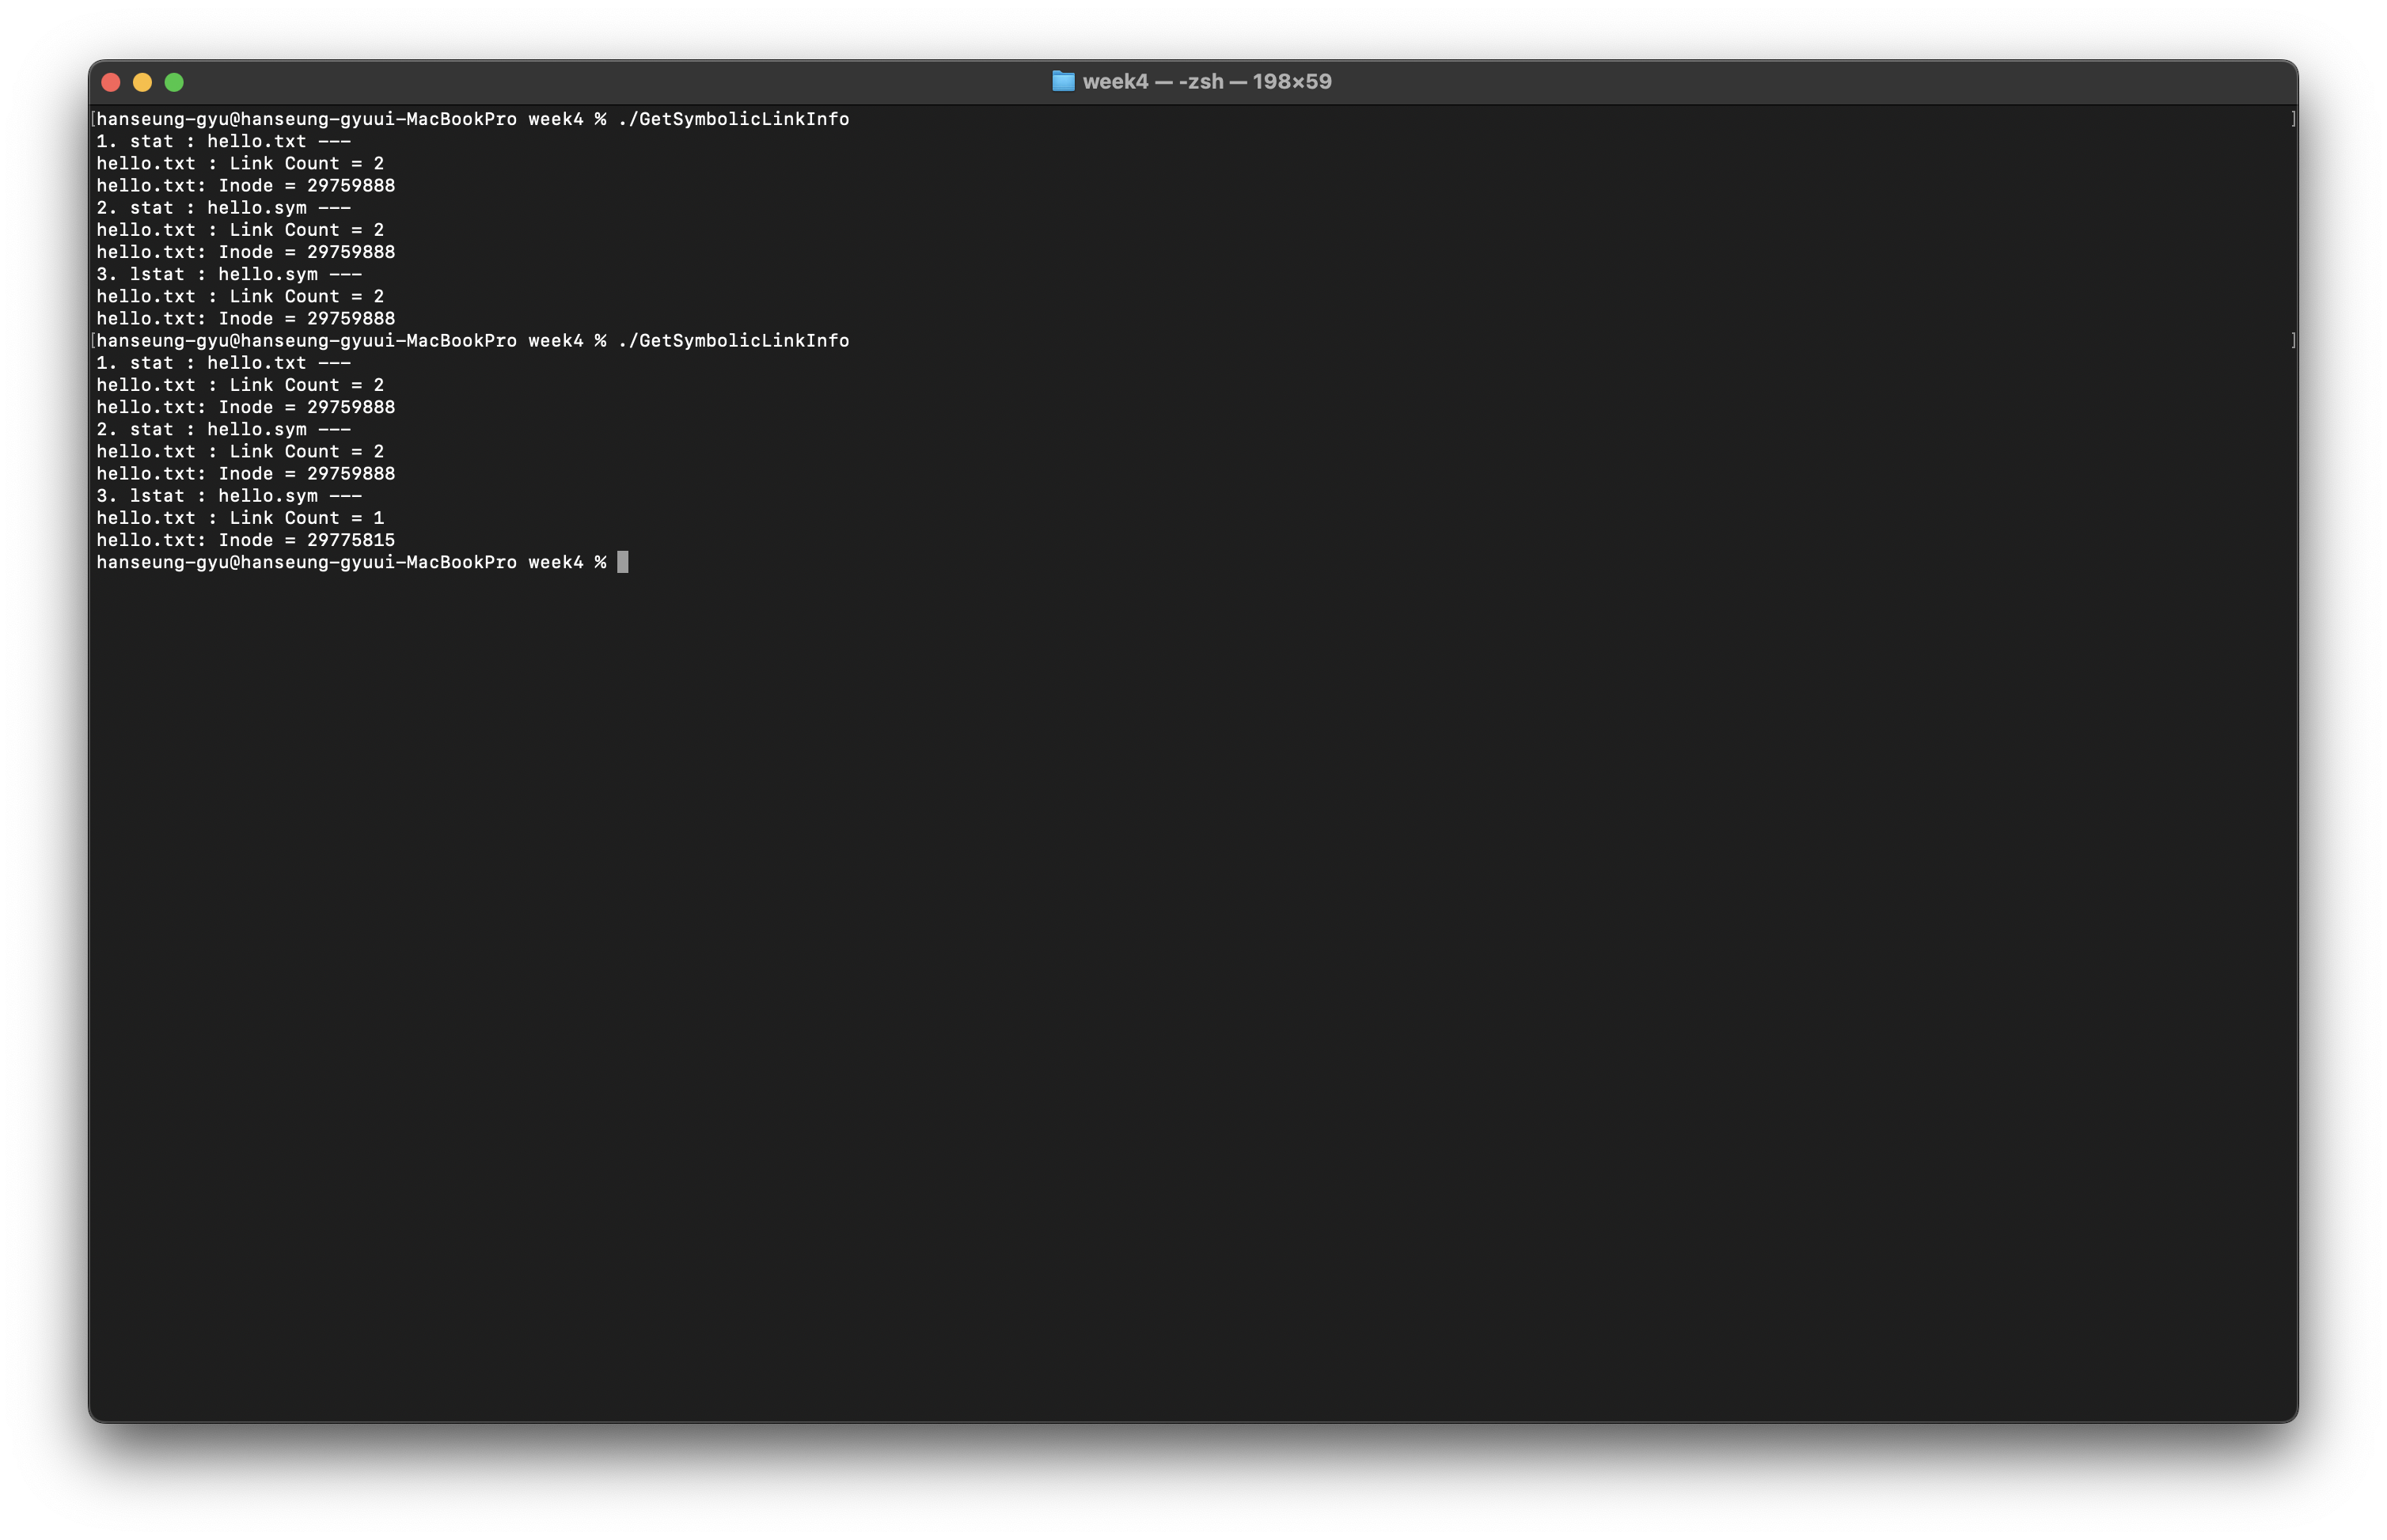
- inode
파일에 대한 정보를 저장한다, 번호를 통해 관리/접근 한다.
- Data block
실제 데이터가 저장된 디스크의 공간이다.
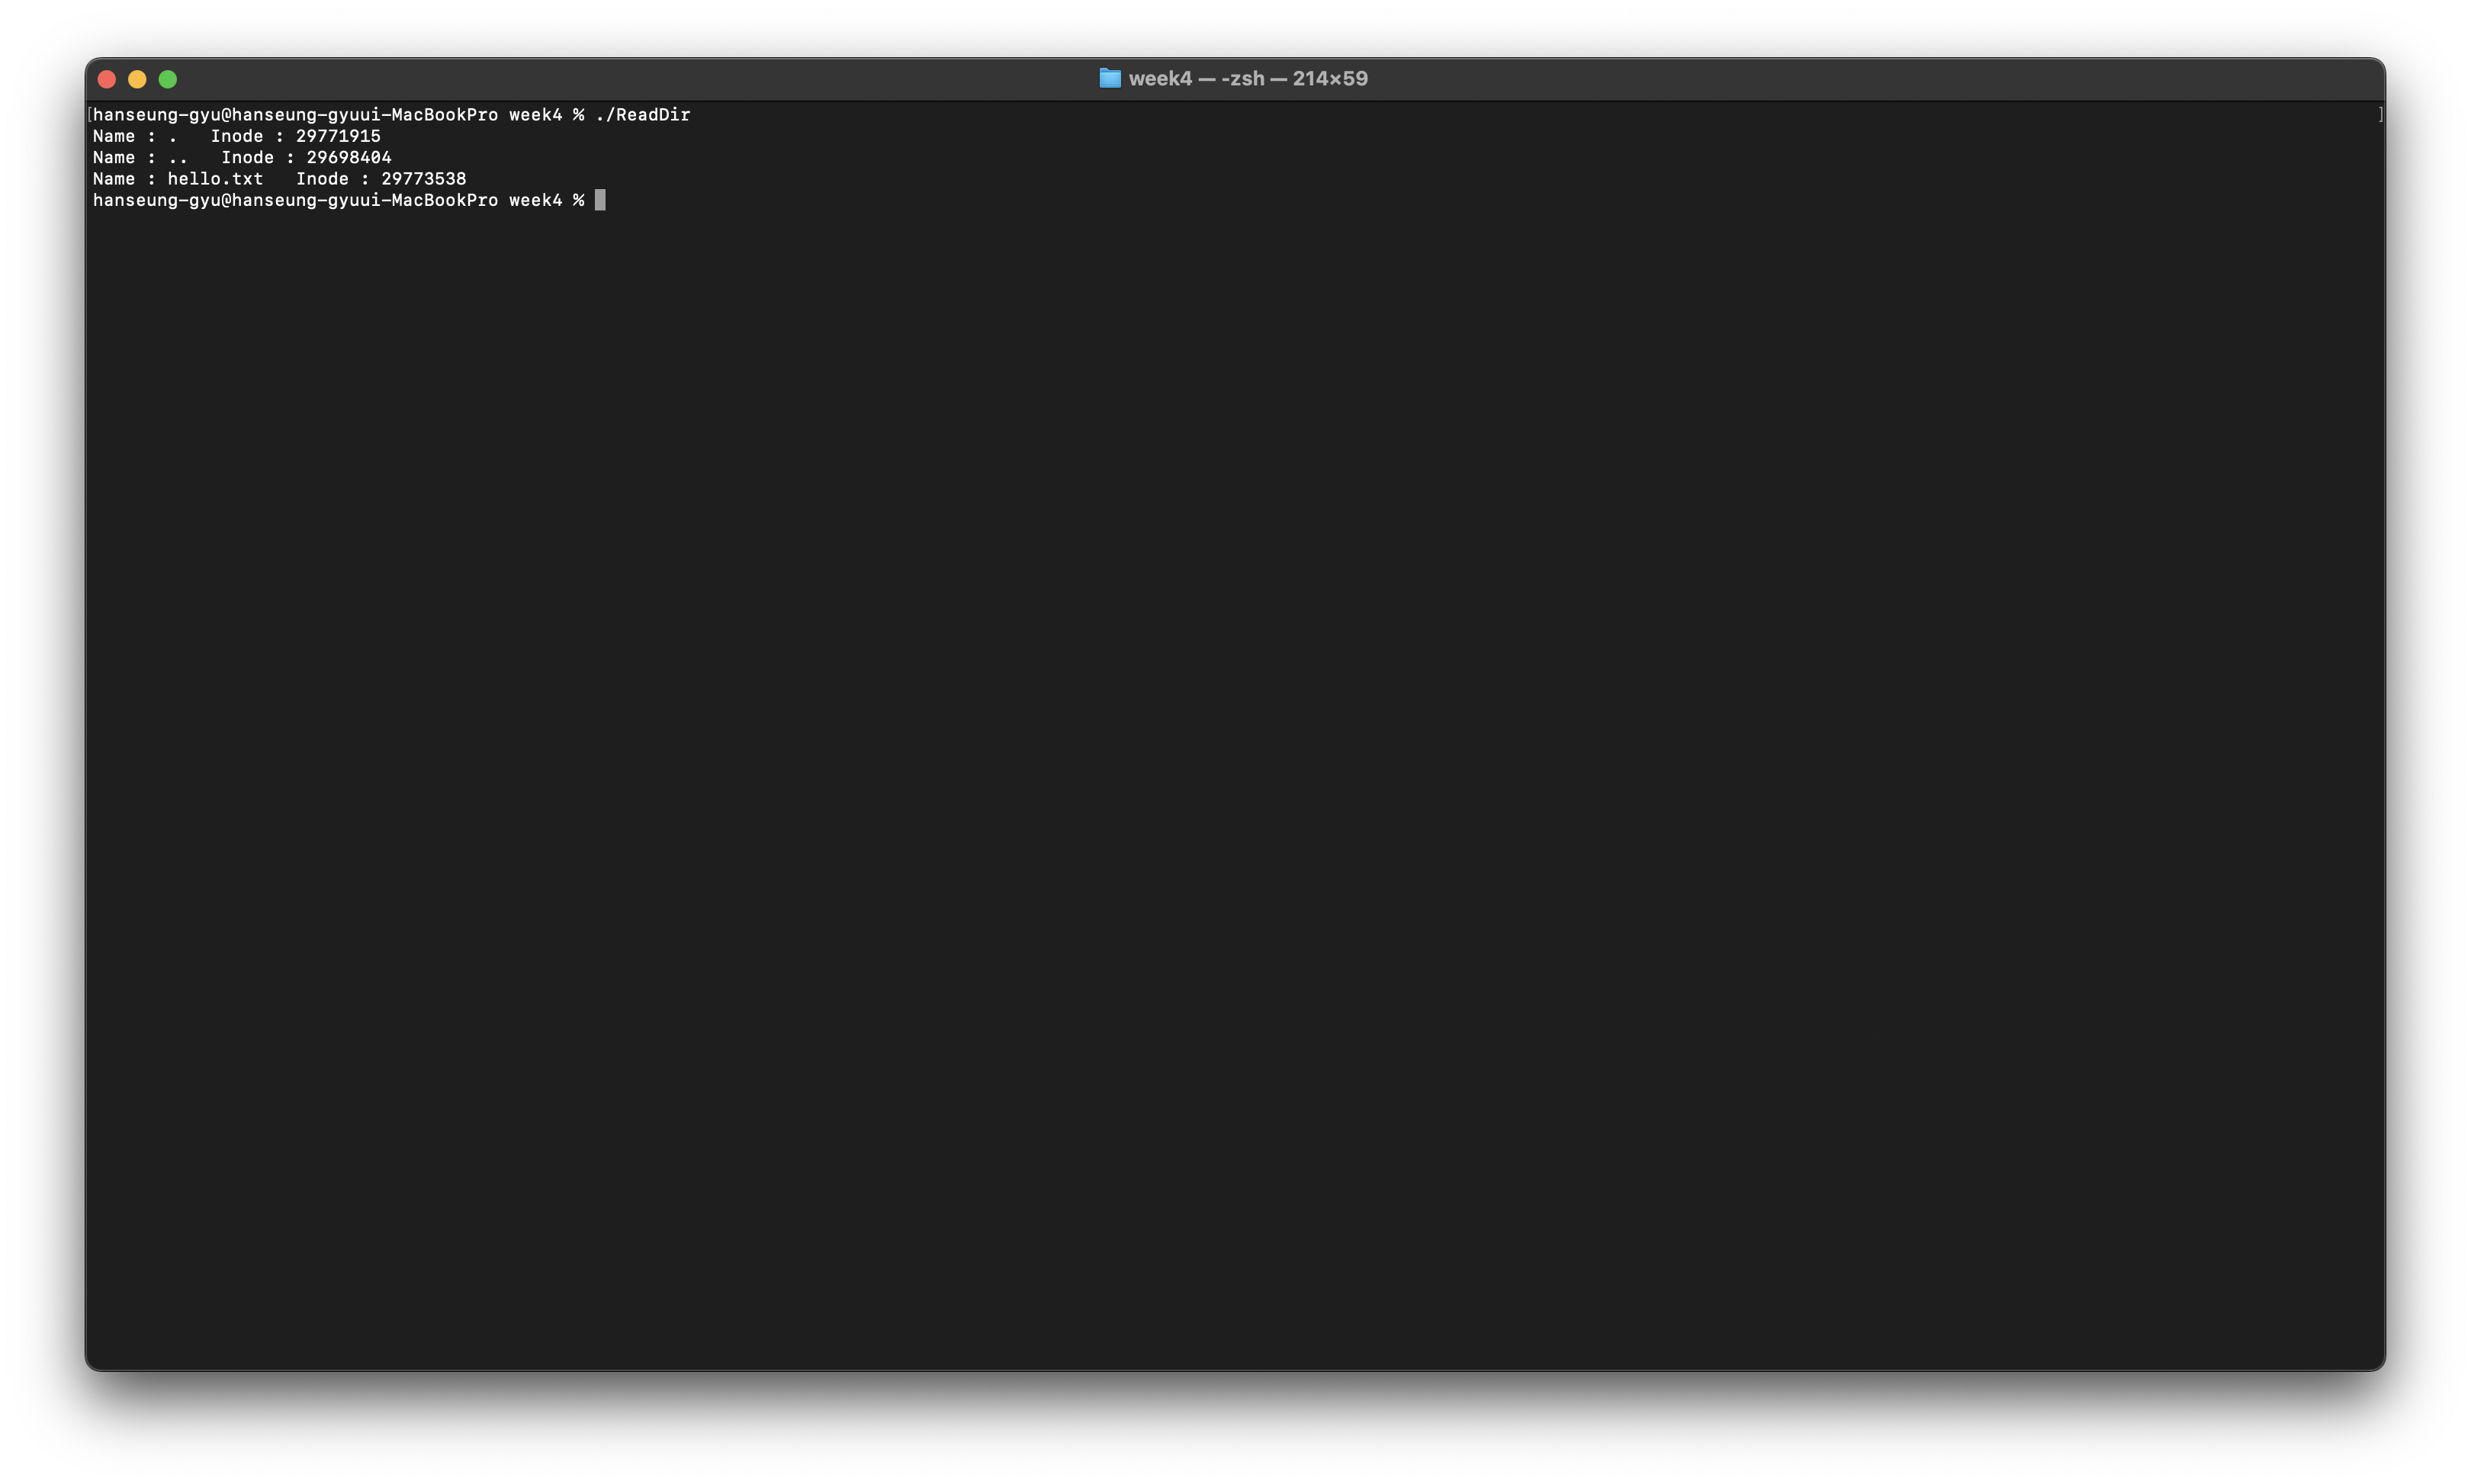
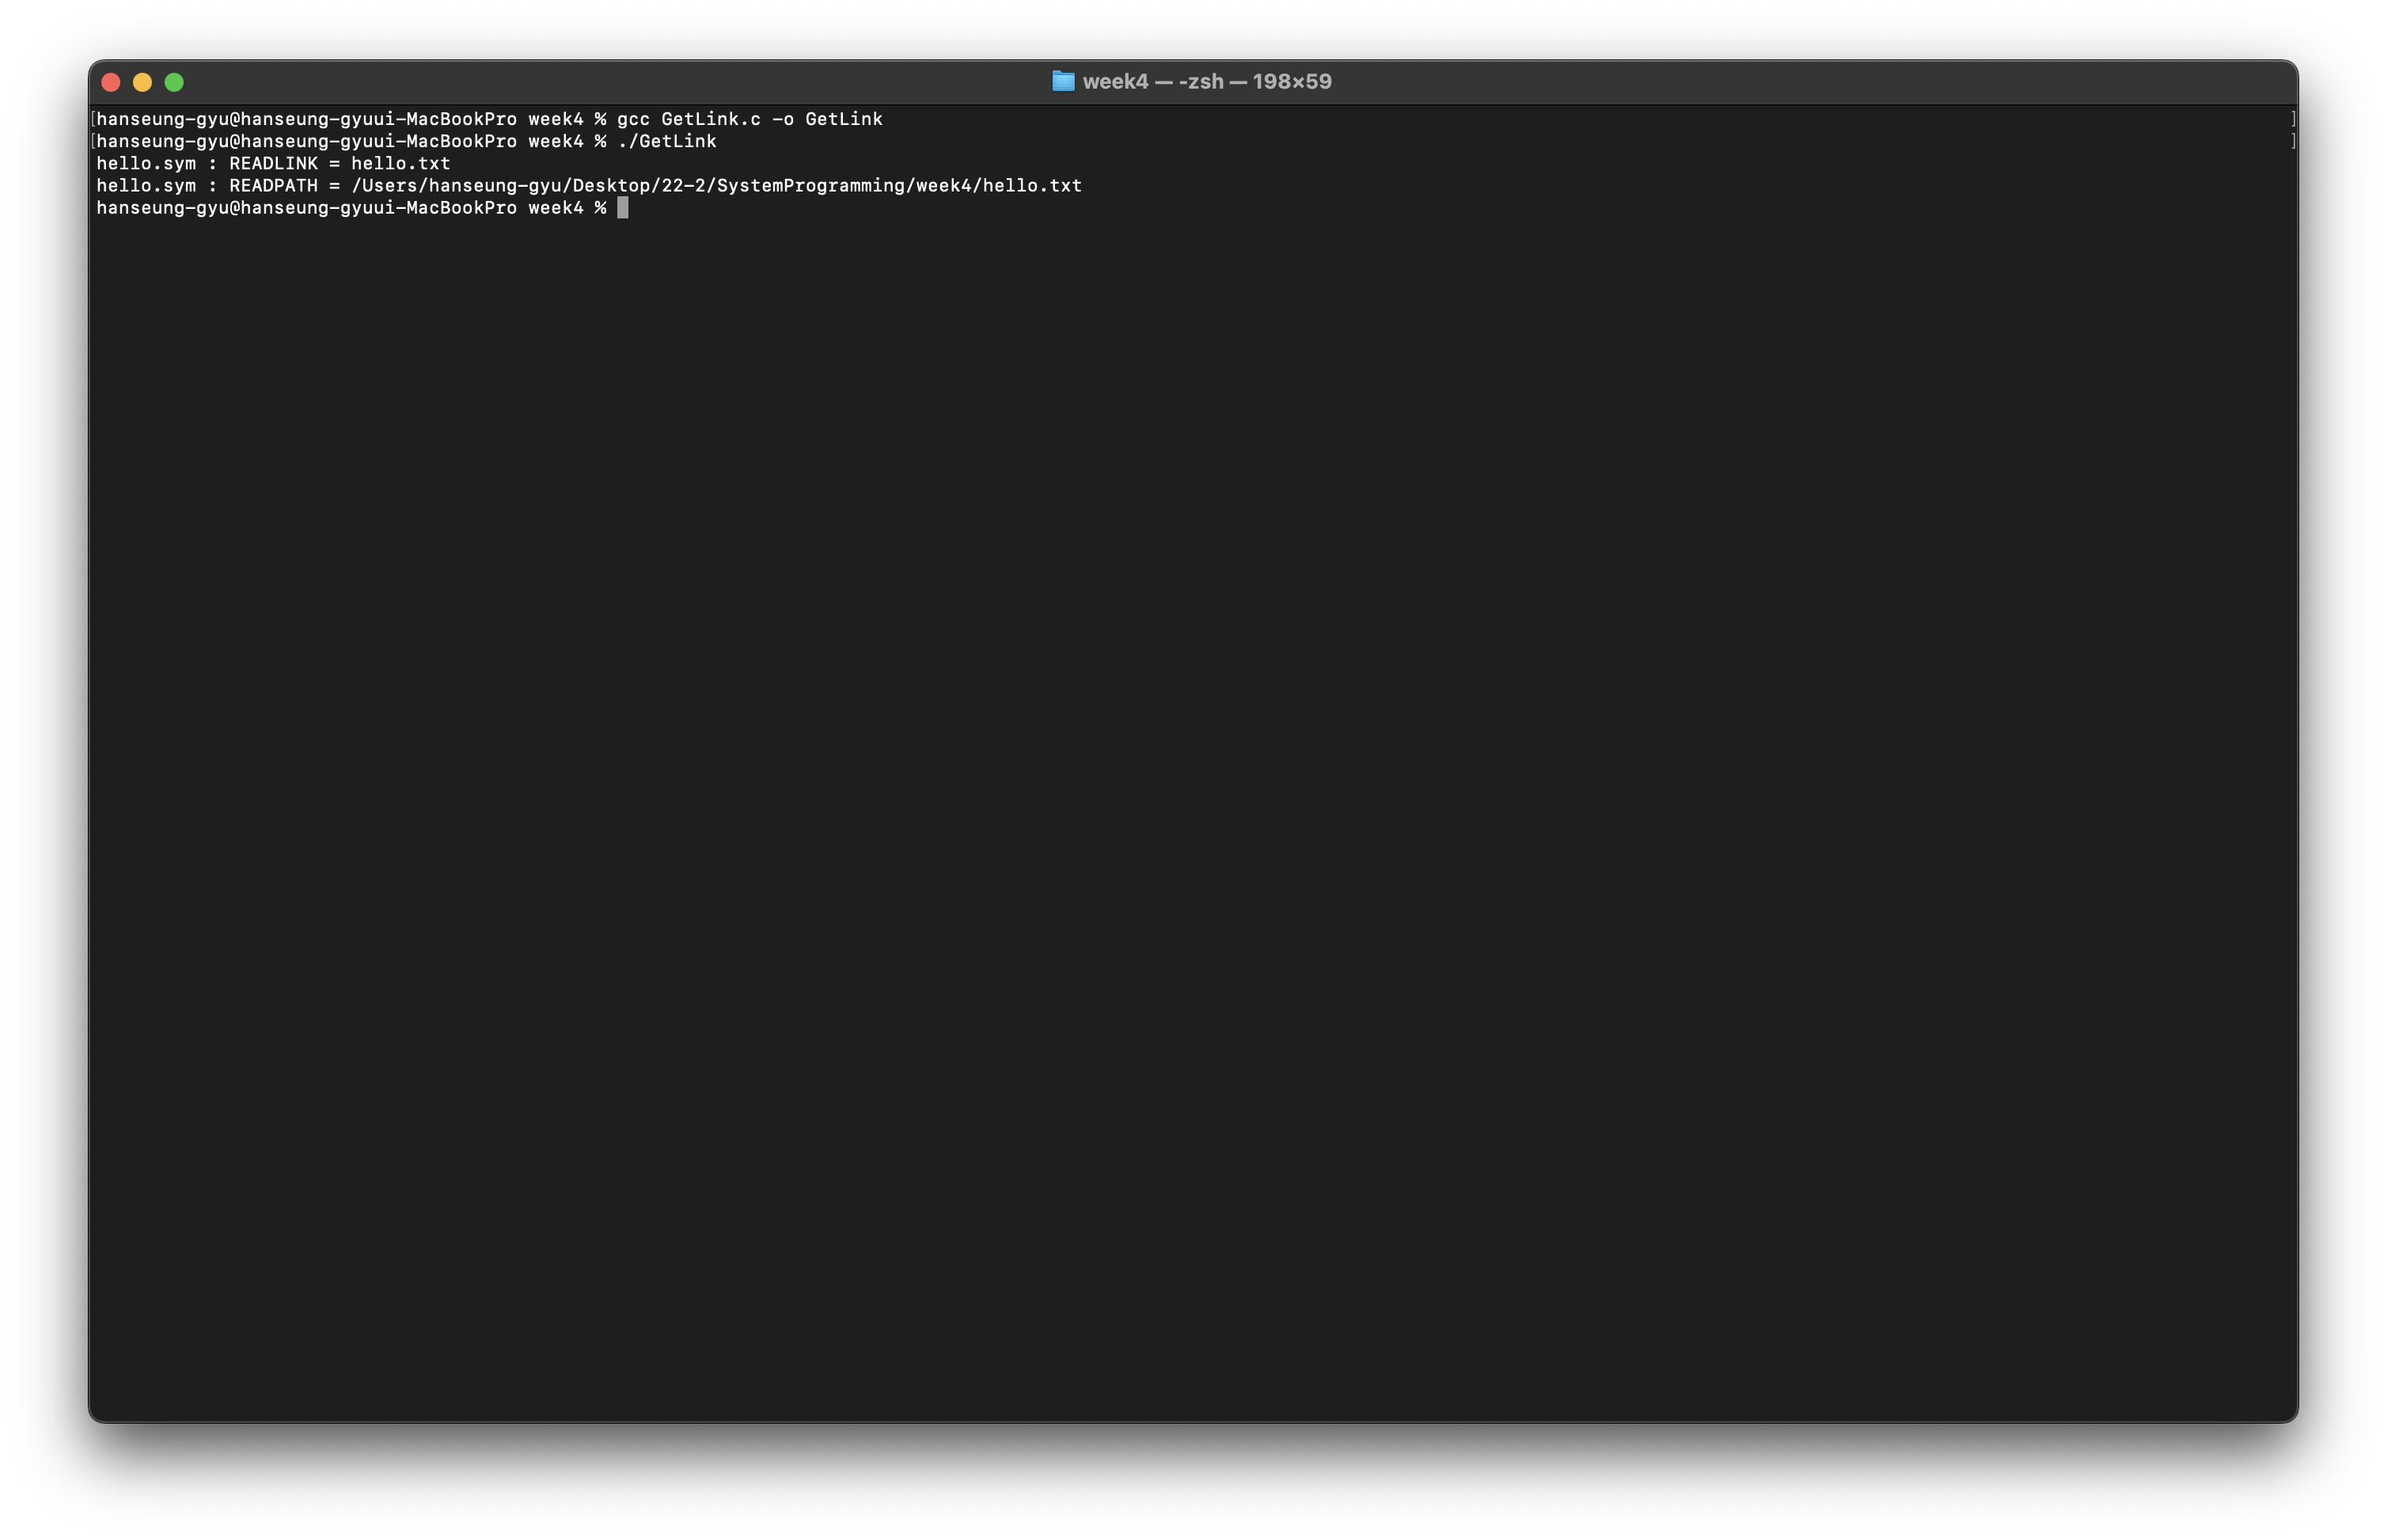
inode는 ls -i로 확인할 수 있다.
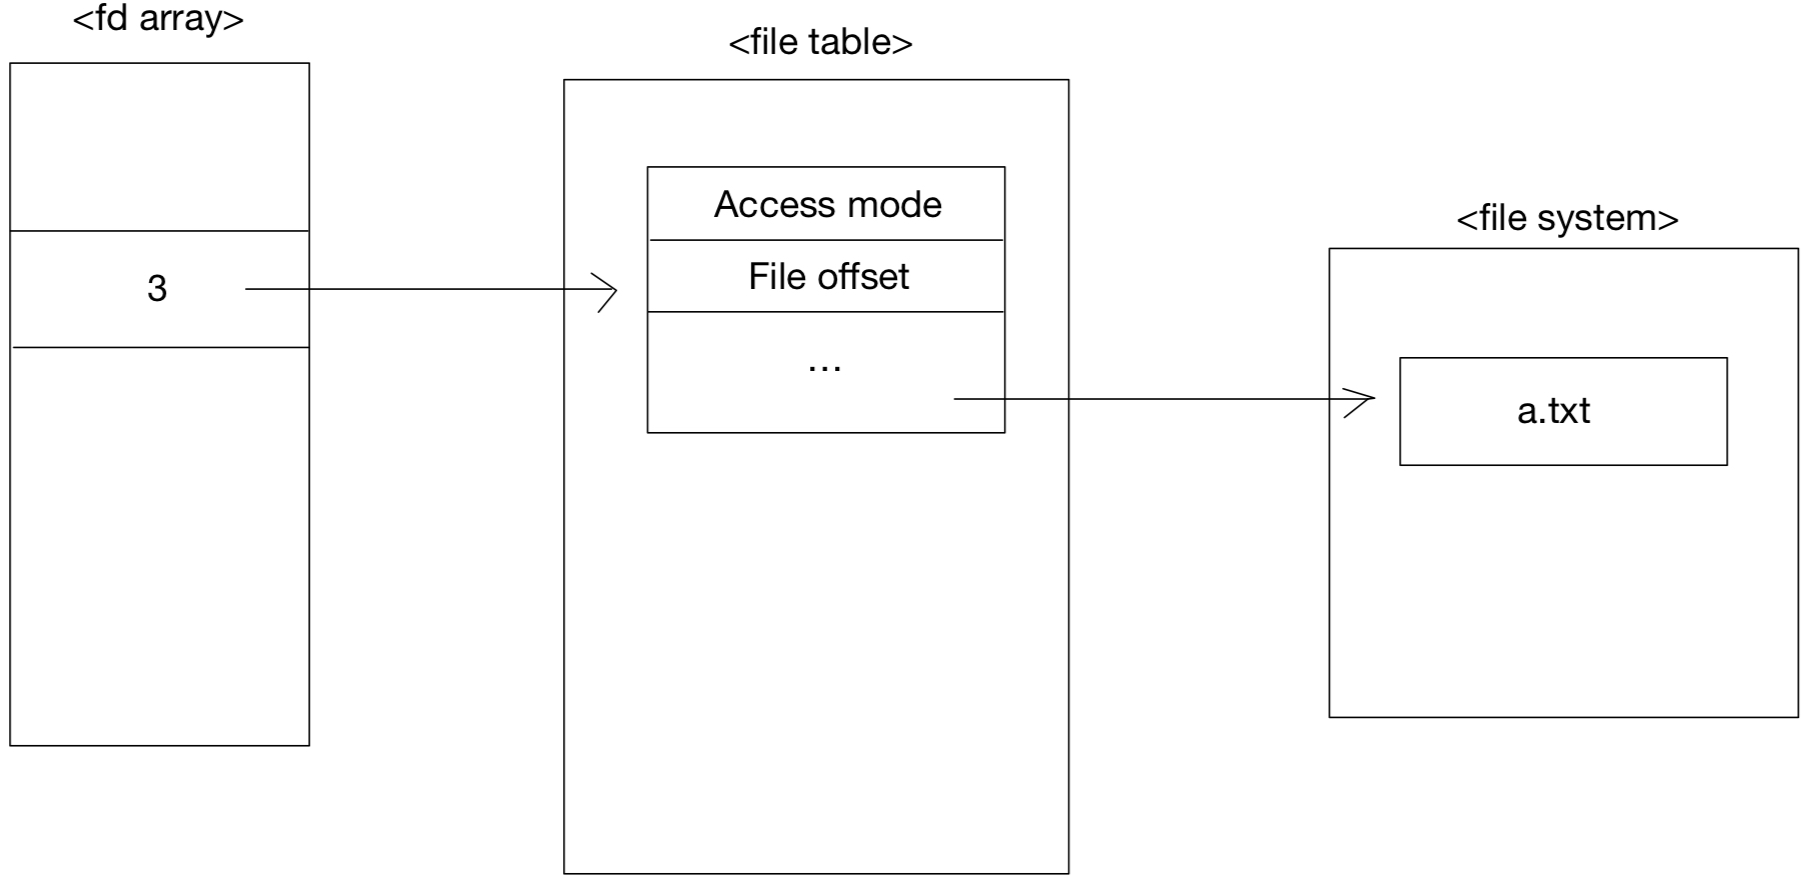
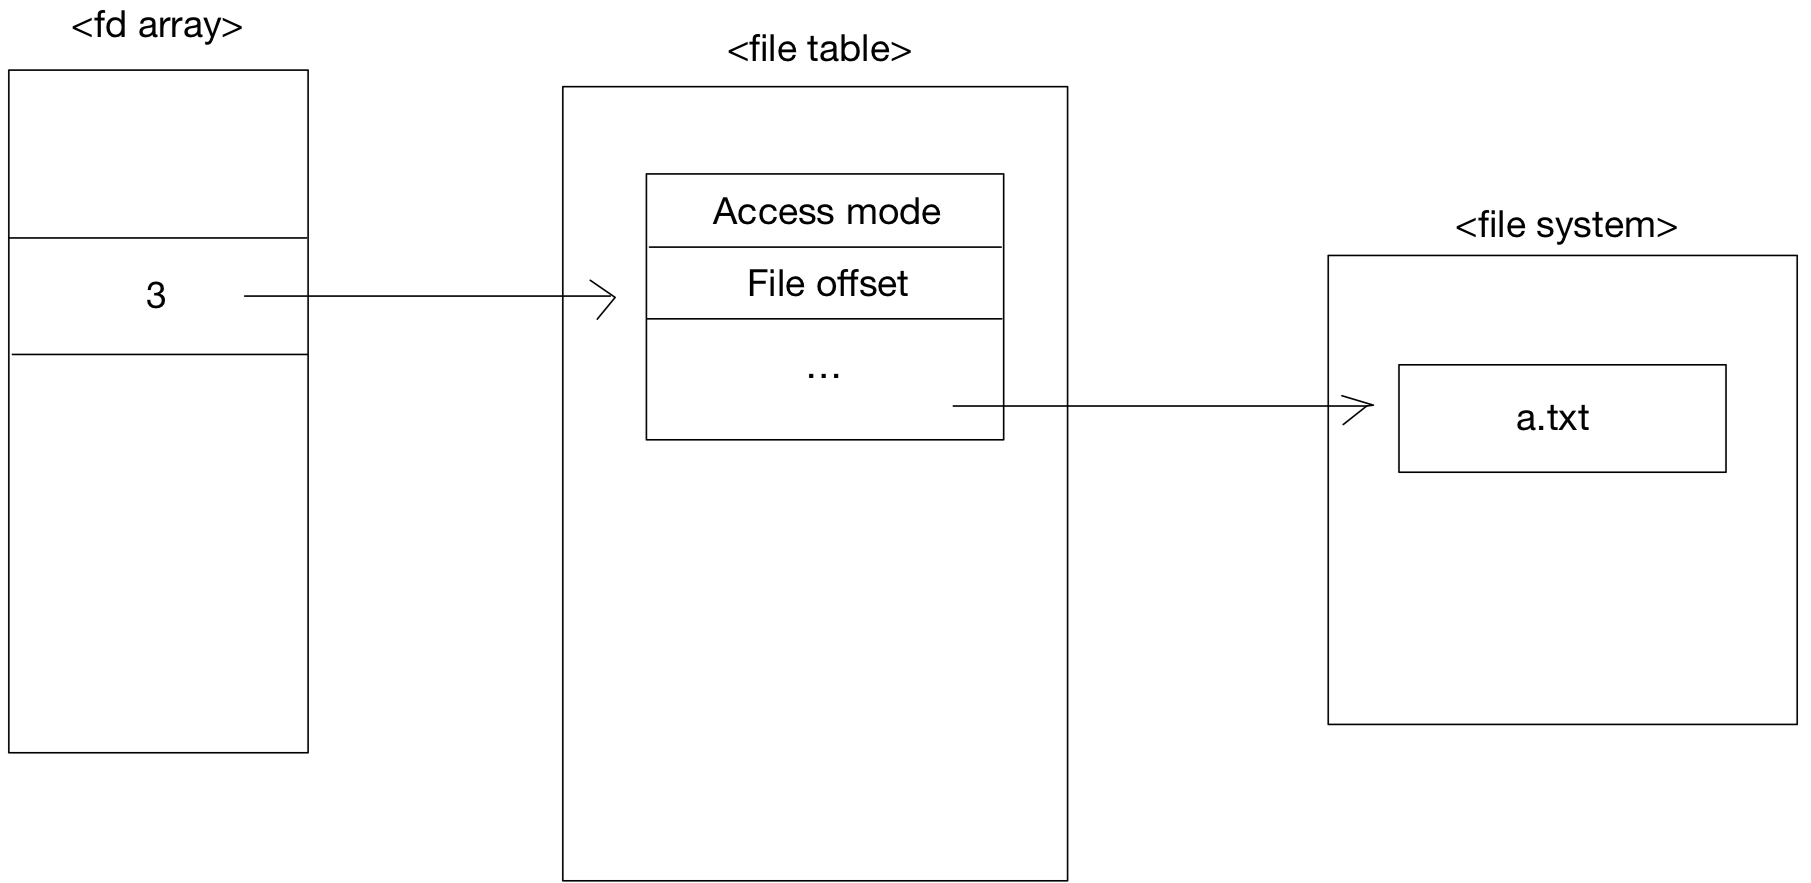
2주차에서 보았던 file table을 다시 보자면
file table은 직접 해당 파일을 가리키는 것이 아니라
i-node를 가리키고 inode에서 해당 파일을 가리키는 것이다.
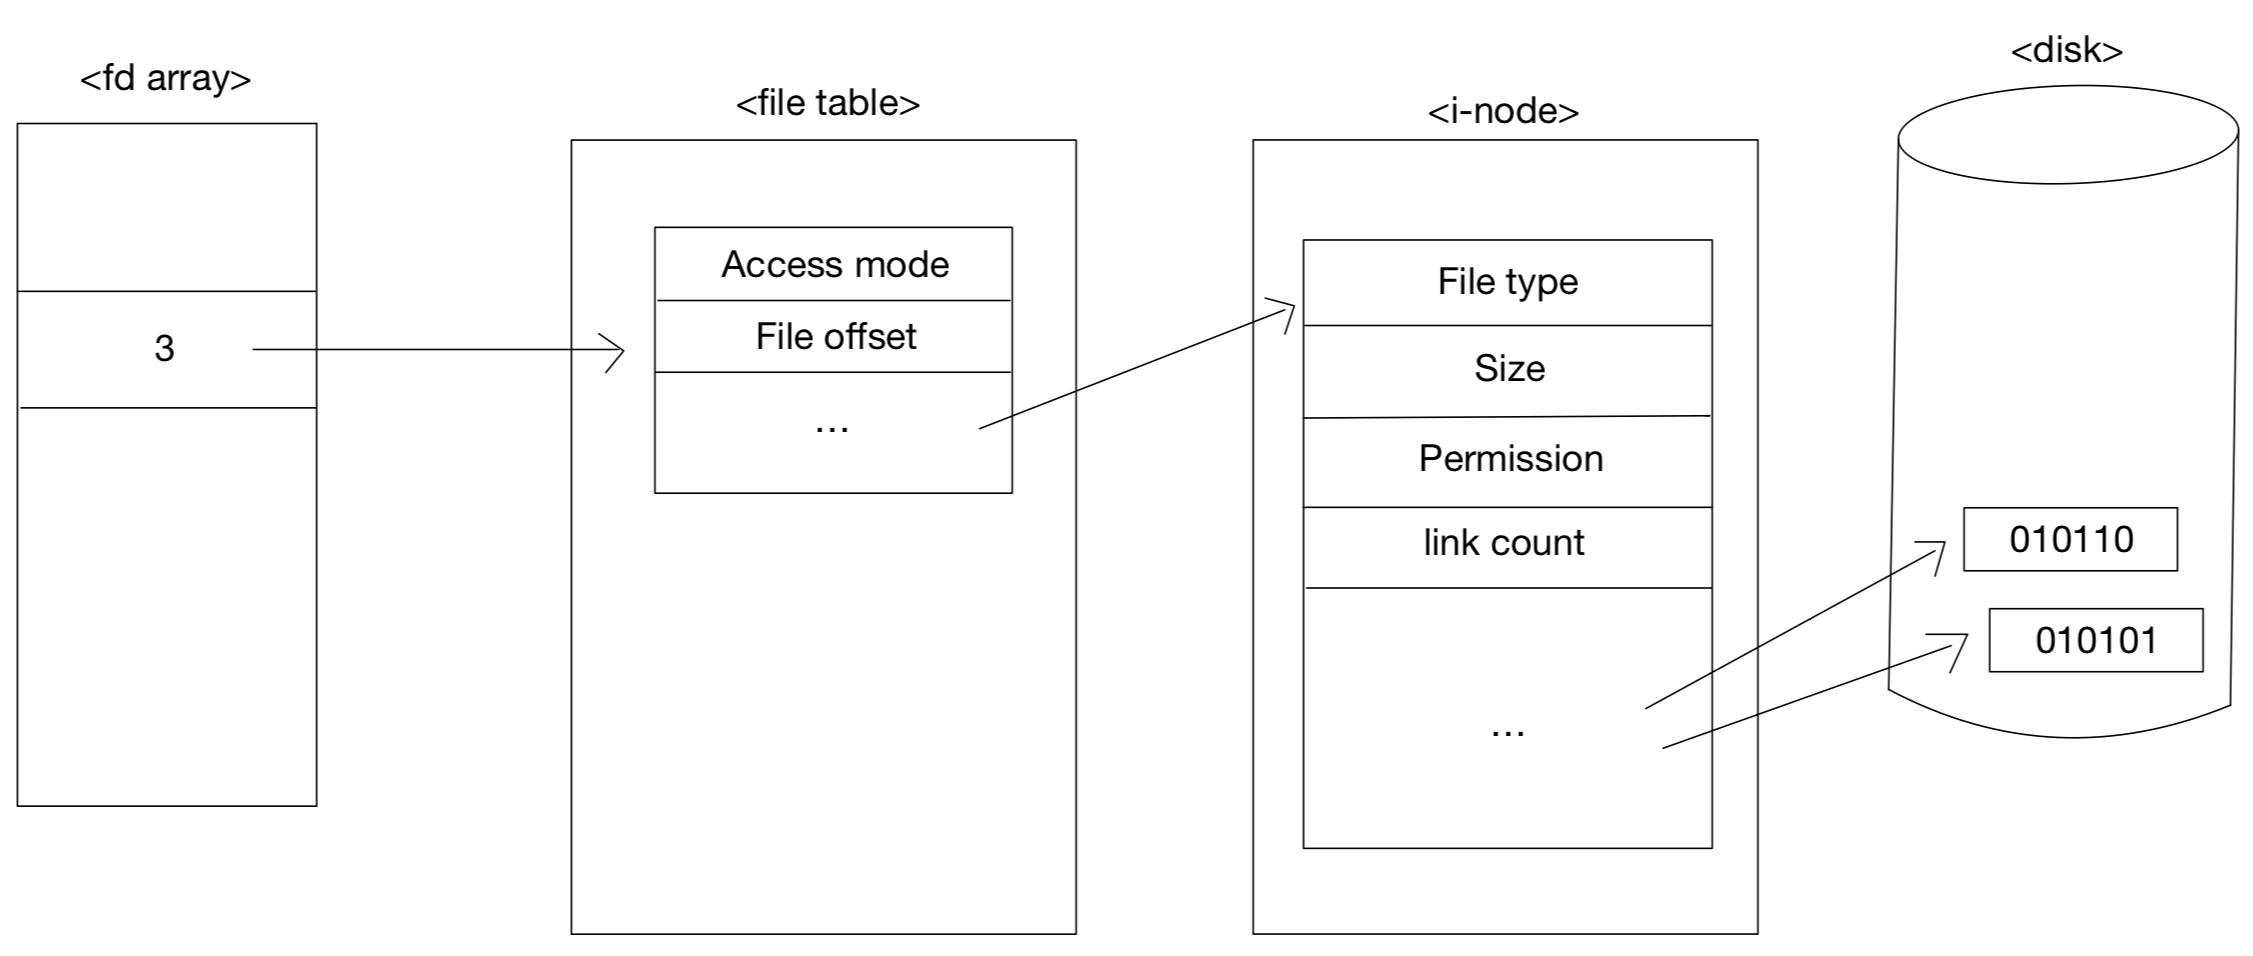
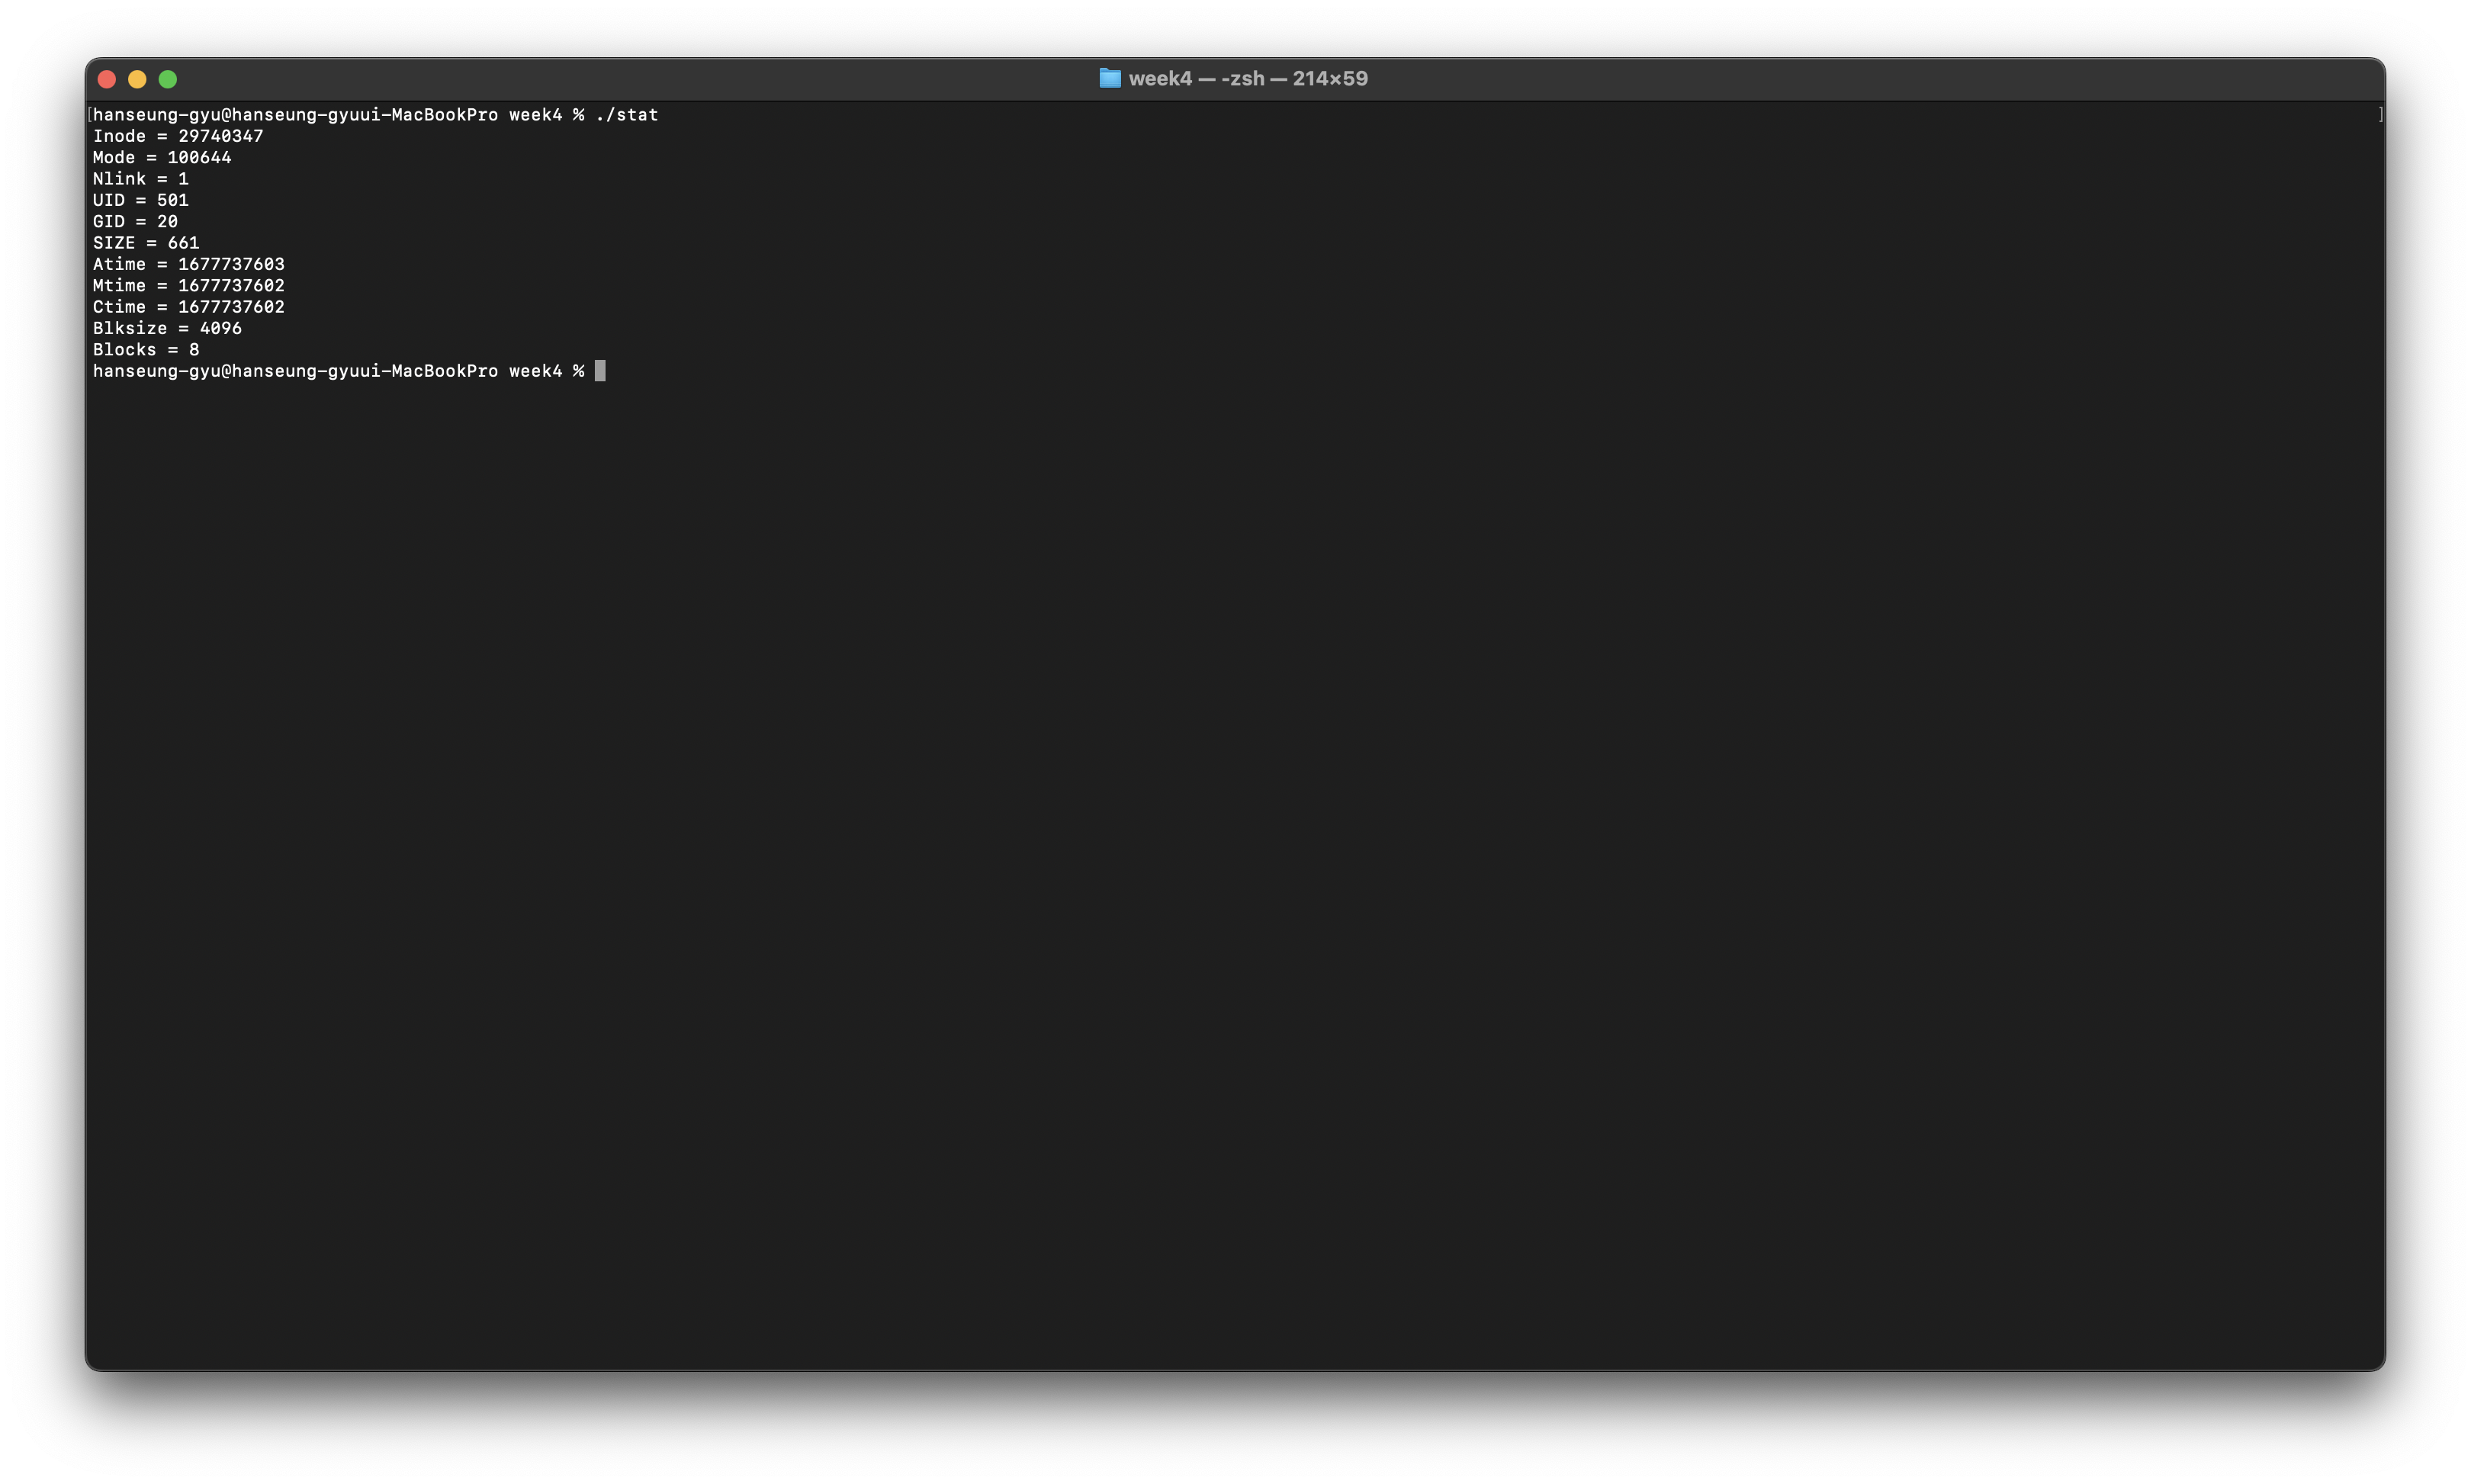
시스템 콜을 사용을 해서 i-node에 저장되어 있는 파일 정보를 읽어 올 수 있다.
File information
#include <fcntl.h>
#include <sys/types.h>
#include <sys/stat.h>
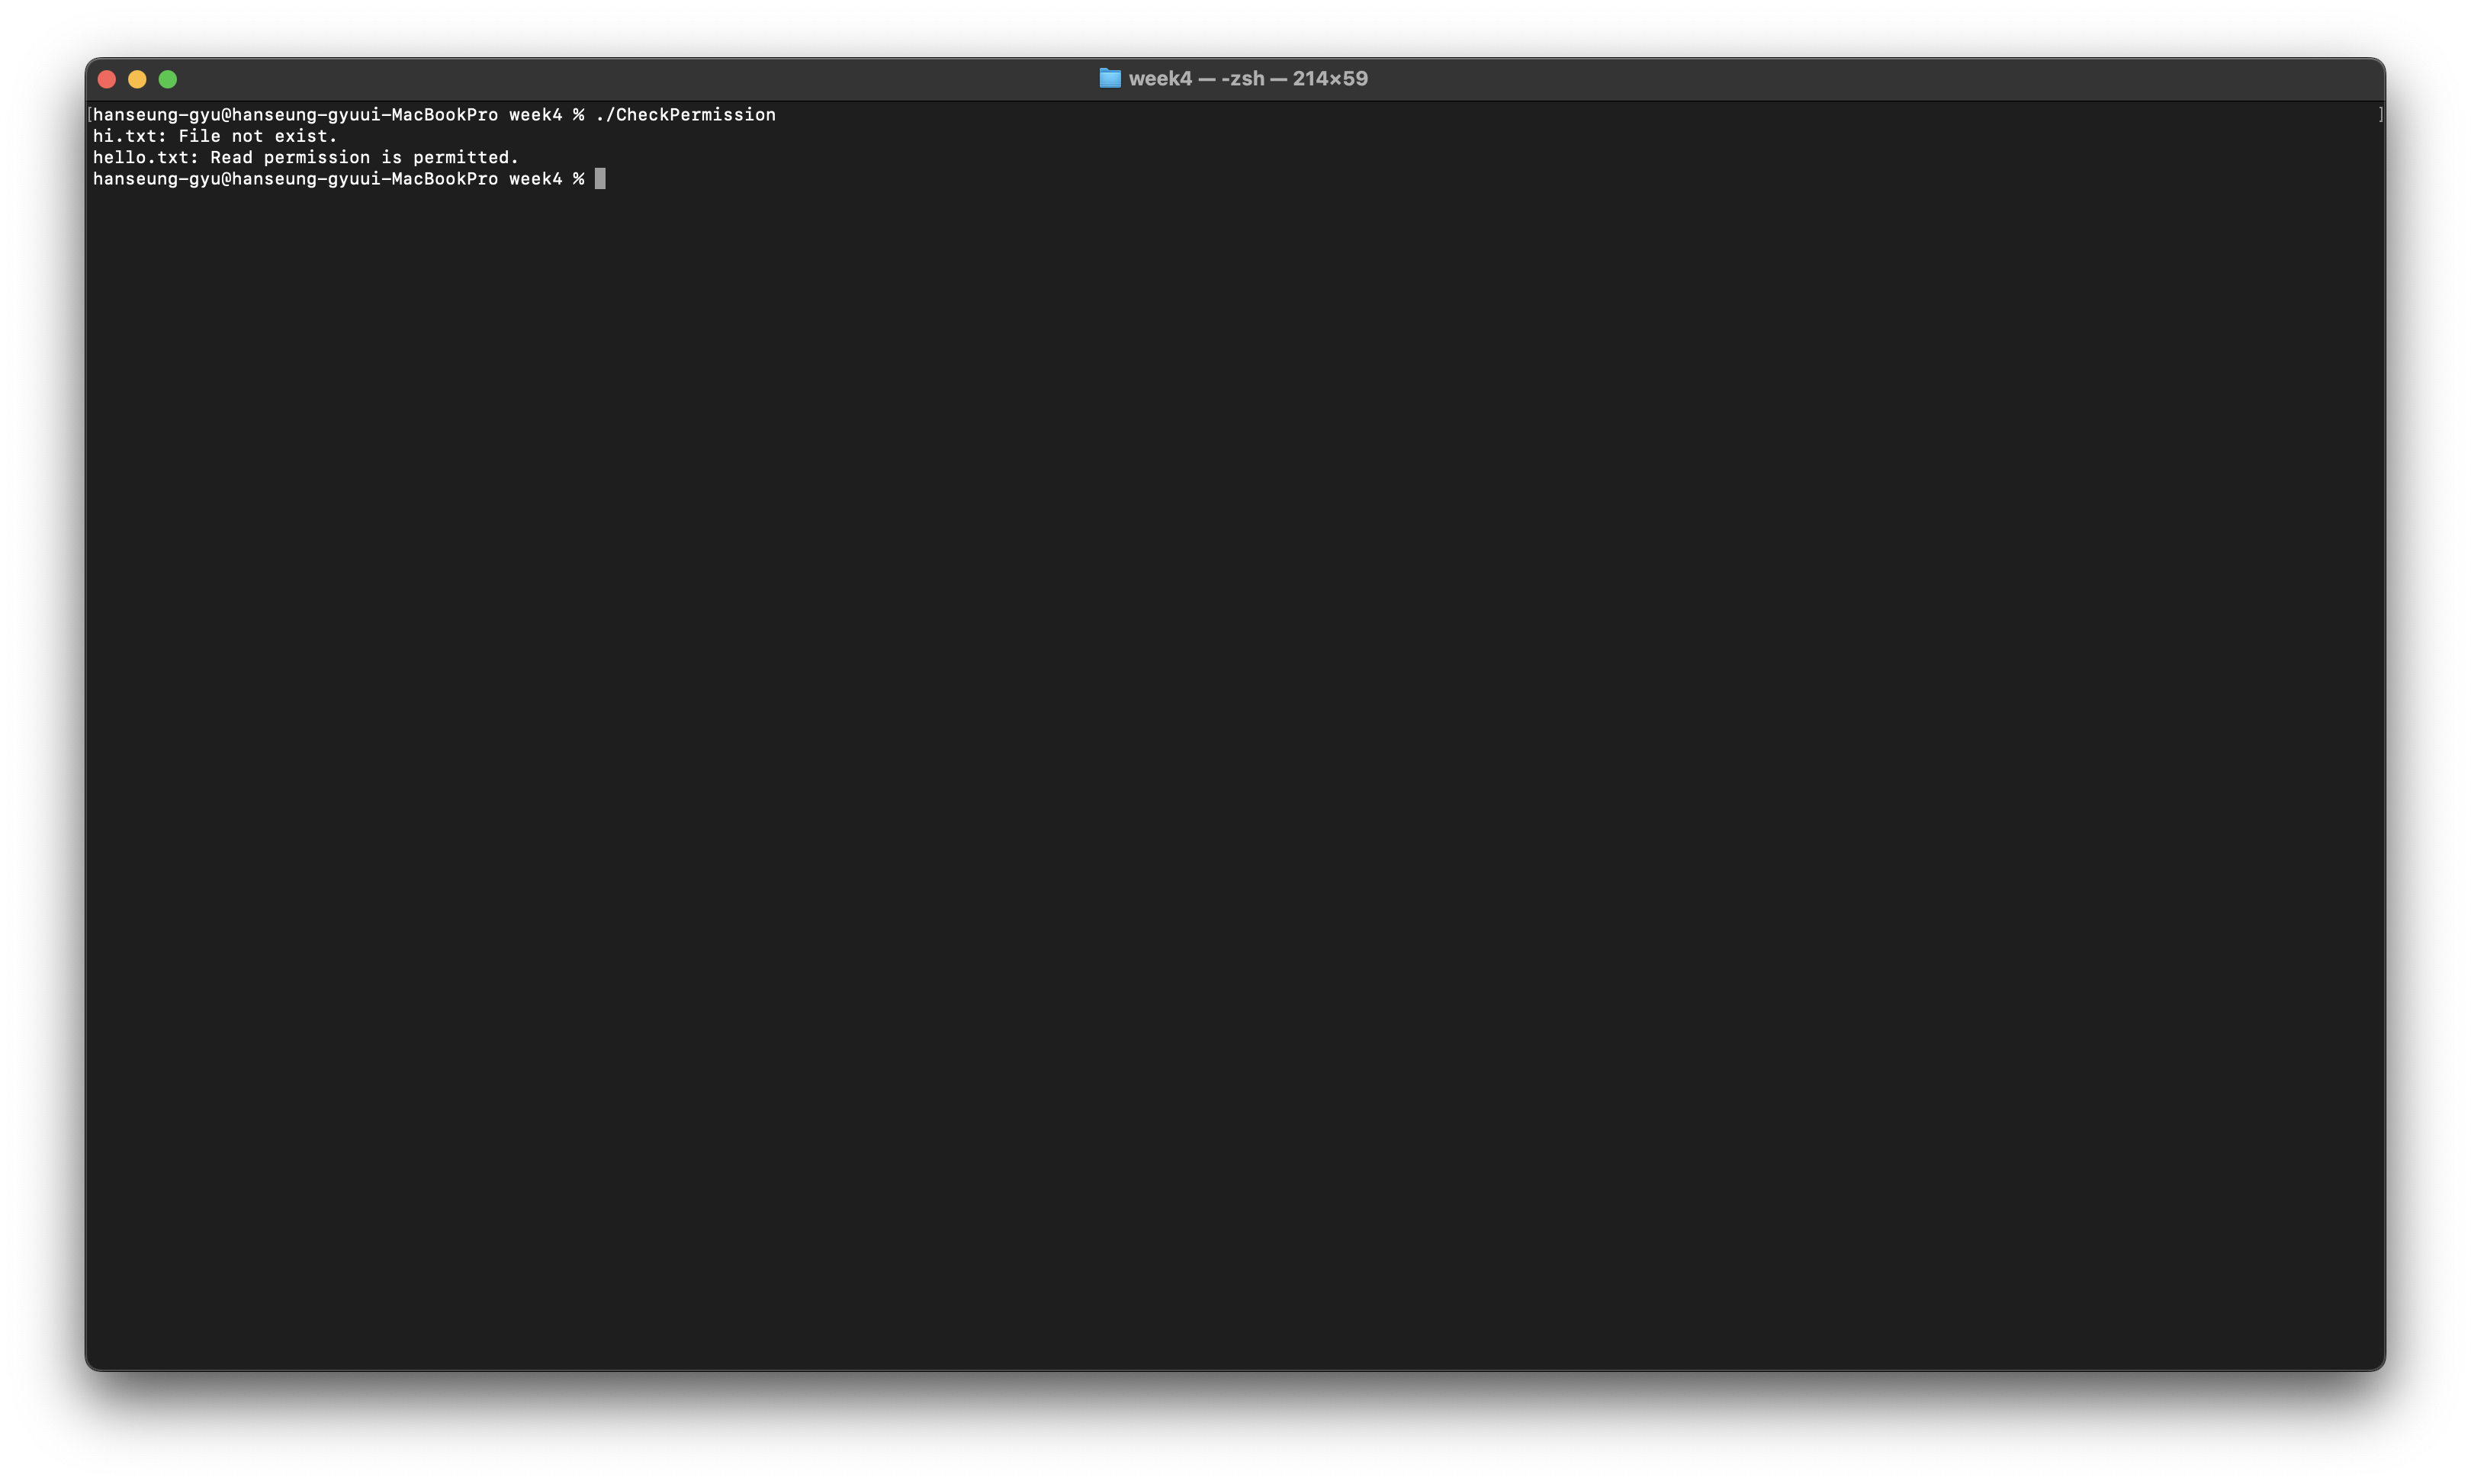
int stat(const char *pathname, struct stat *buf);
int fstat(int fd, struct stat *buf);
file descriptor를 사용하면 fstat를 사용한다.
- pathname(file path or file descriptor)
파일의 경로(파일의 이름을 포함한)
-buf
파일의 정보를 저장한 주소
return: 0(success), -1(error)
당연히 파일에 읽기 권한이 있어야 한다.
struct stat의 구조체를 살펴보면
struct stat {
	dev_t           st_dev;         /* [XSI] ID of device containing file */
	ino_t           st_ino;         /* [XSI] File serial number */
	mode_t          st_mode;        /* [XSI] Mode of file (see below) */
	nlink_t         st_nlink;       /* [XSI] Number of hard links */
	uid_t           st_uid;         /* [XSI] User ID of the file */
	gid_t           st_gid;         /* [XSI] Group ID of the file */
	dev_t           st_rdev;        /* [XSI] Device ID */
	time_t          st_atime;       /* [XSI] Time of last access */
	long            st_atimensec;   /* nsec of last access */
	time_t          st_mtime;       /* [XSI] Last data modification time */
	long            st_mtimensec;   /* last data modification nsec */
	time_t          st_ctime;       /* [XSI] Time of last status change */
	long            st_ctimensec;   /* nsec of last status change */
	off_t           st_size;        /* [XSI] file size, in bytes */
	blkcnt_t        st_blocks;      /* [XSI] blocks allocated for file */
	blksize_t       st_blksize;     /* [XSI] optimal blocksize for I/O */
	__uint32_t      st_flags;       /* user defined flags for file */
	__uint32_t      st_gen;         /* file generation number */
	__int32_t       st_lspare;      /* RESERVED: DO NOT USE! */
	__int64_t       st_qspare[2];   /* RESERVED: DO NOT USE! */
};
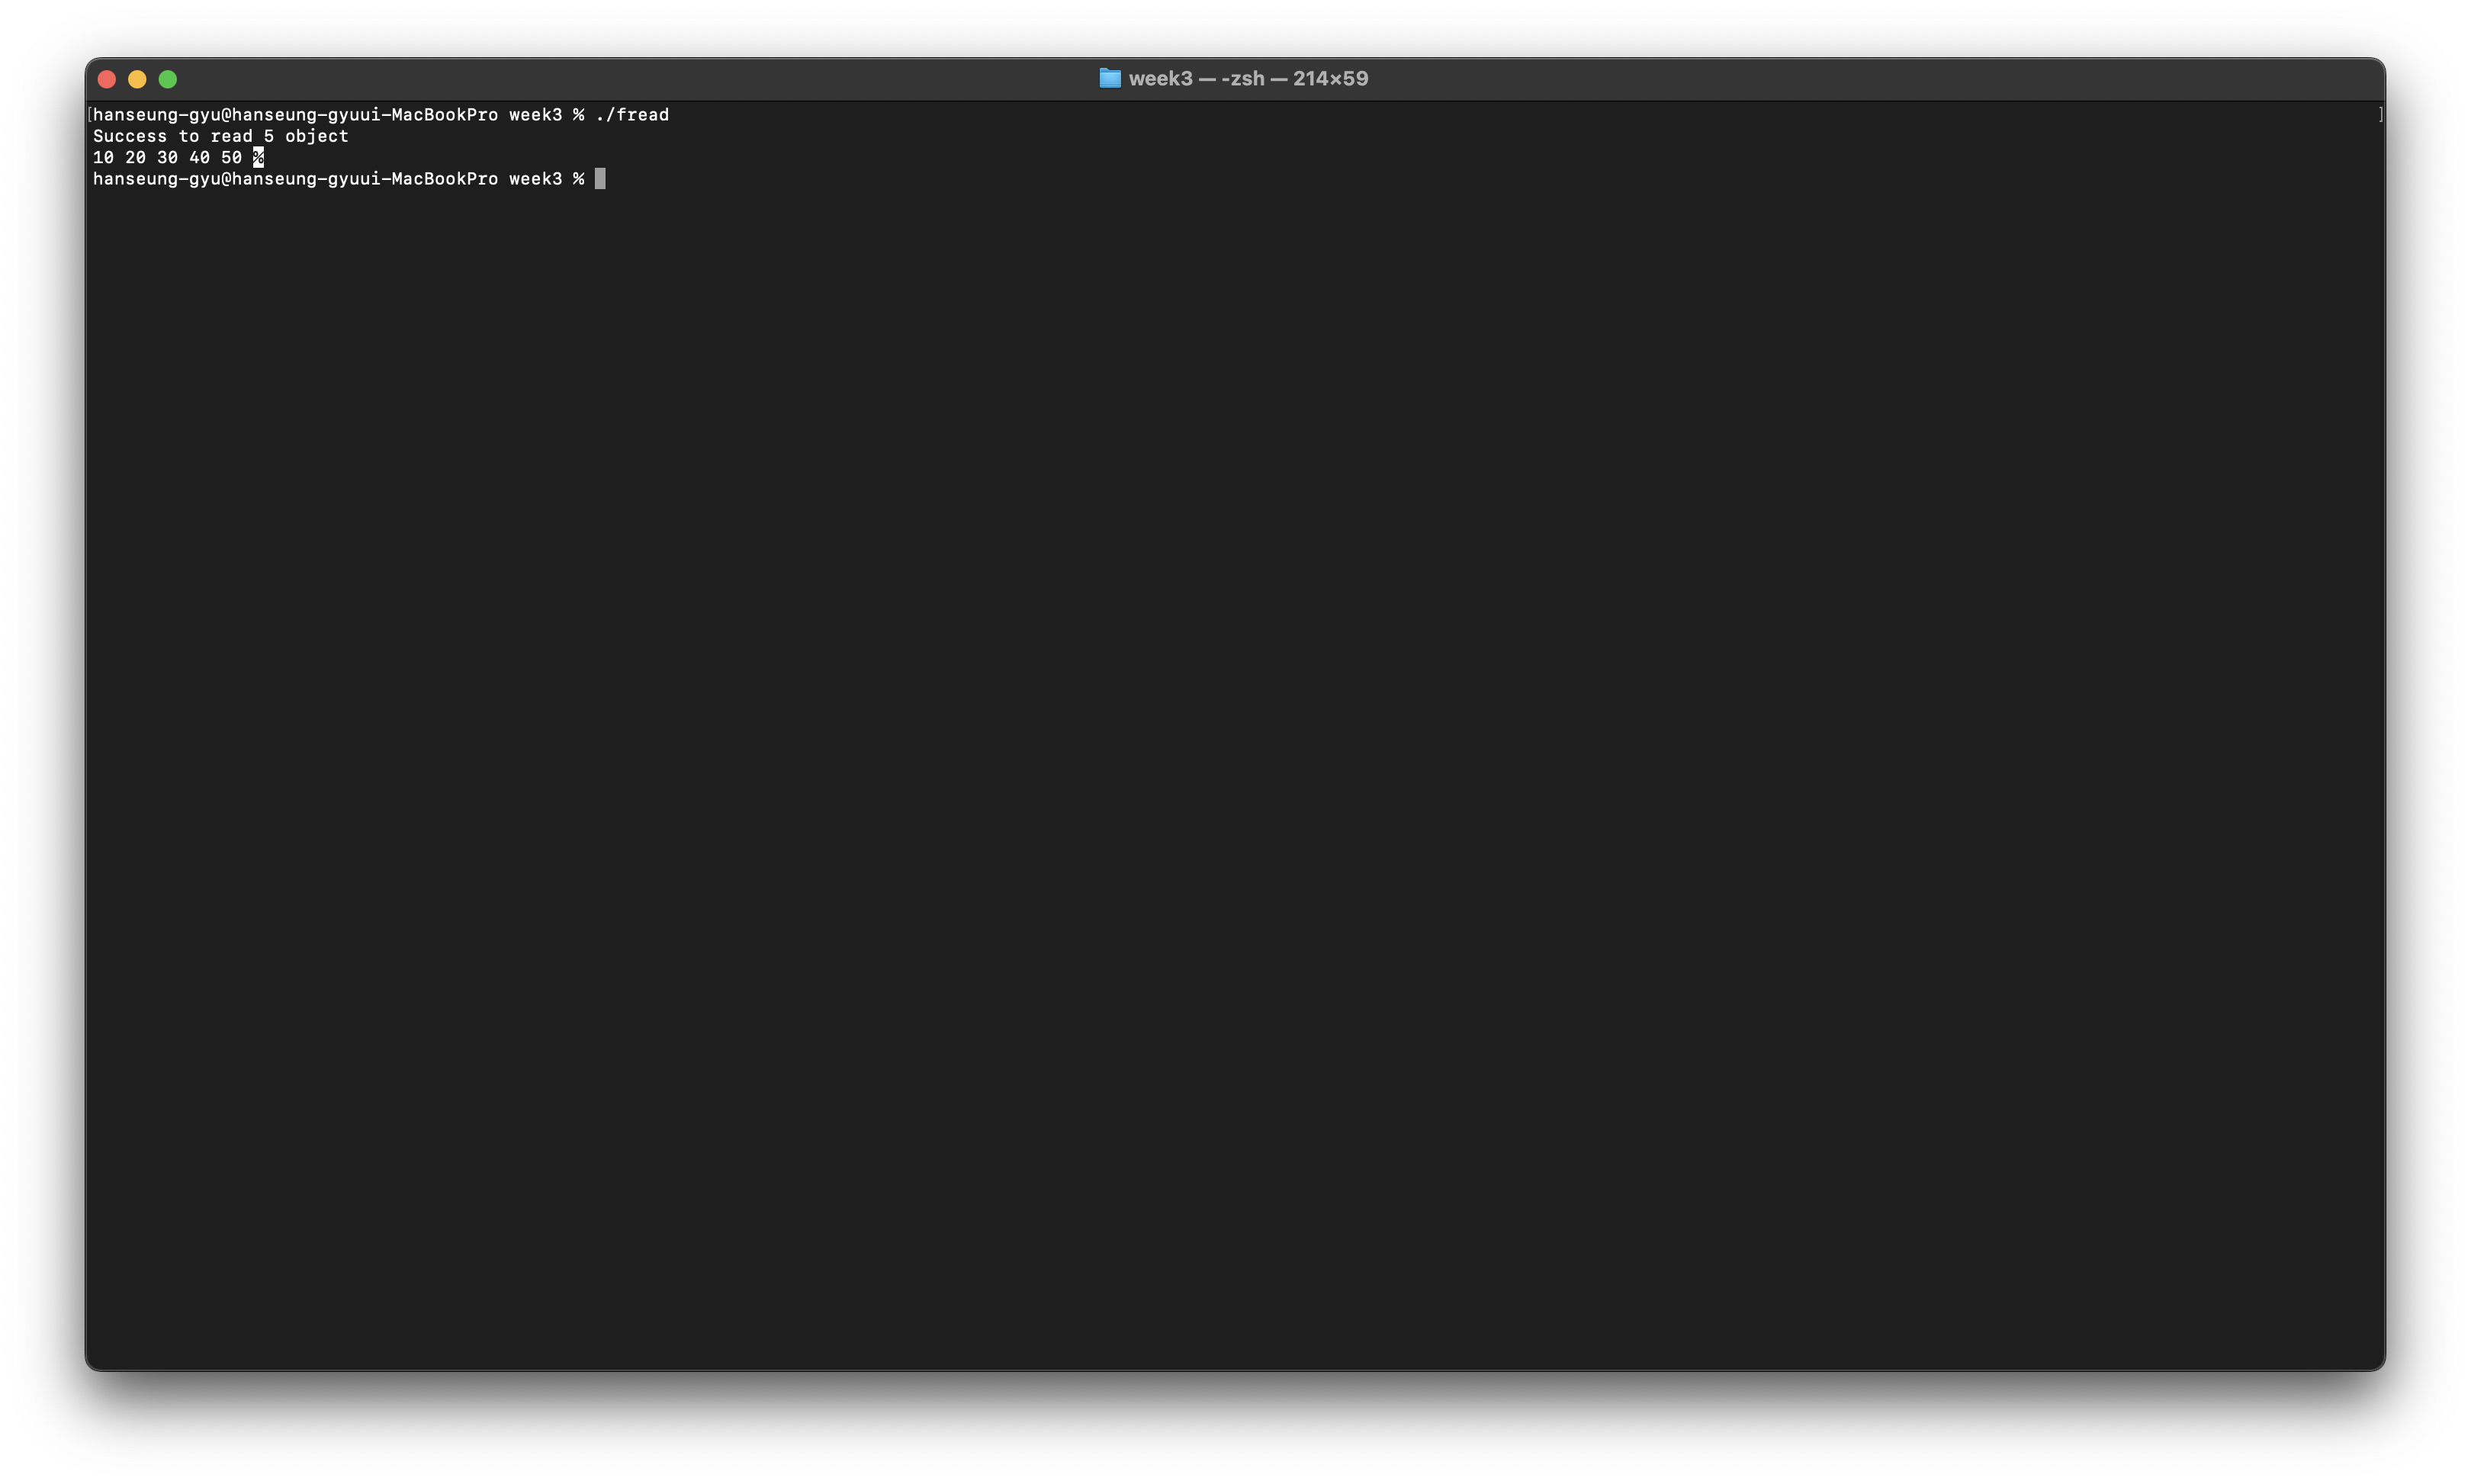
#include <stdio.h>
#include <stdlib.h>
typedef struct{
int ID;
char name[8];
float score;
}Student;
int fileOpen(FILE **fp, char *fileName, char *mode){
*fp = fopen(fileName, mode);
if(!*fp){
printf("Fail to open - %s\n", fileName);
return -1;
}
return 0;
}
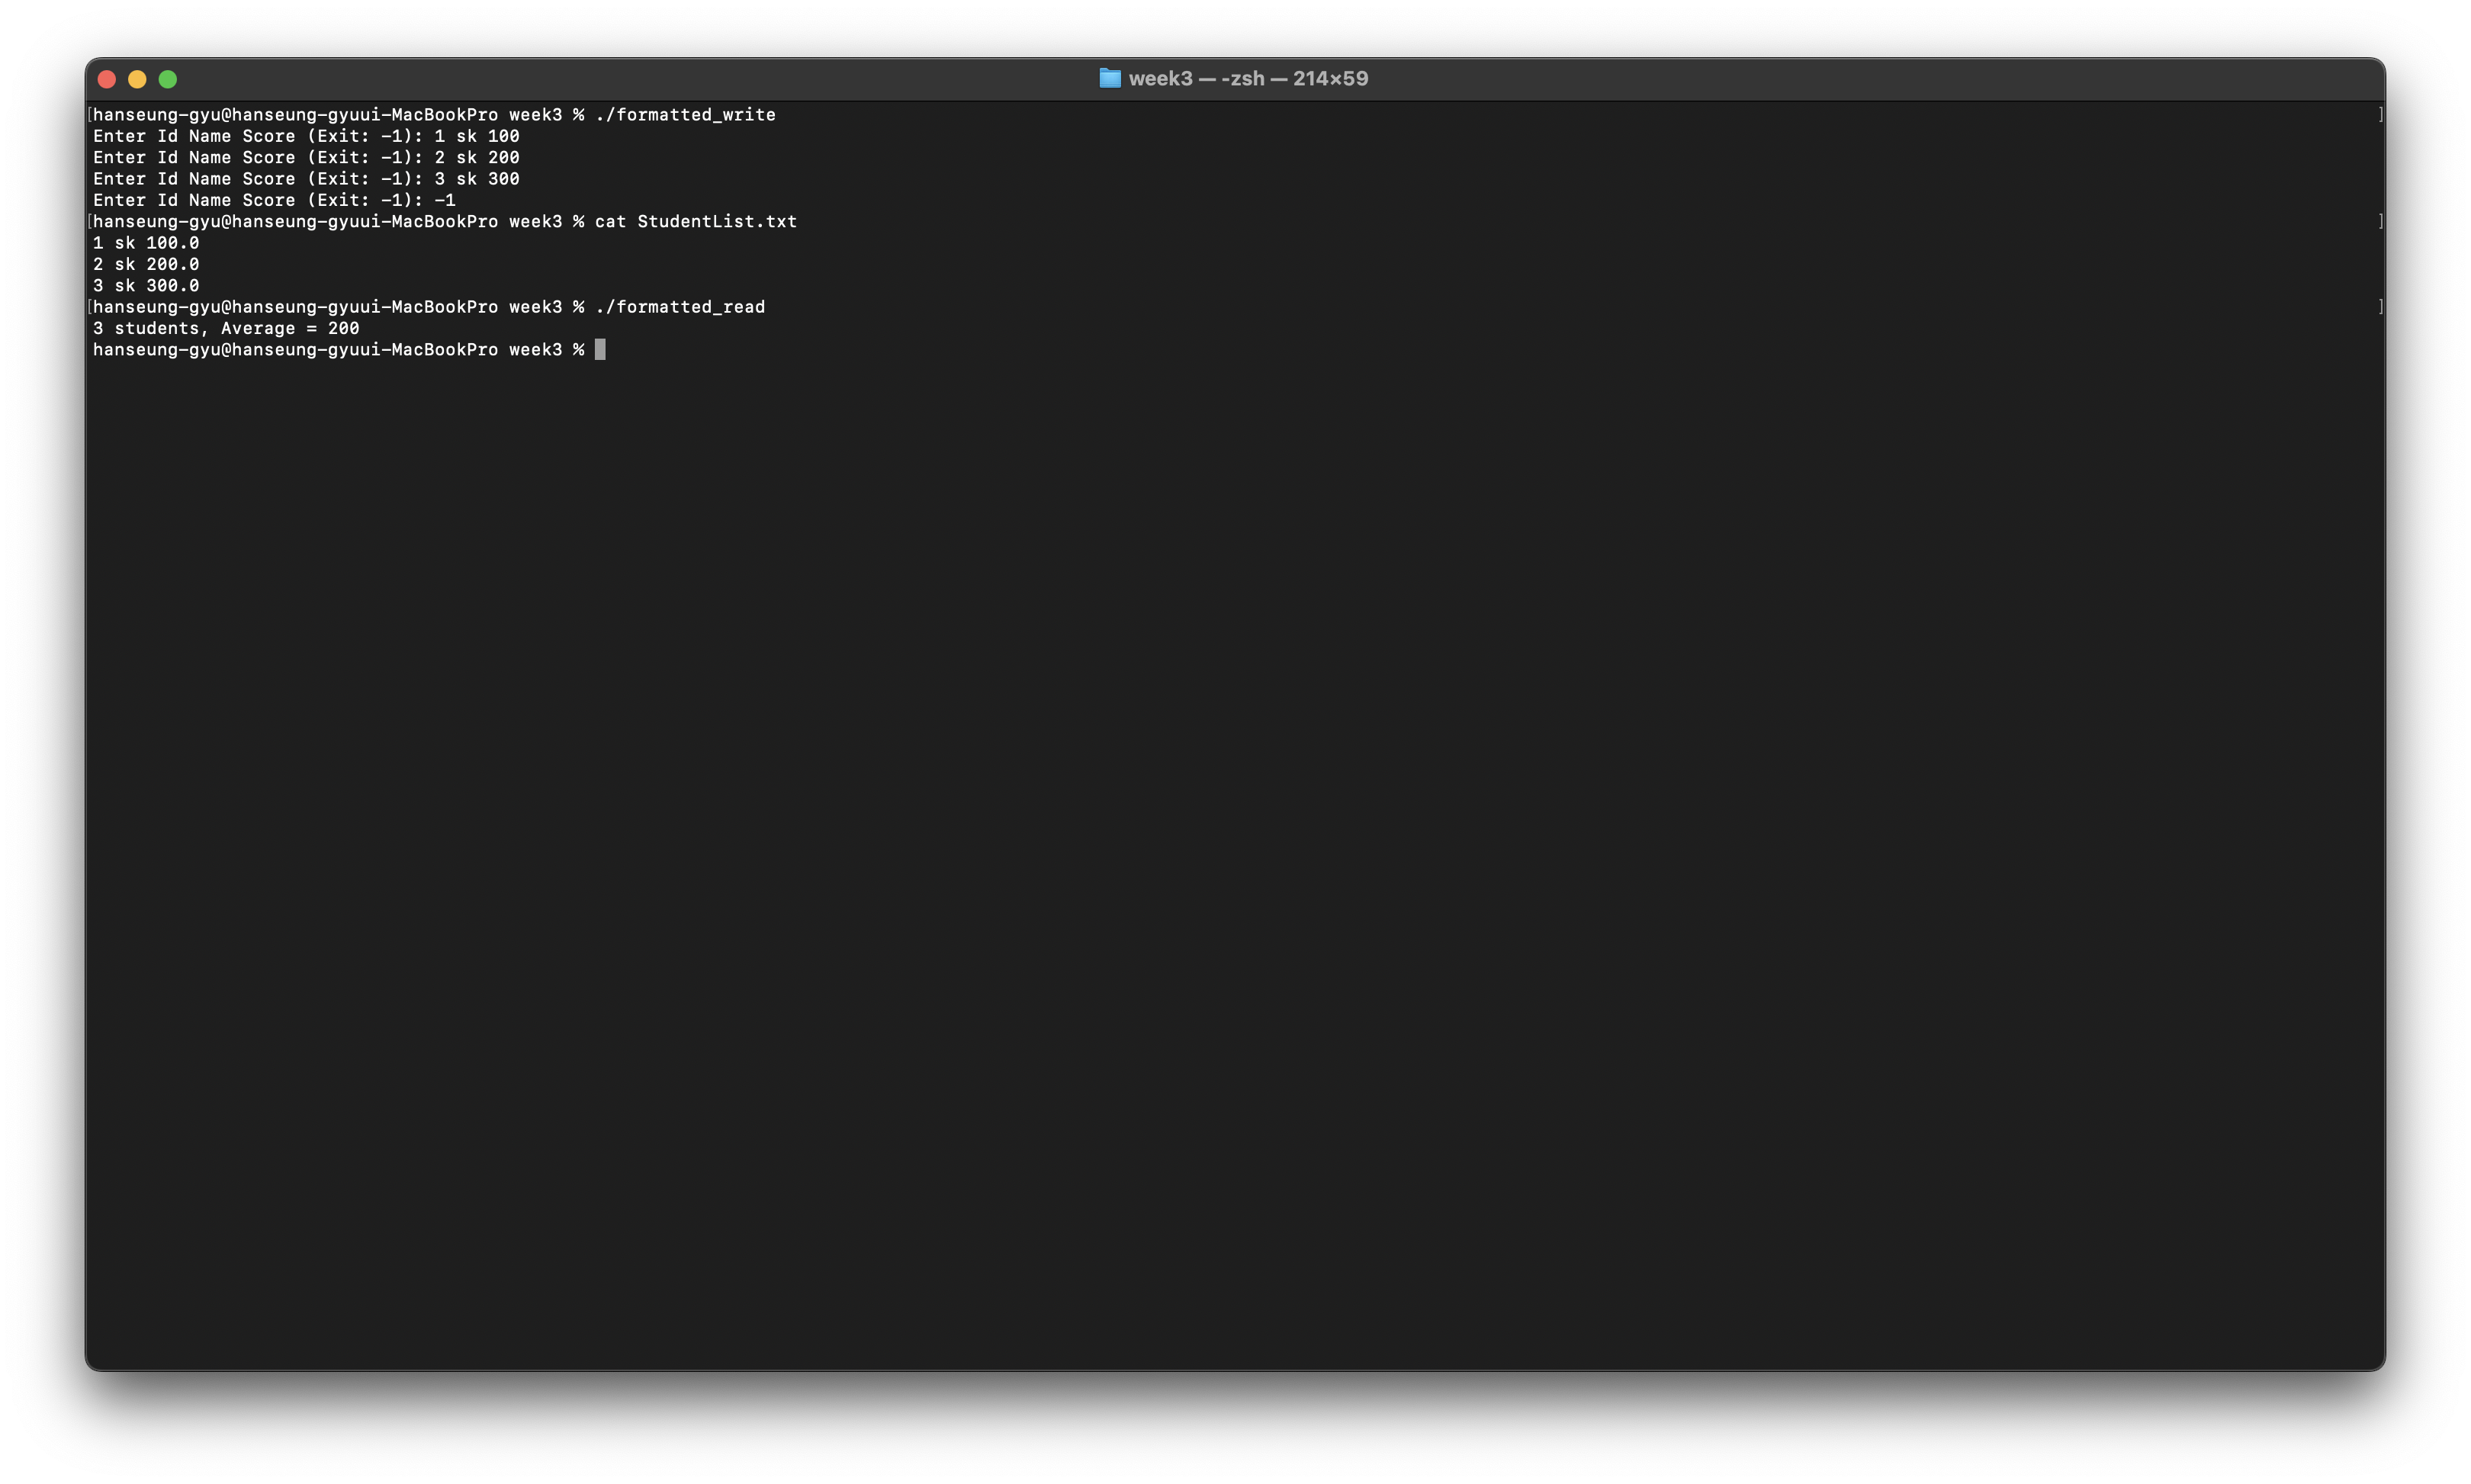
int main(void){
Student info = {0};
char *fileName = "StudentList.txt";
FILE *fp = NULL;
if(fileOpen(&fp, fileName, "r") < 0) exit(1);
int numStudent = 0;
float sum = 0;
while(!feof(fp)){
fscanf(fp, "%d %s %f\n", &info.ID, &info.name, &info.score);
sum += info.score;
numStudent++;
}
printf("%d students, Average = %2.f\n", numStudent, sum / numStudent);
fclose(fp);
}
해당 파일을 잘 읽는 것을 볼 수 있다.
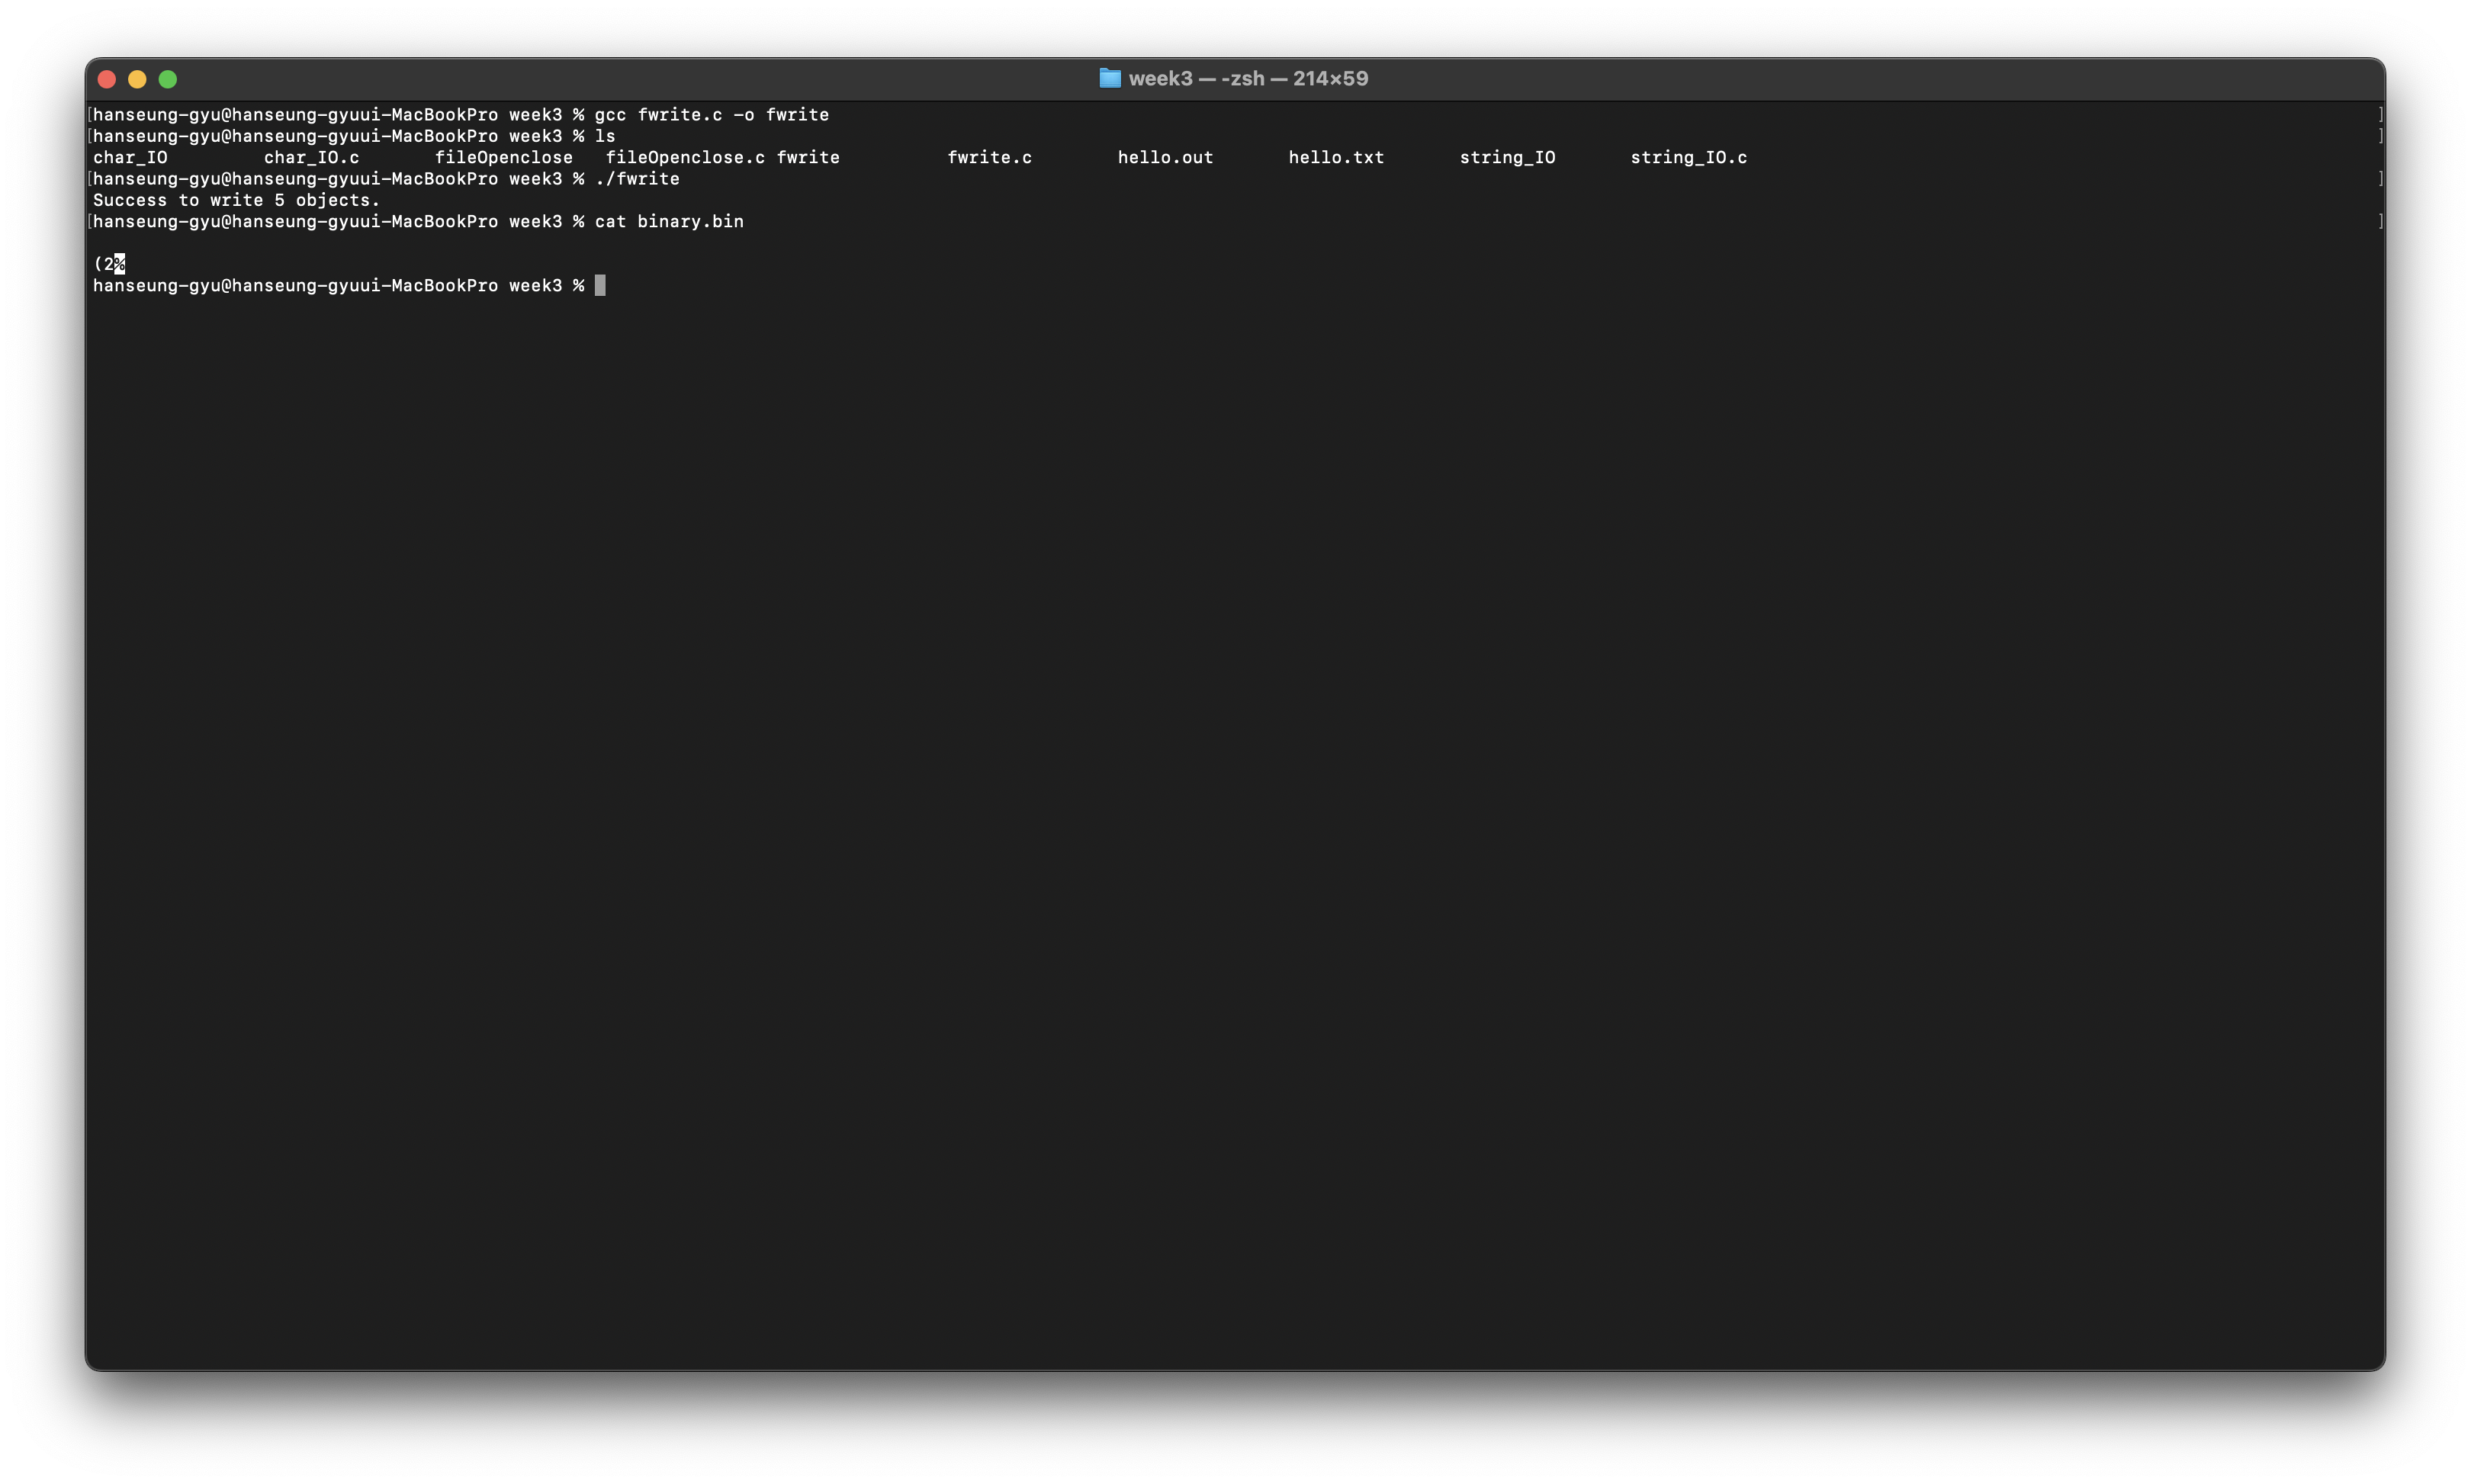
Synchronizing with the disk
#include <stdio.h>

int fflush(FILE *stream);
-stream
File operation을 수행 할 stream
return: 0(-1:error)
stream에 있는 내용들을 바로 디스크에 작성하는 방법
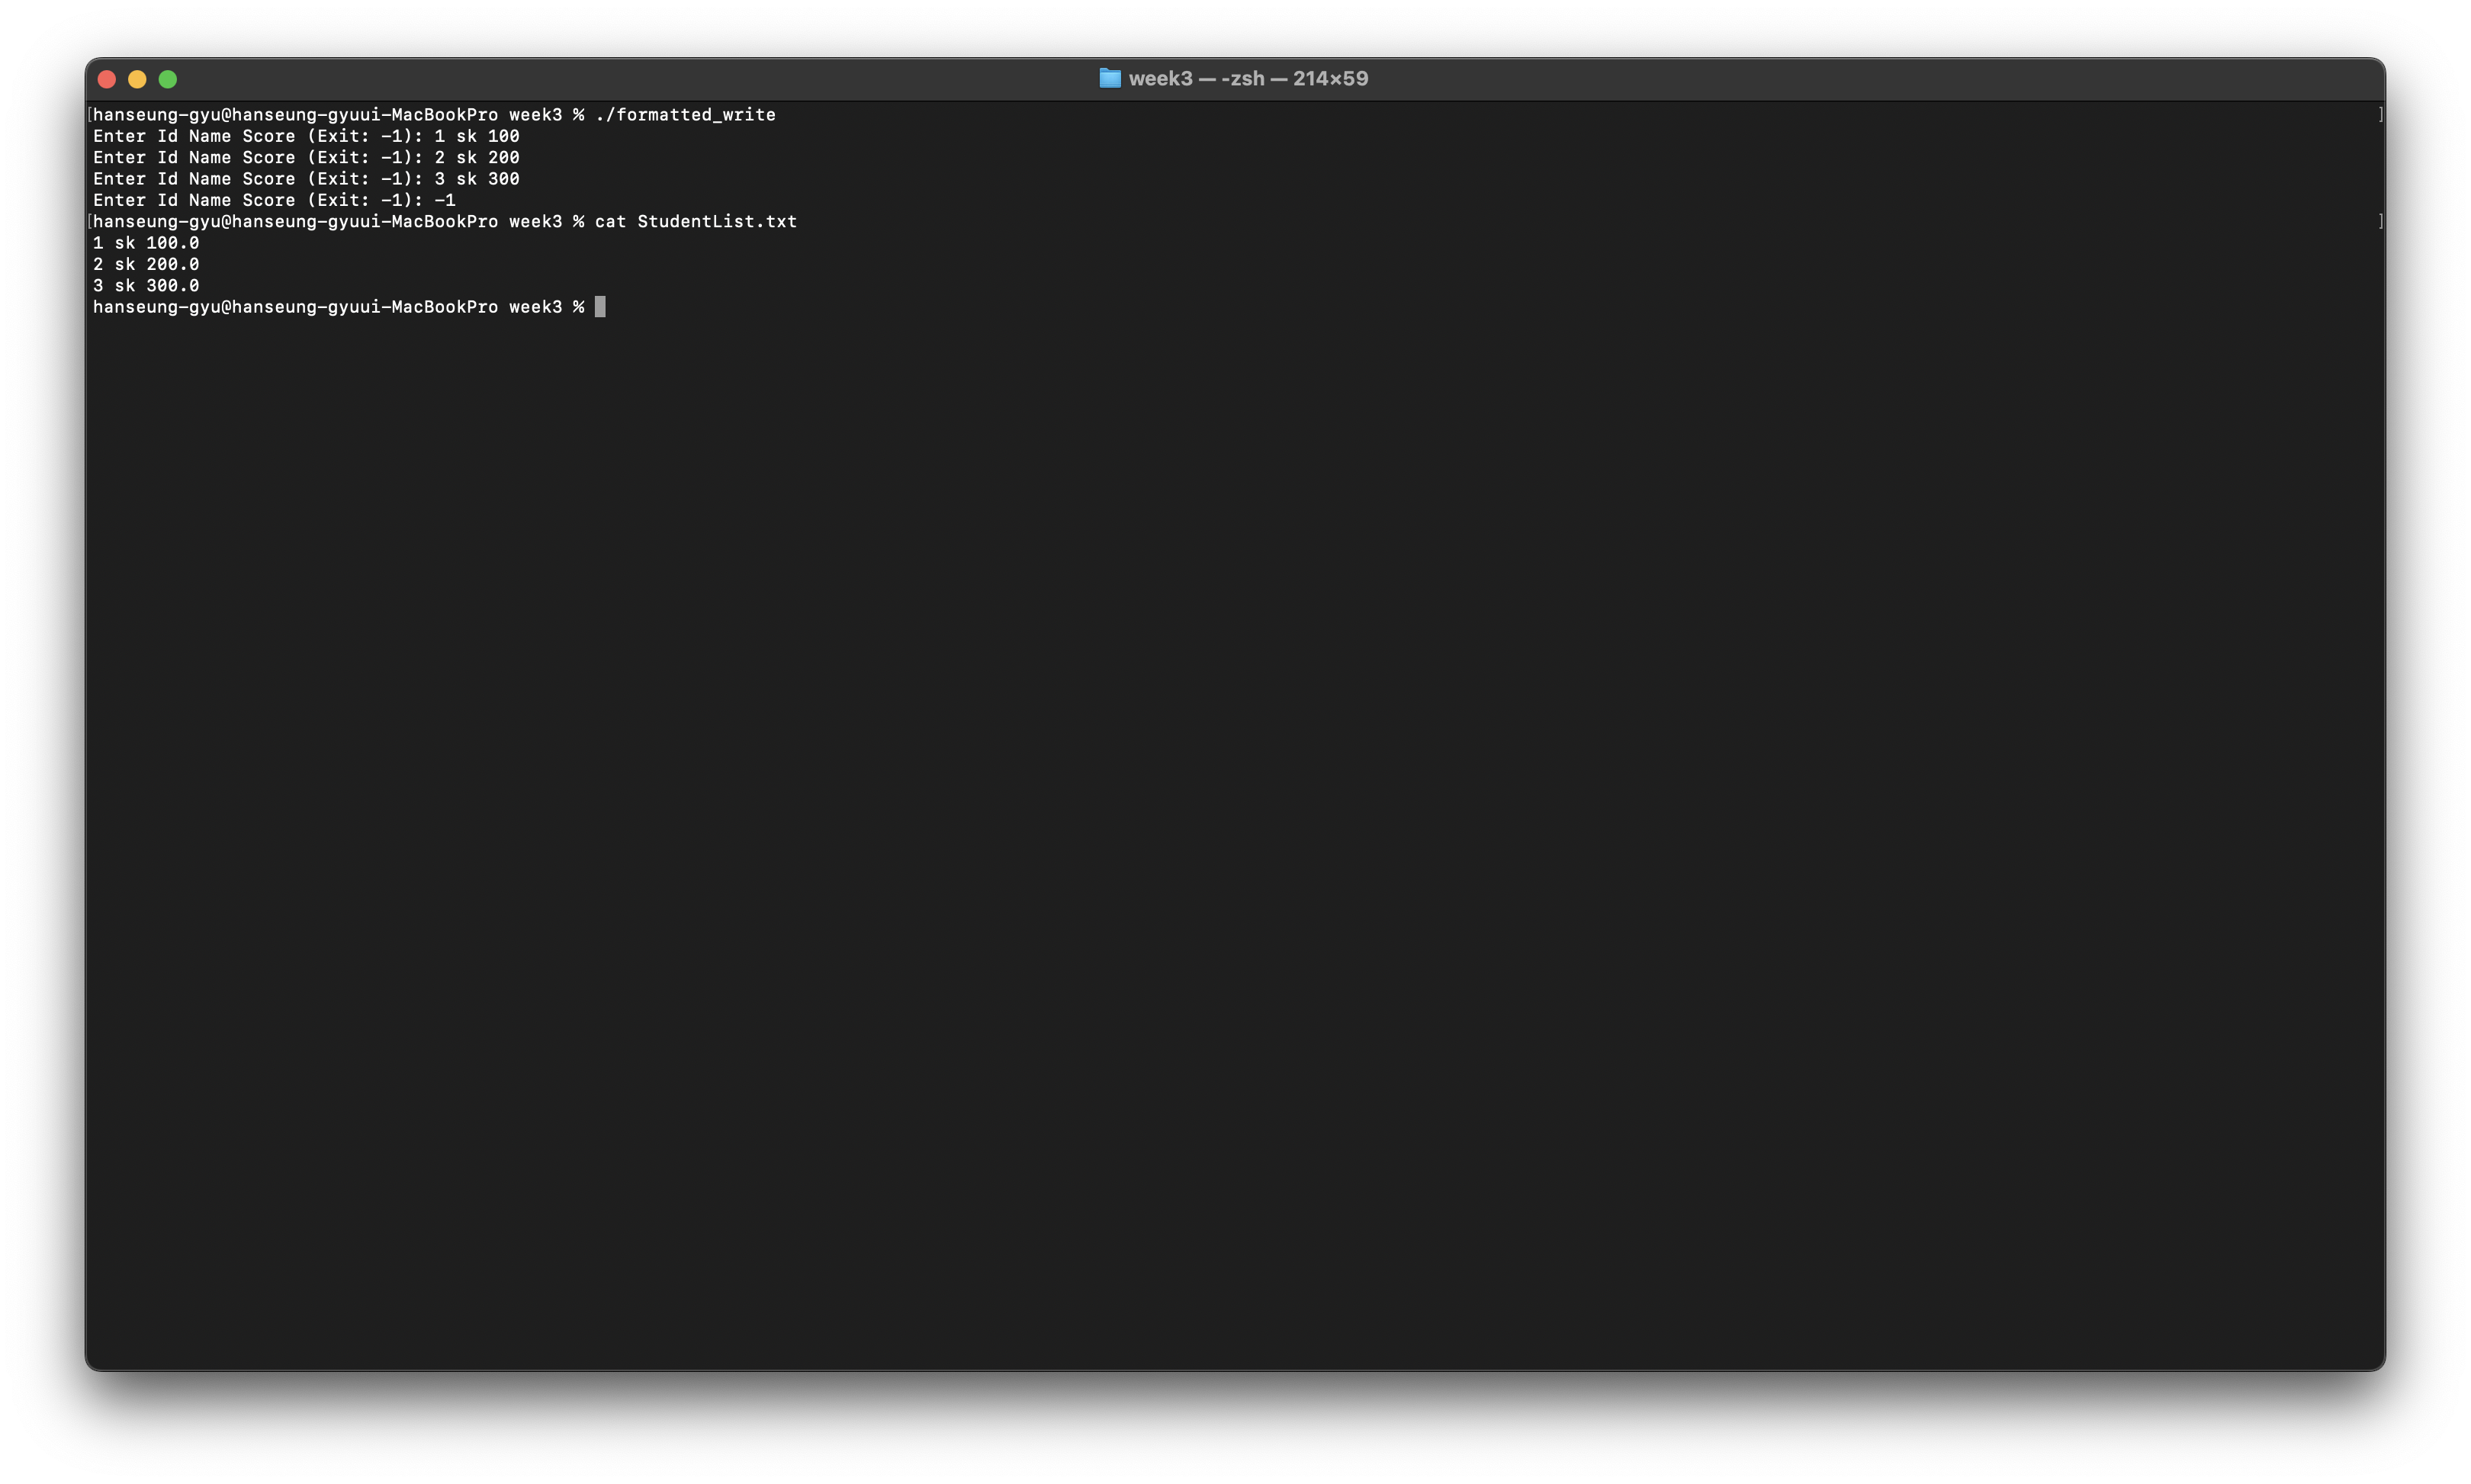
File offset & File pointer
Handling file offset
#include <stdio.h>

int fseek(FILE *stream, long offset, int whence);
int ftell(FILE *stream);
void rewind(FILE *stream);
int fsetpos(FILE *stream, const fpost_t *pos);
int fgetpos(FILE *stream, fpost_t *pos);
보통은 WSL Ubuntu를 사용하겠지만 MAC을 가지고 있기 때문에 MAC을 이용해서 시스템 프로그래밍을 정리할 예정이다.
시스템 프로그래밍의 개요
Systems programming, or system programming, is the activity of programming computersystem software. The primary distinguishing characteristic of systems programming when compared to application programming is that application programming aims to produce software which provides services to the user directly (e.g. word processor), whereas systems programming aims to produce software and software platforms which provide services to other software, are performance constrained, or both - from wikipedia
시스템 프로그래밍은 시스템 호출을 이용해서 프로그램을 작성하는 것이다.
시스템 호출은 운영체제에서 제공하는 서비스를 프로그램에서 이용할 수 있도록 지원하는 프로그래밍 인터페이스를 의미한다.
시스템 프로그램은 시스템을 구성하는 자원을 다루는 프로그램이며 응용프로그램에 서비스를 제공하는 프로그램으로 OS, firmware, compiler 등이 있다.
프로그래밍을 하면서 라이브러리는 많이 사용을 해보았을 것이다.
Library function과 System call을 비교해보면
System call: 시스템의 기능을 이용하는 통로, Kernel 내 모듈을 직접 호출
Library function: 미리 컴파일 된 함수, 자주 사용되는 기능을 독립적으로 구현 (내부적으로 System call을 활용)
미리 만들어진 Library를 사용할 수 있지만 굳이 System programming을 배워 사용하는 이유는
직접 System call을 사용한다면 더 많은 것들을 만들 수 있으며 중간 과정을 건너 뛰고 직접 사용한다면 더 높은 성능을 얻을 수 있기 때문이다.
이 시스템 프로그래밍 공부의 목표는
시스템을 효율적으로 활용하는 능력 함양
Unix/Linux 기반 시스템 및 새로 만나는 시스템
시스템 자원에 대한 이해 향상
- File / Directory
- System information
- Process
- Signal
- Memory
- Communication interface
그냥 프로그램을 만드는 것이 아니라 더 높은 성능의 프로그램을 만들 수 있도록 시스템에 대해 이해하는 것이다.
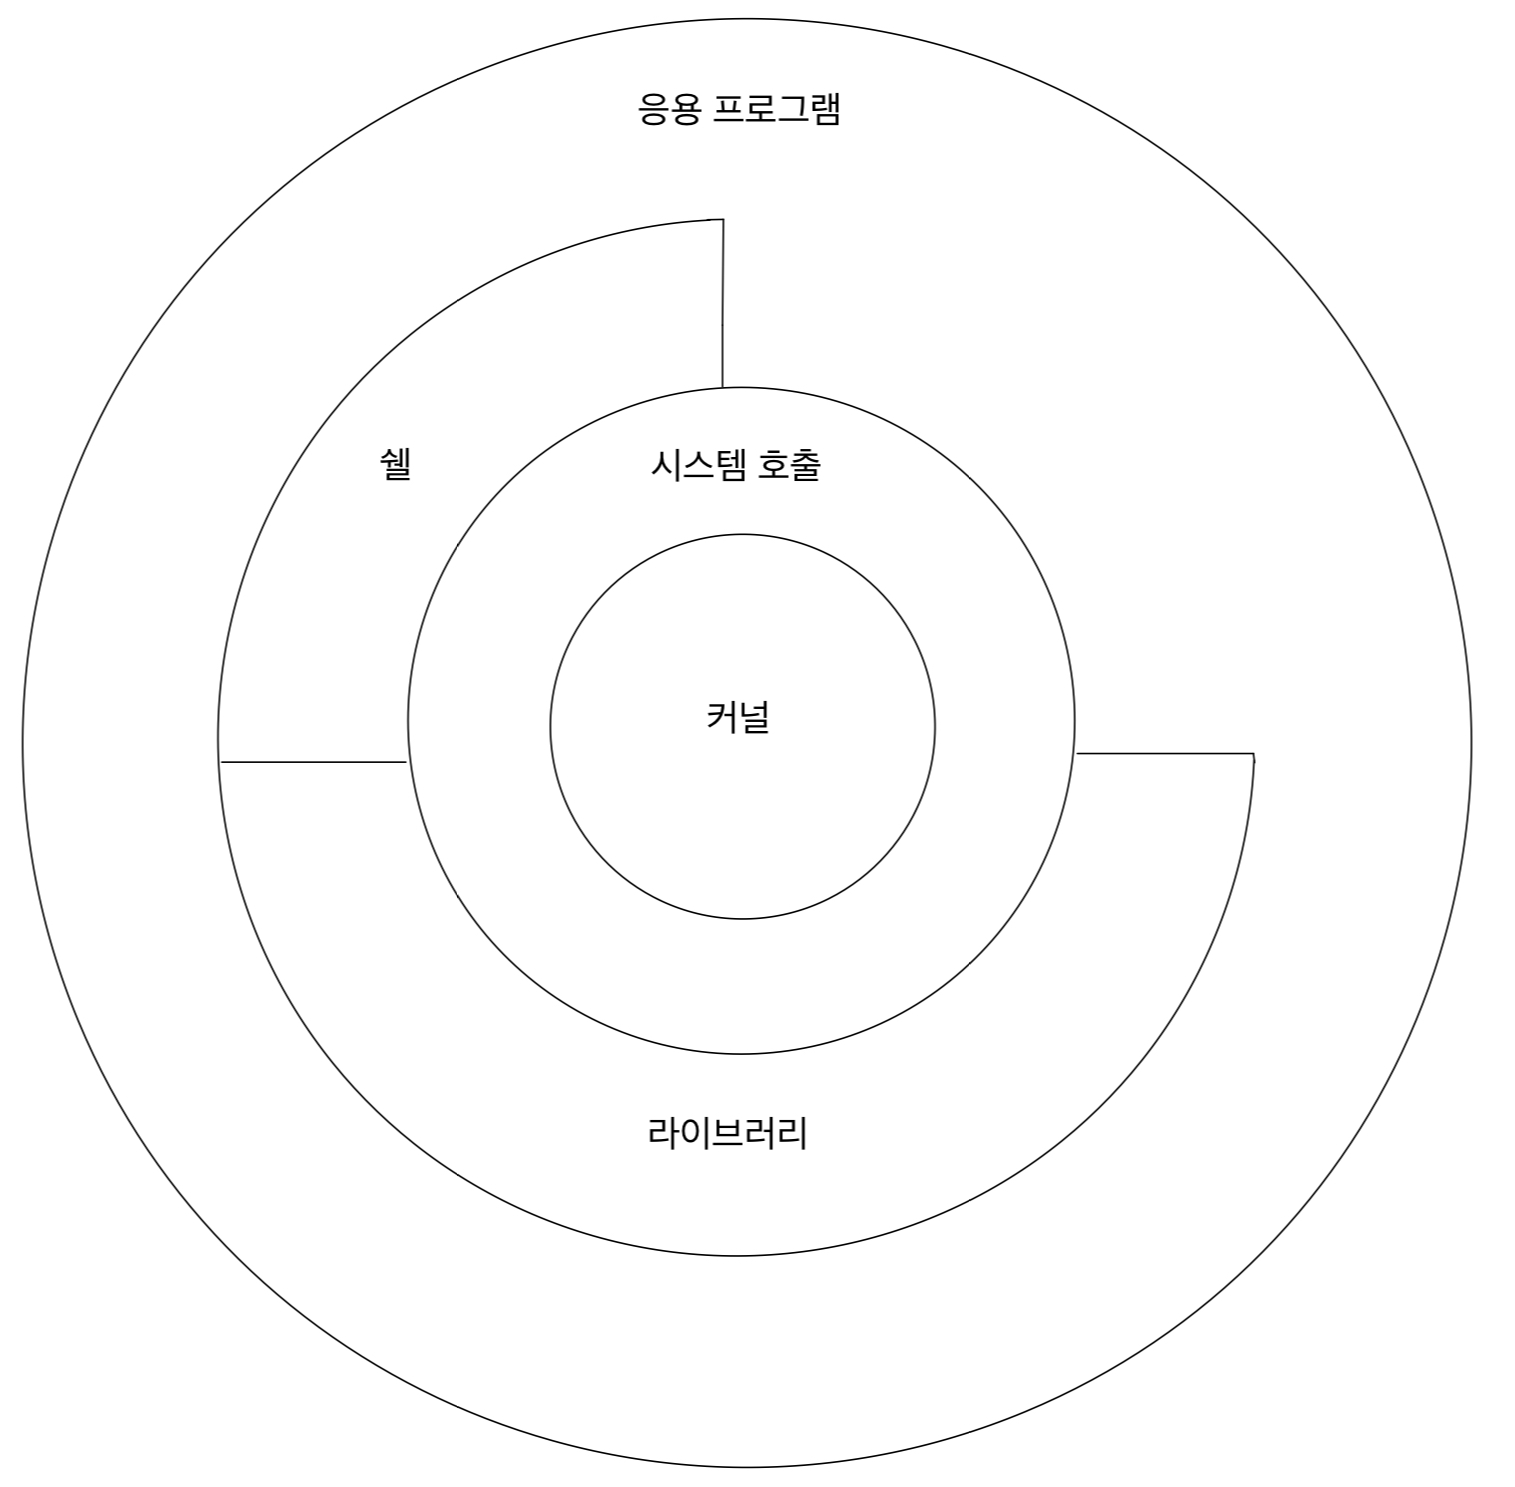
Unix/Linux architecture
시스템 프로그래밍 중 사용할 Linux/Unix에 대해 알아보자
현재, 다양한 시스템에서 가장 널리 사용하는 OS이다.
Unix/Linux architecture
- Kernel
OS의 핵심 기능을 모아놓은것
-System call
OS 기능 중 응용프로그램이 사용하도록 허락된 기능들의 집합
-Shell
사용자와 OS 사이의 인터페이스
사용자의 입력을 해석하여 커널의 함수 호출
Basic Unix/Linux commands
- Login/Logout
telnet: 유닉스 시스템에 접속
이거는 잘 안써서 사용 방법을 모르겠다....
logout: 유닉스 시스템에서 접속해제
ex) logout
exit: 유닉스 시스템에서 접속해제
ex) exit
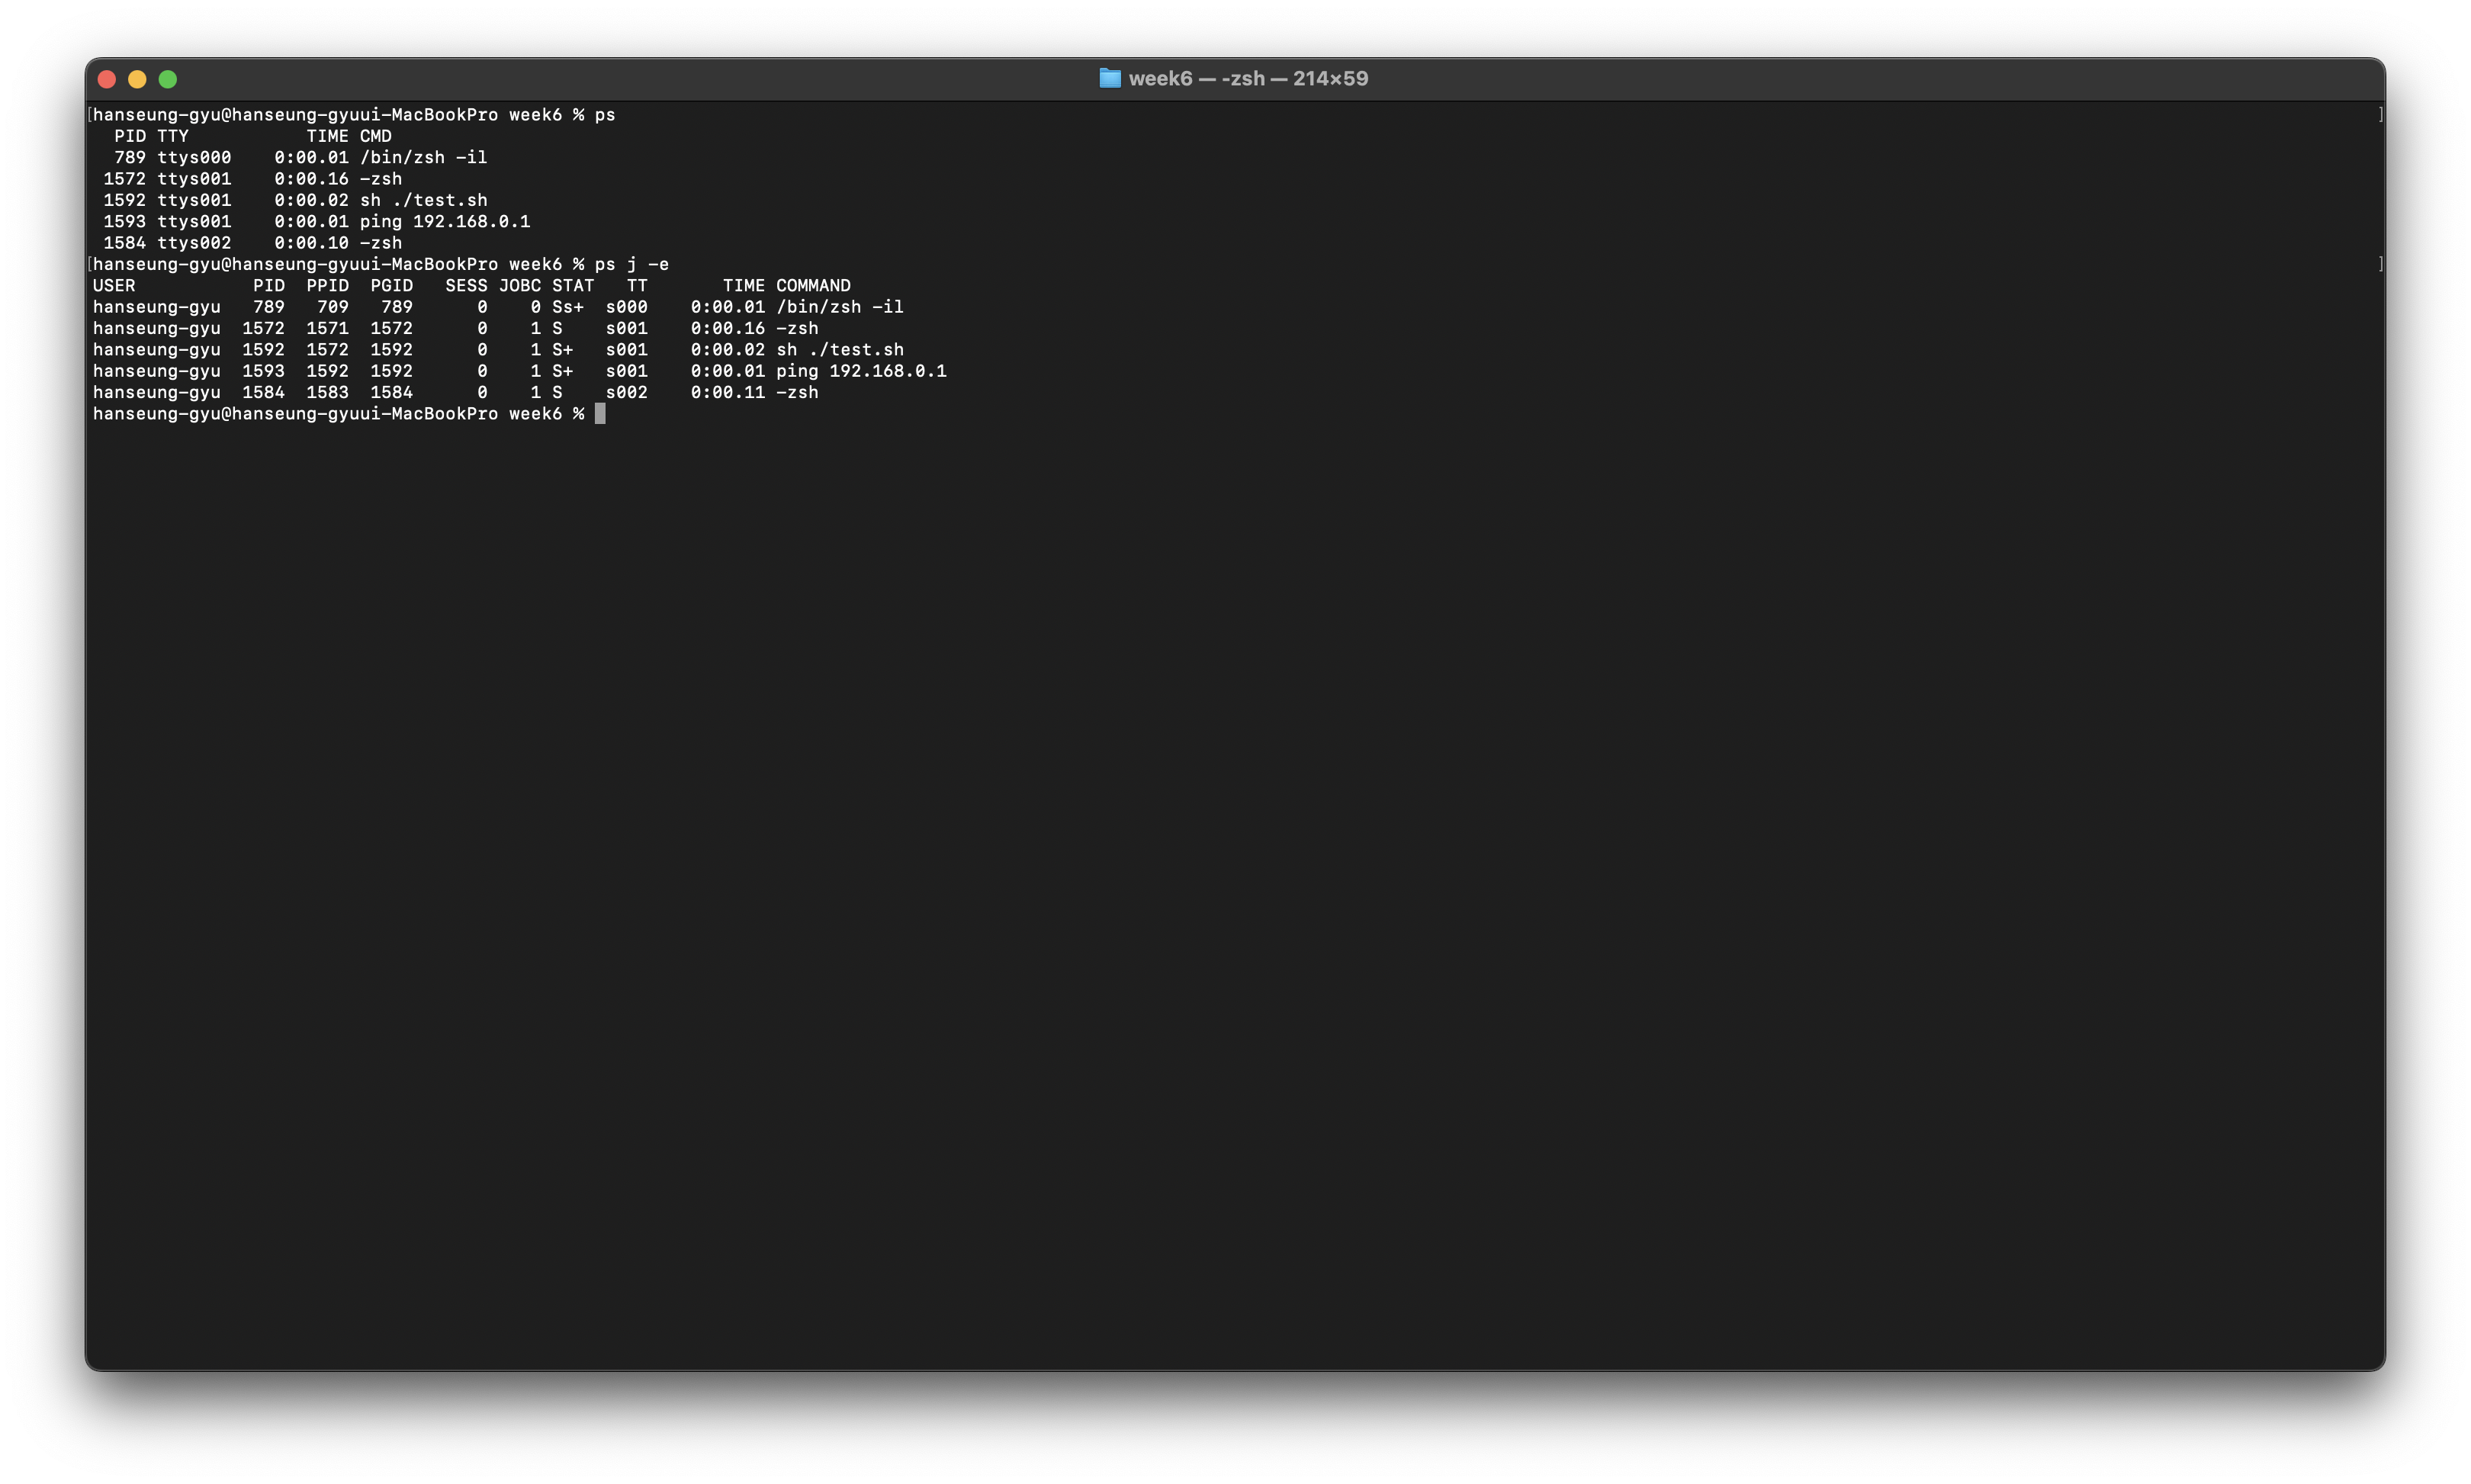
-Process management
ps: 현재 실생중인 프로세스를 출력
ex) ps -u 사용자ID
kill: process 강제 종료
ex) kill -9 사용자ID
-File/Directory
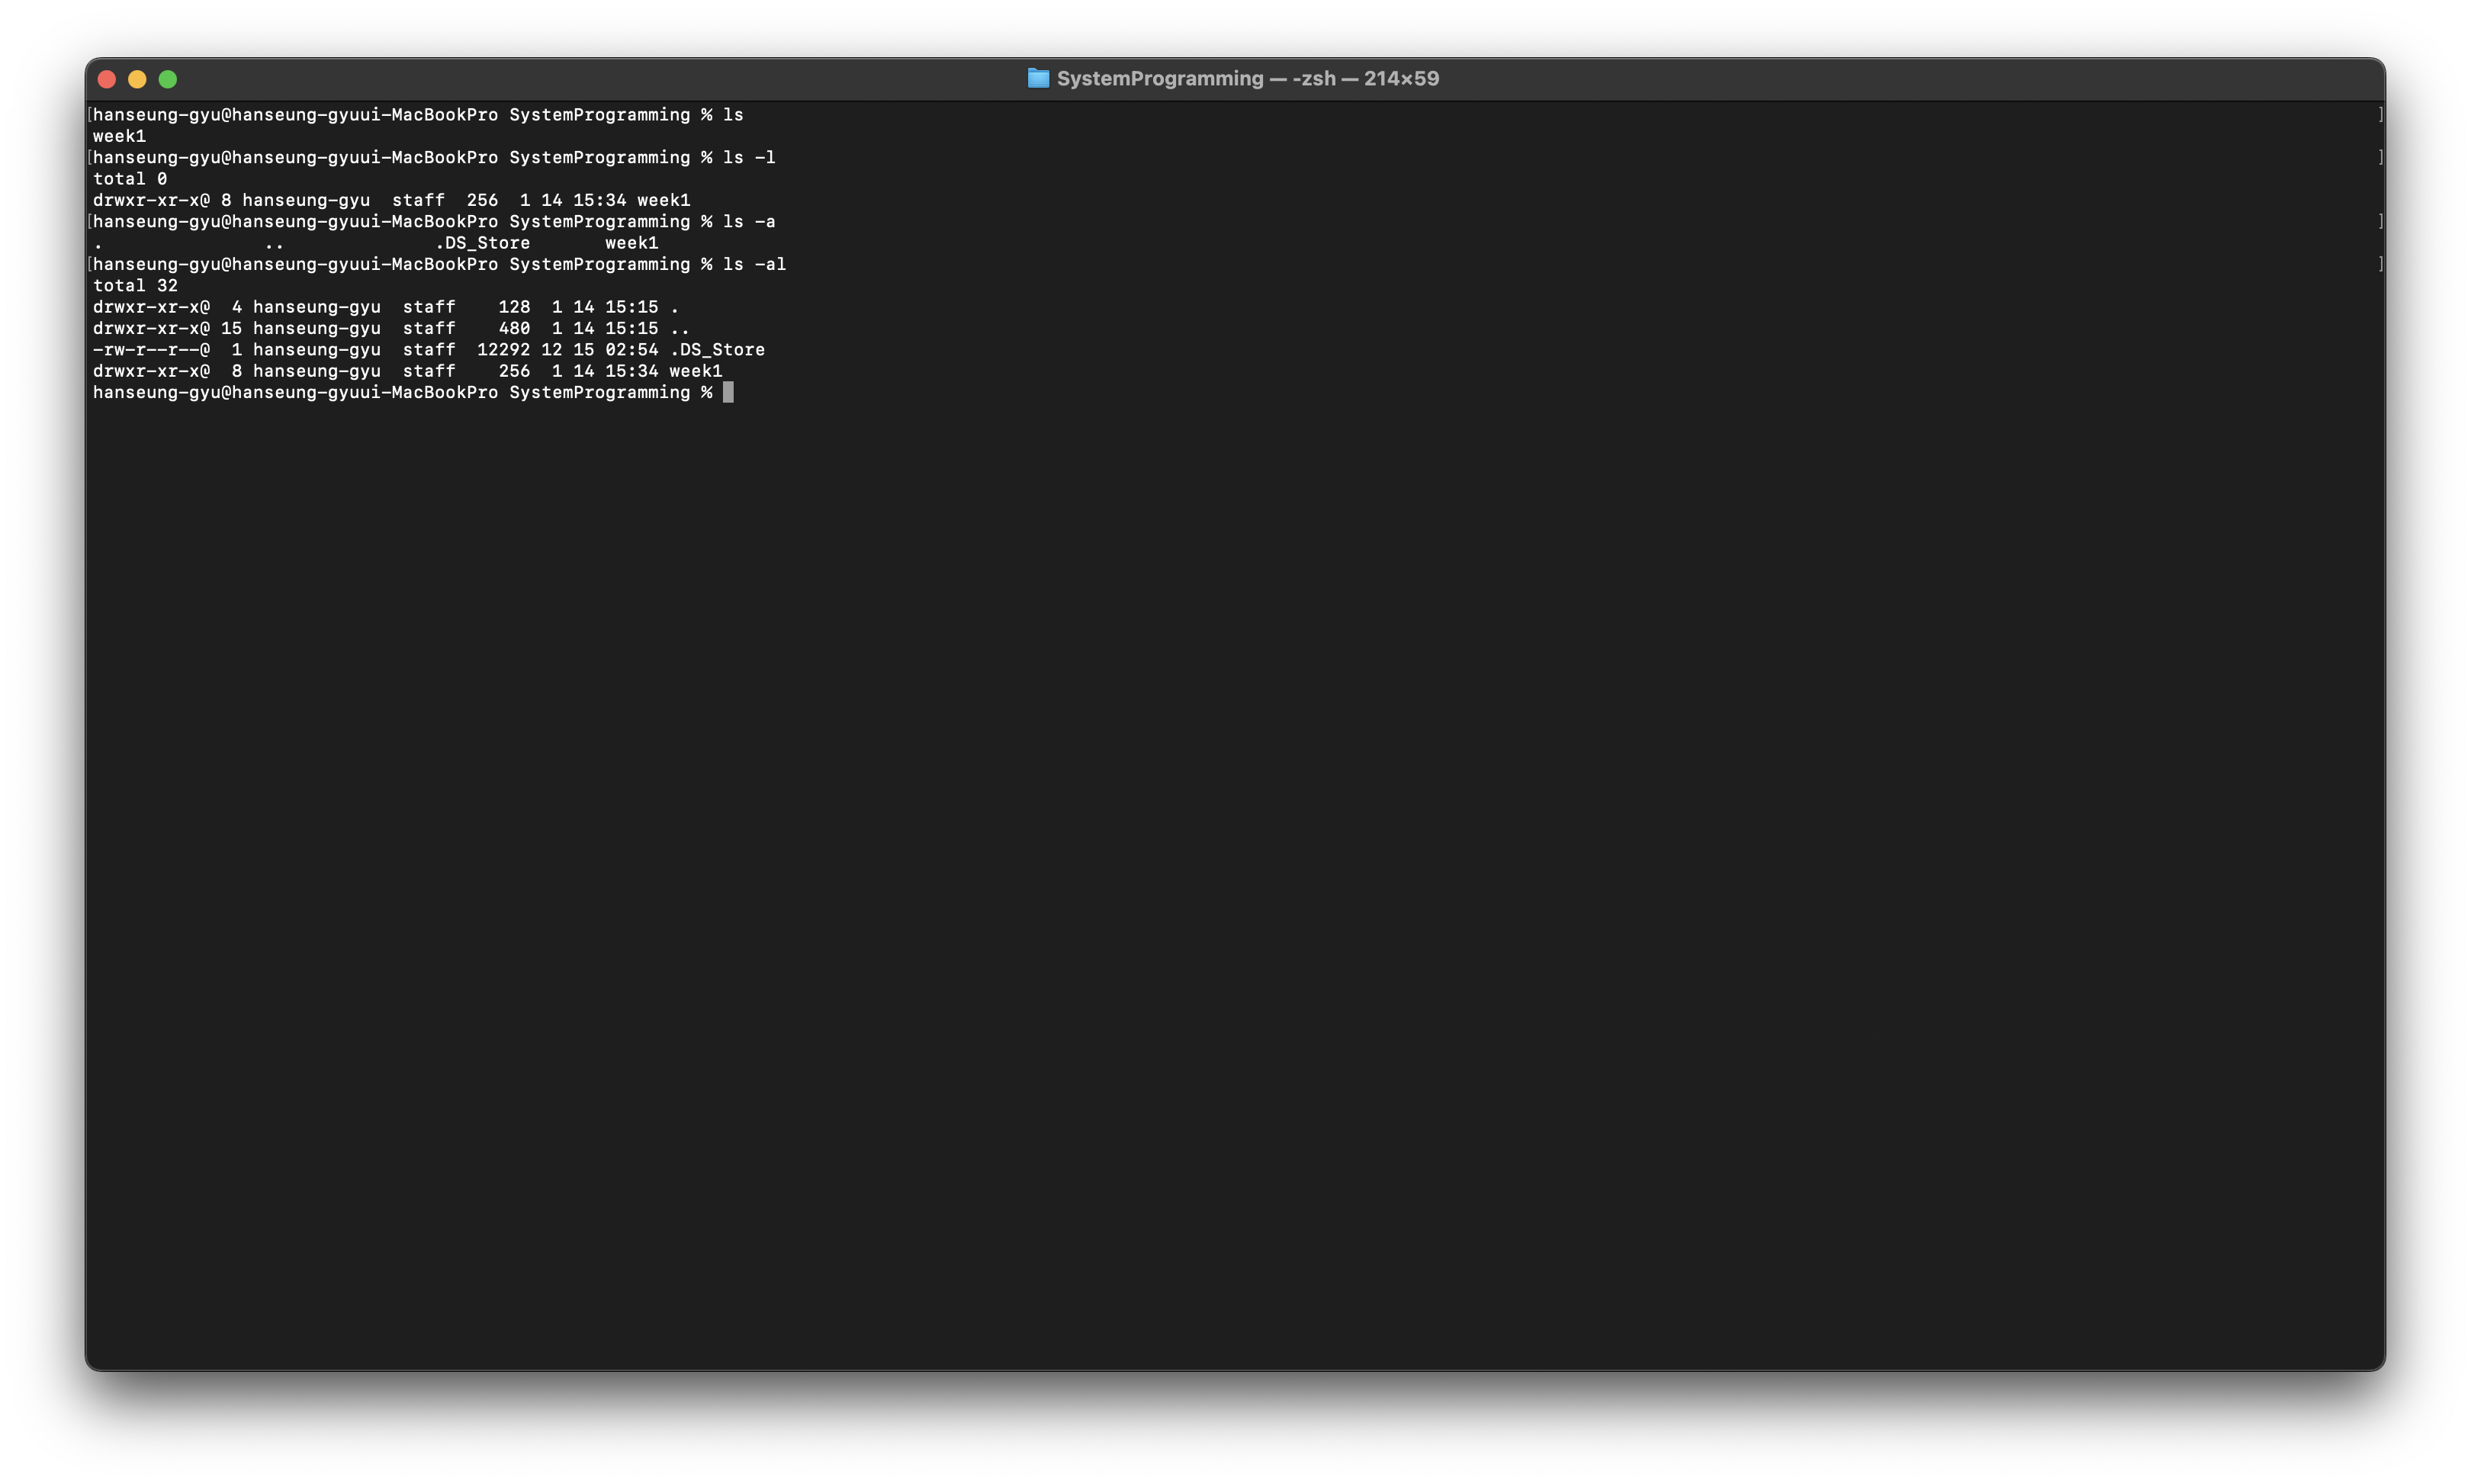
pwd: 현재 디렉토리 경로 출력
ex) pwd
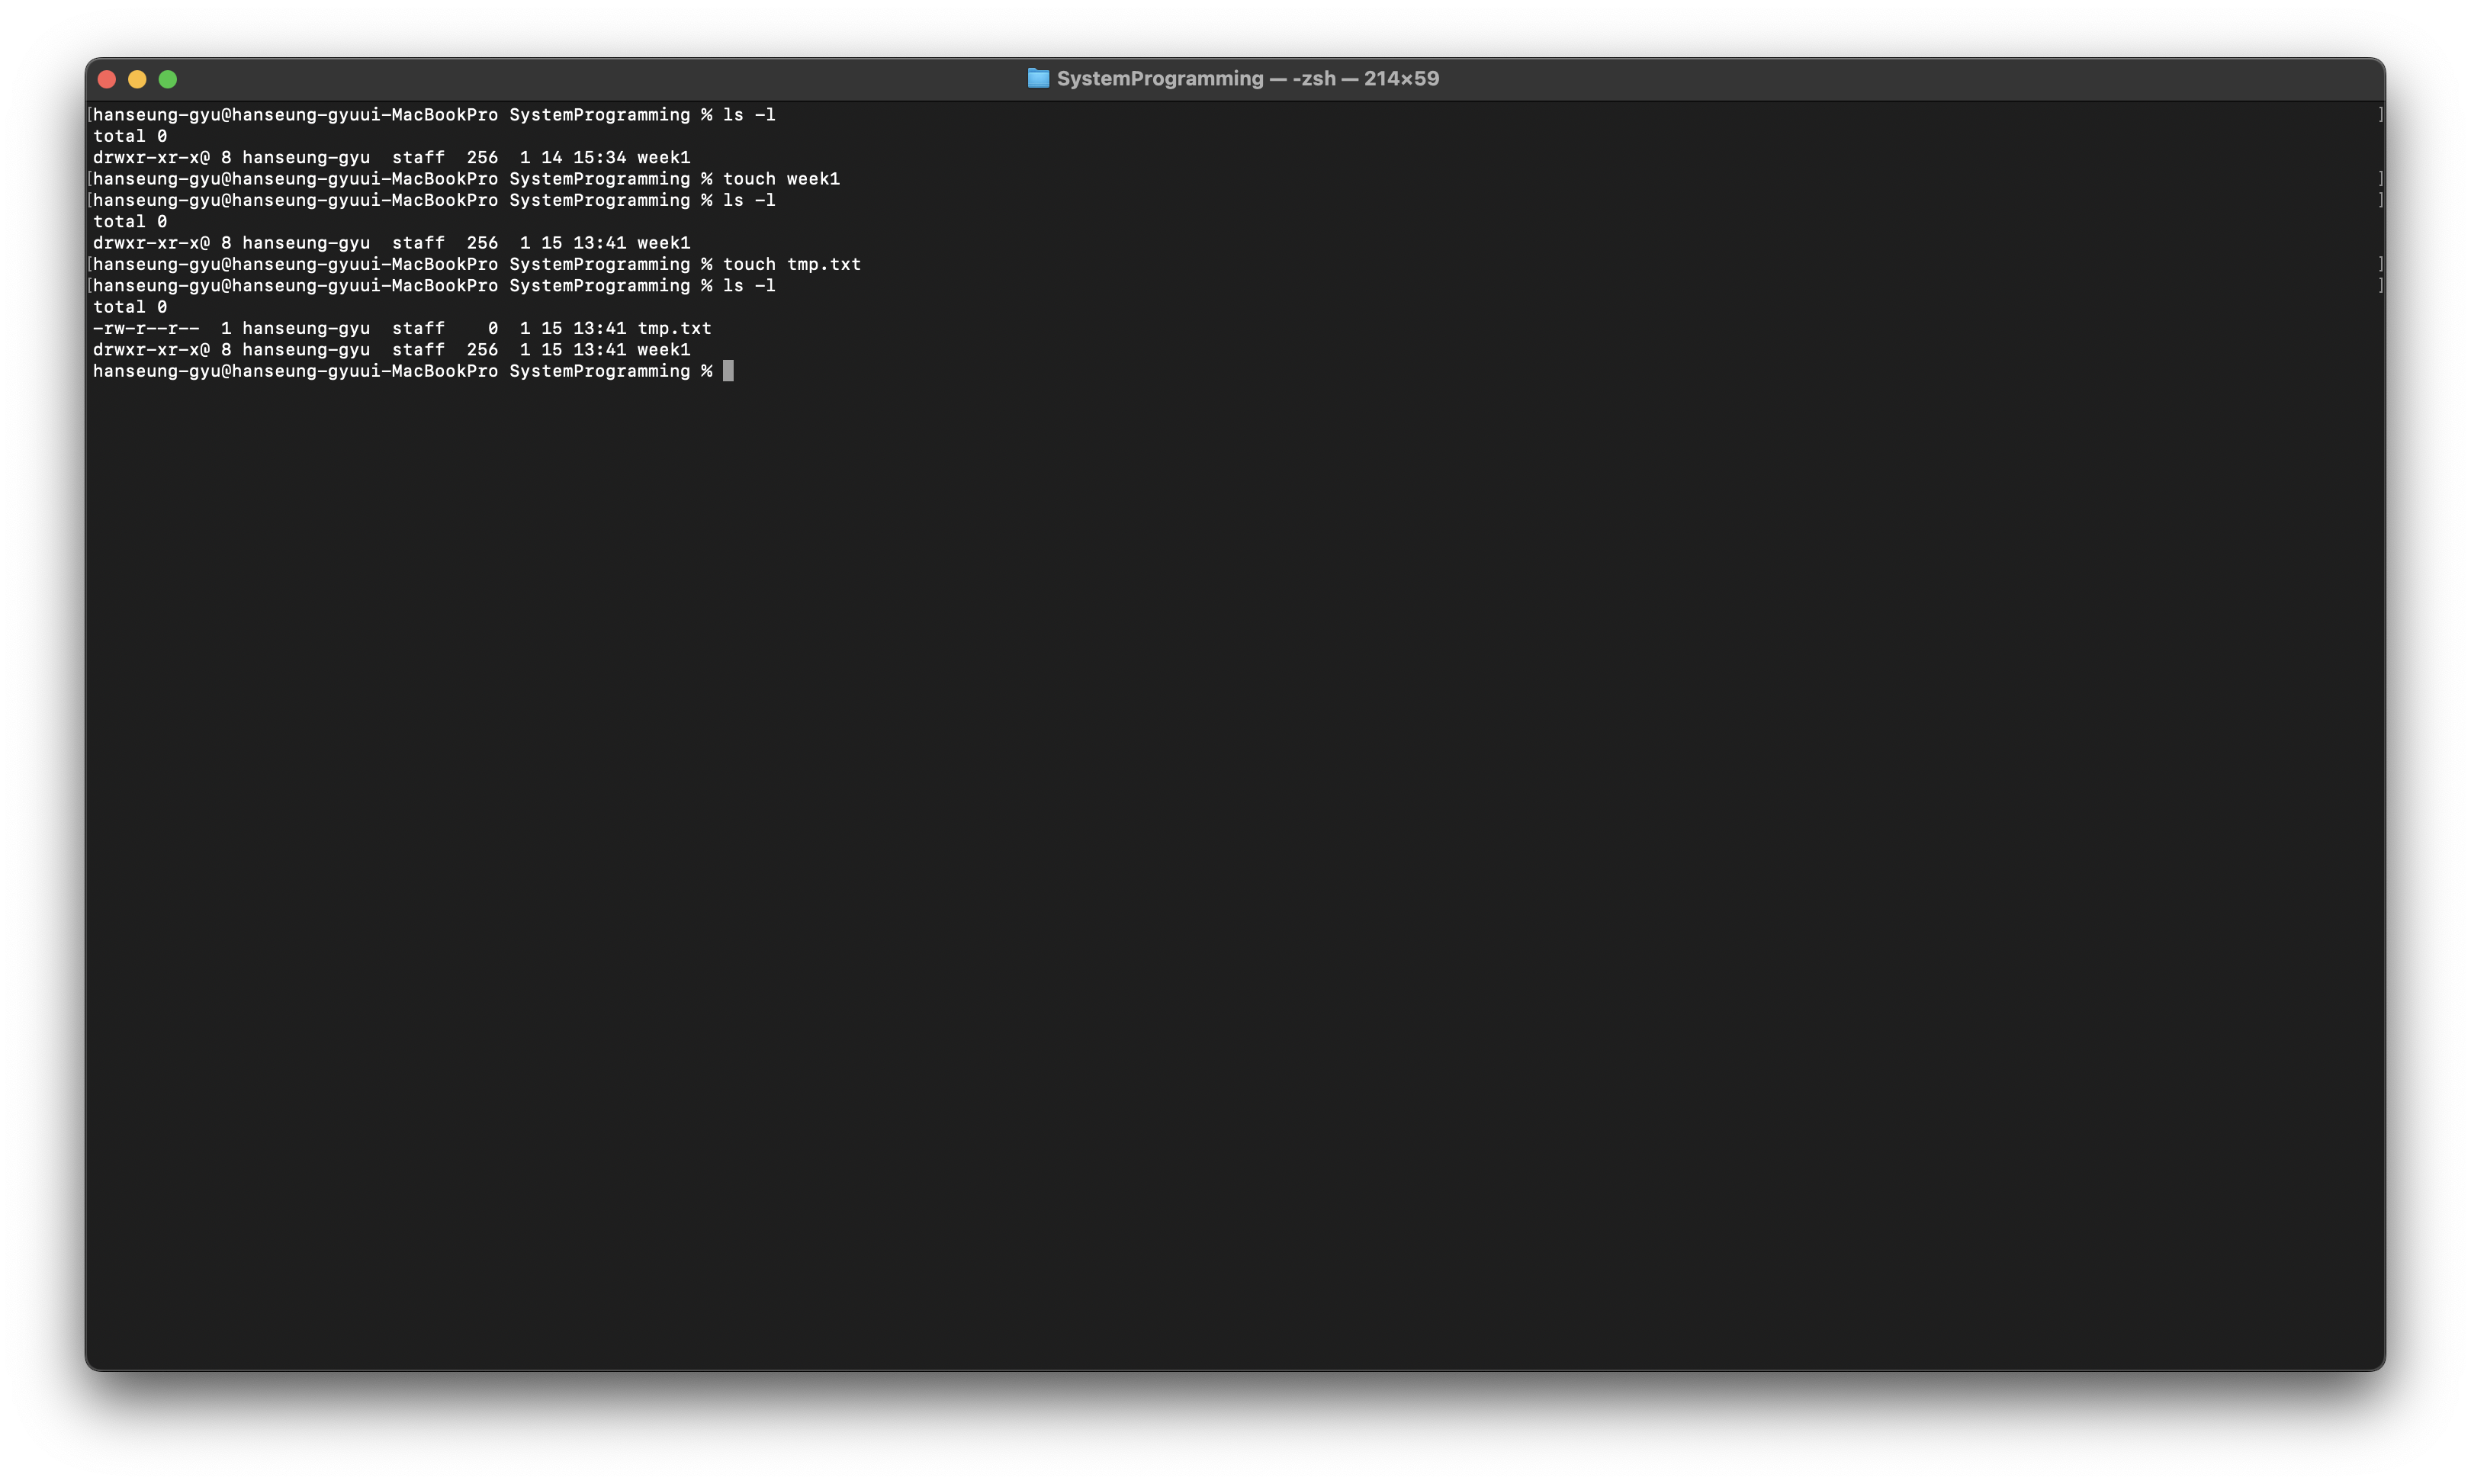
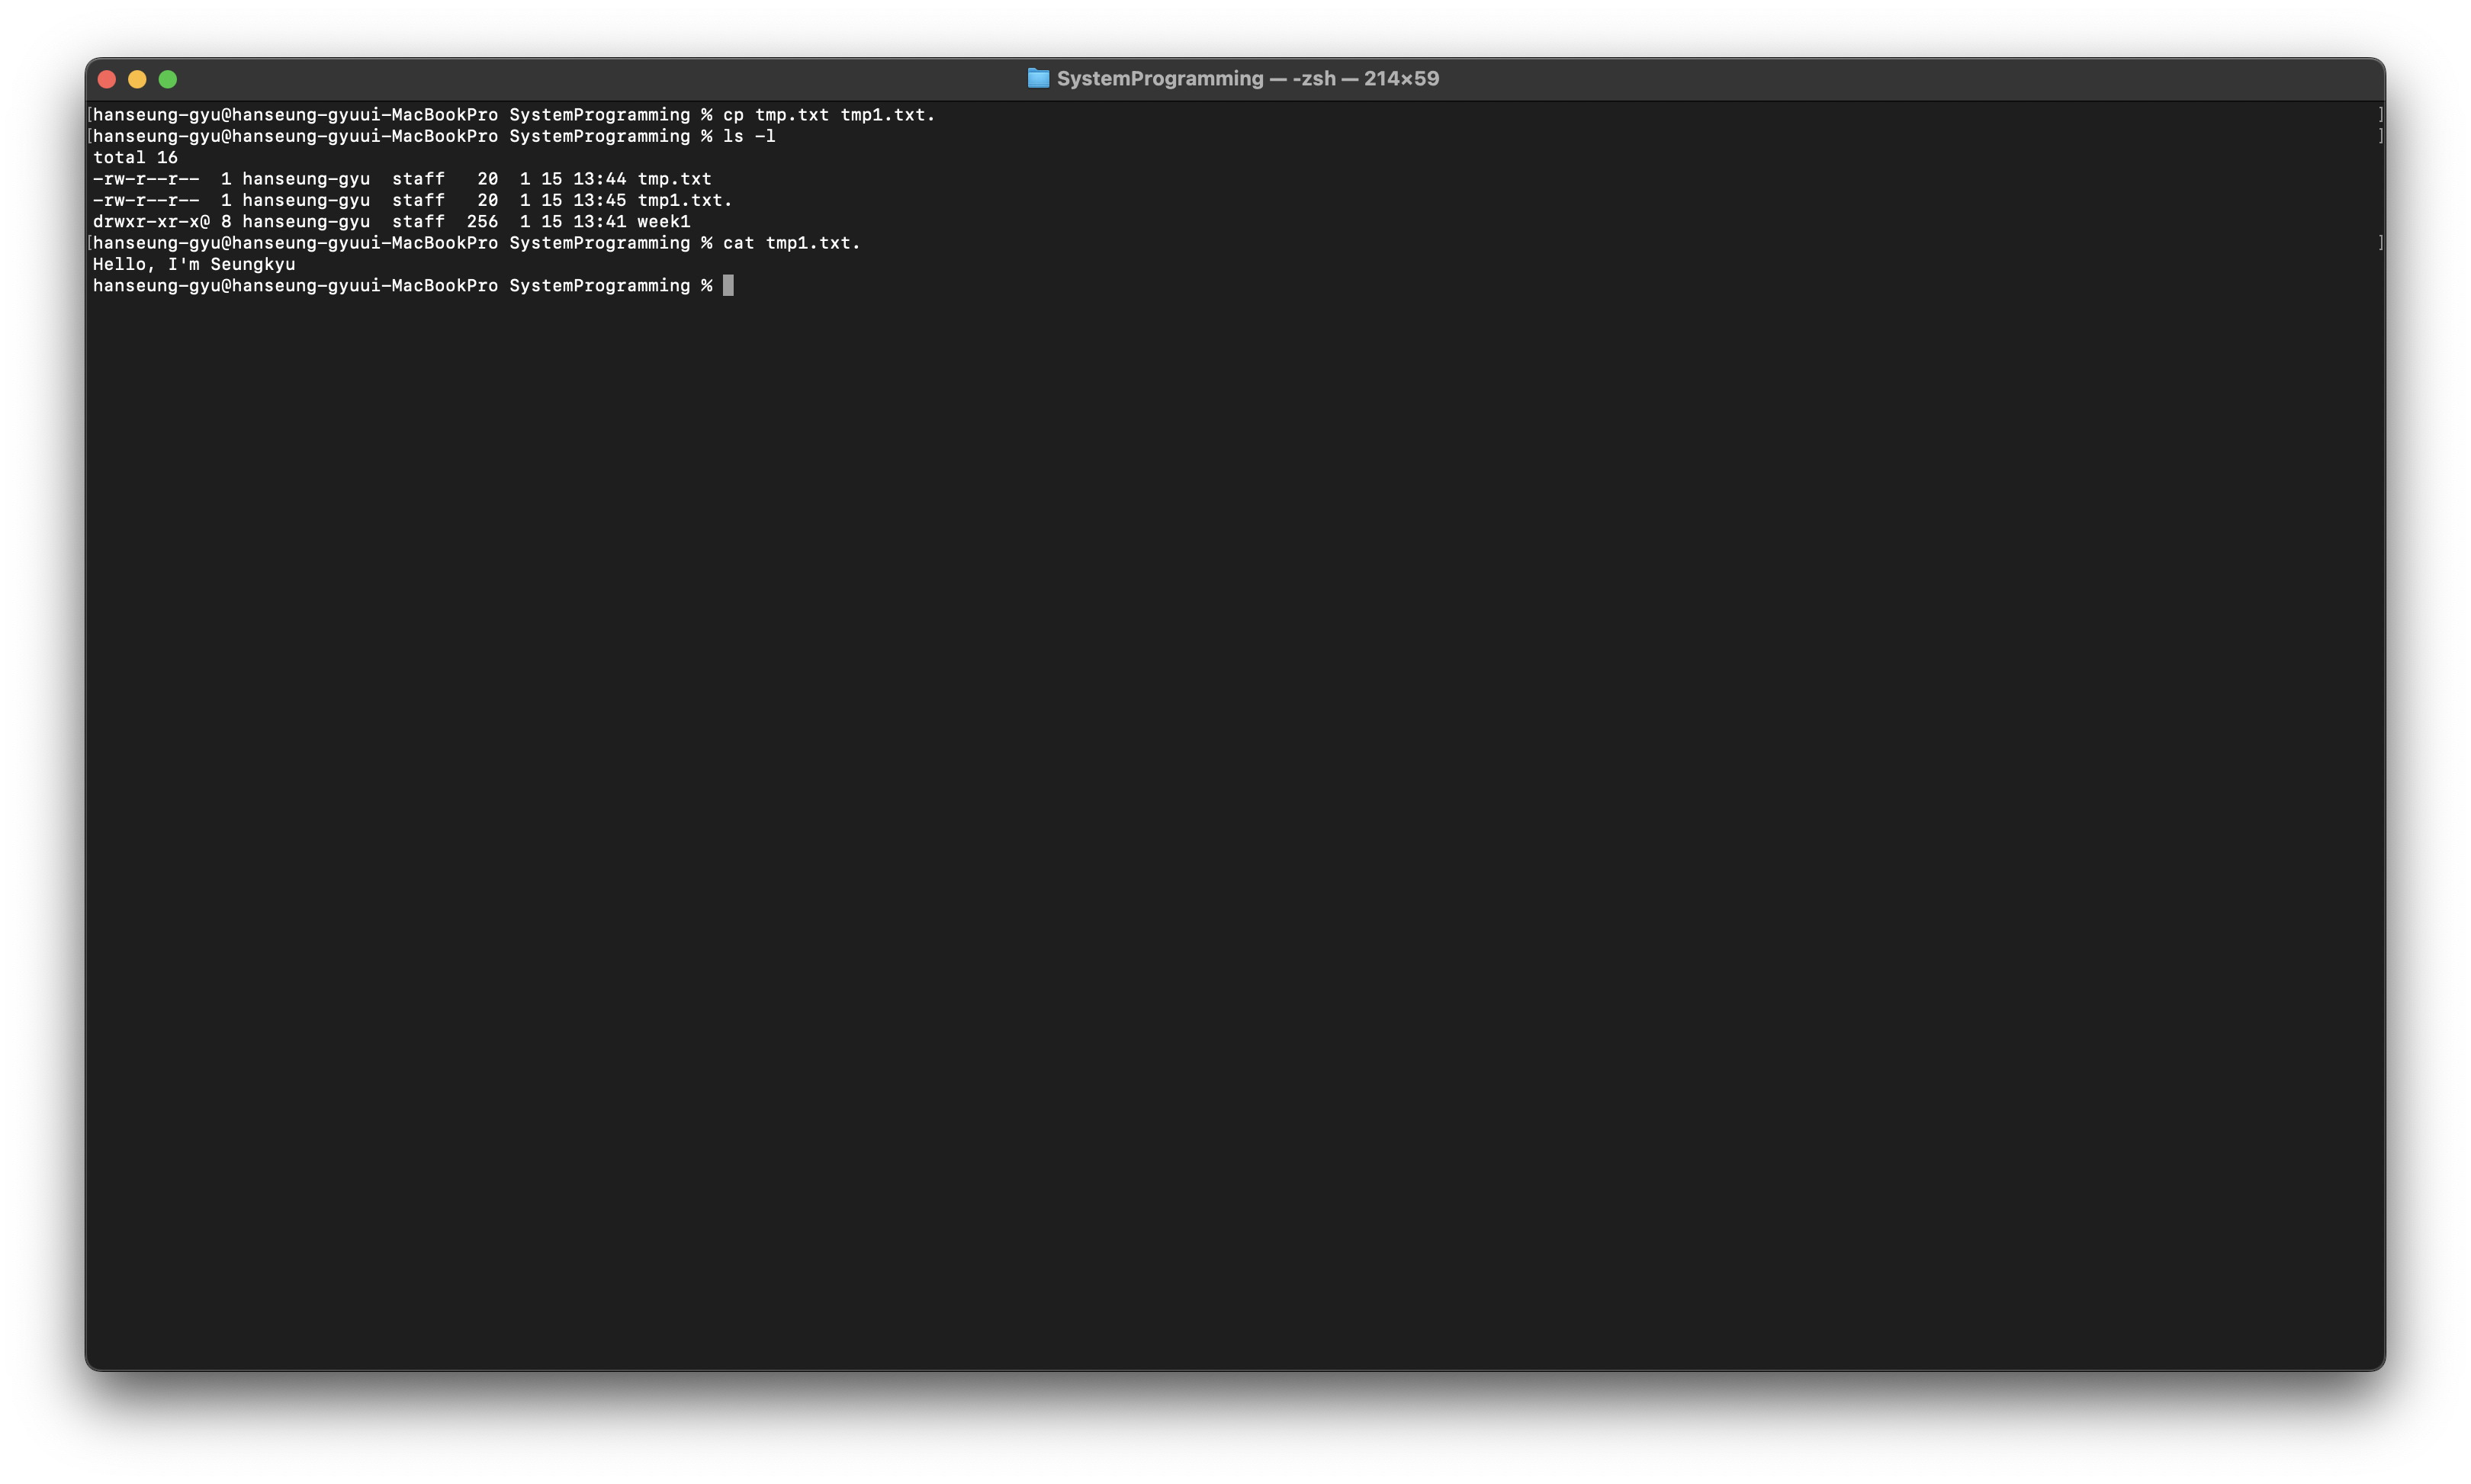
ls: 디렉토리 내용 출력
ex) ls -l
cd: 현재 디렉토리 변경
ex) cd /tmp
cp: 파일/디렉토리 복사
ex) cp a.txt b.txt
mv: 파일/디렉토리 이름변경과 이동
ex) mv a.txt b.txt
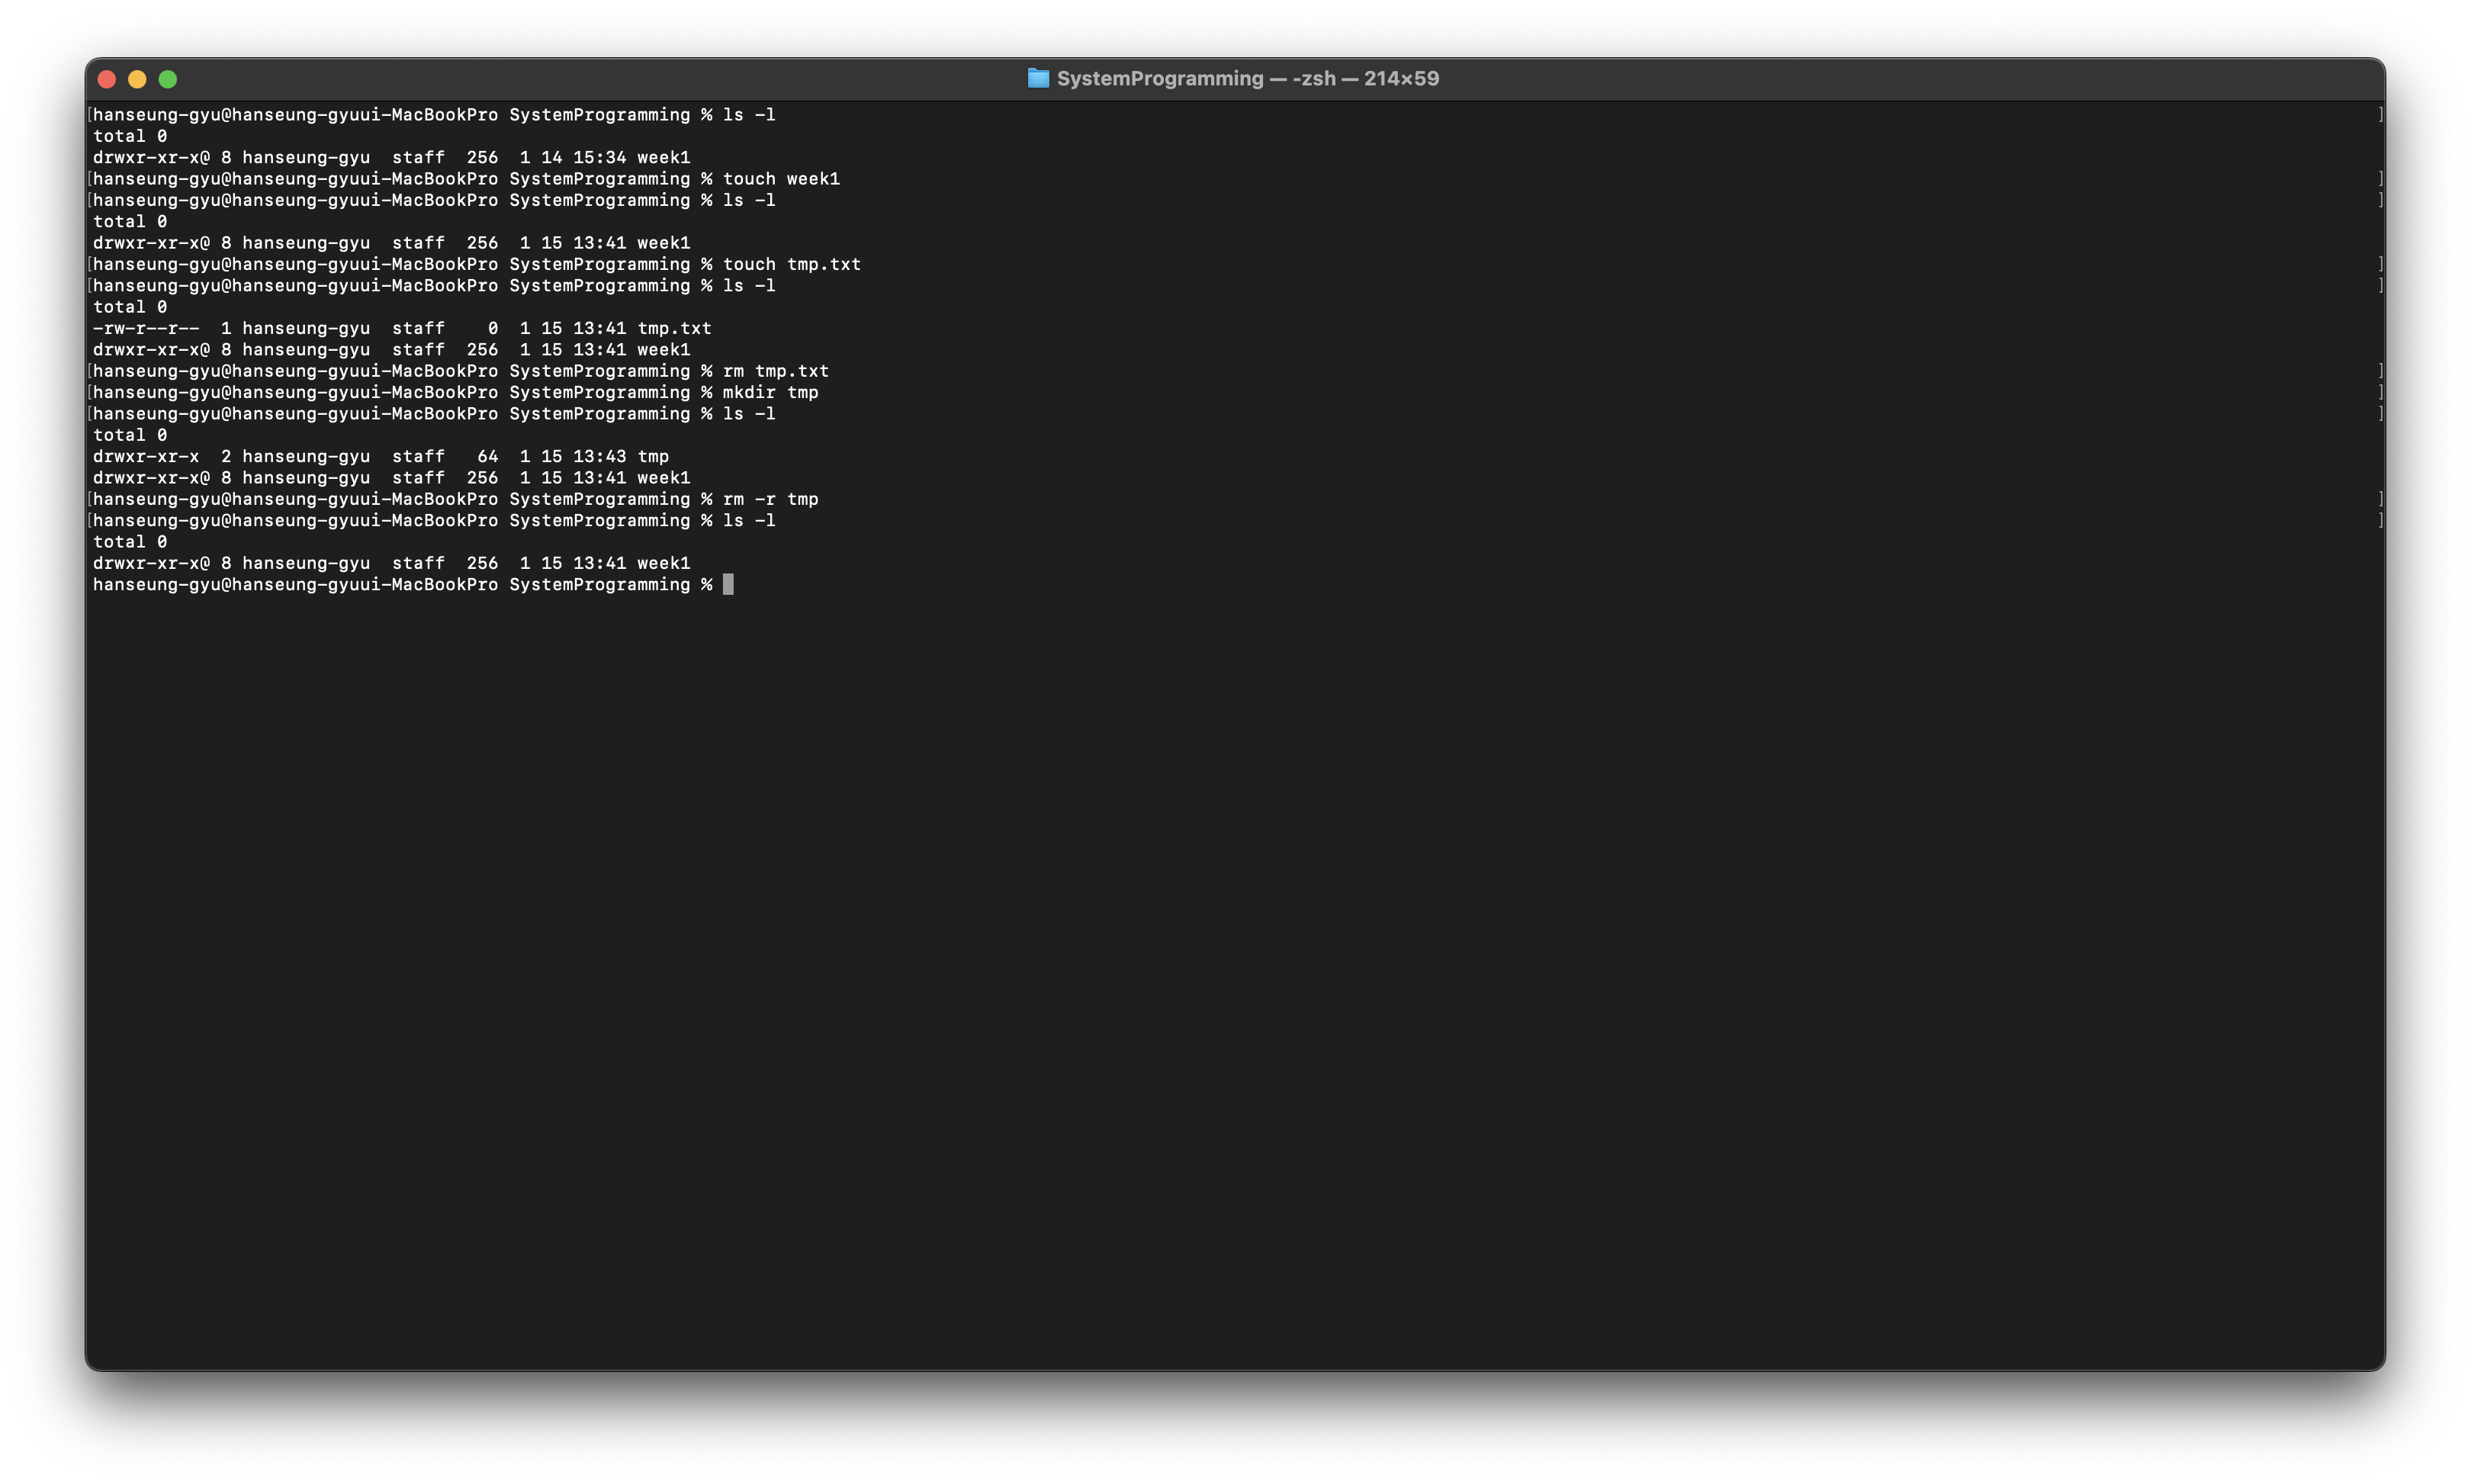
rm: 파일/디렉토리 삭제
ex) rm a.txt
mkdir: 디렉토리 생성
ex) mkdir dir1
rmdir: 빈 디렉토리 삭제
ex) rmdir dir2
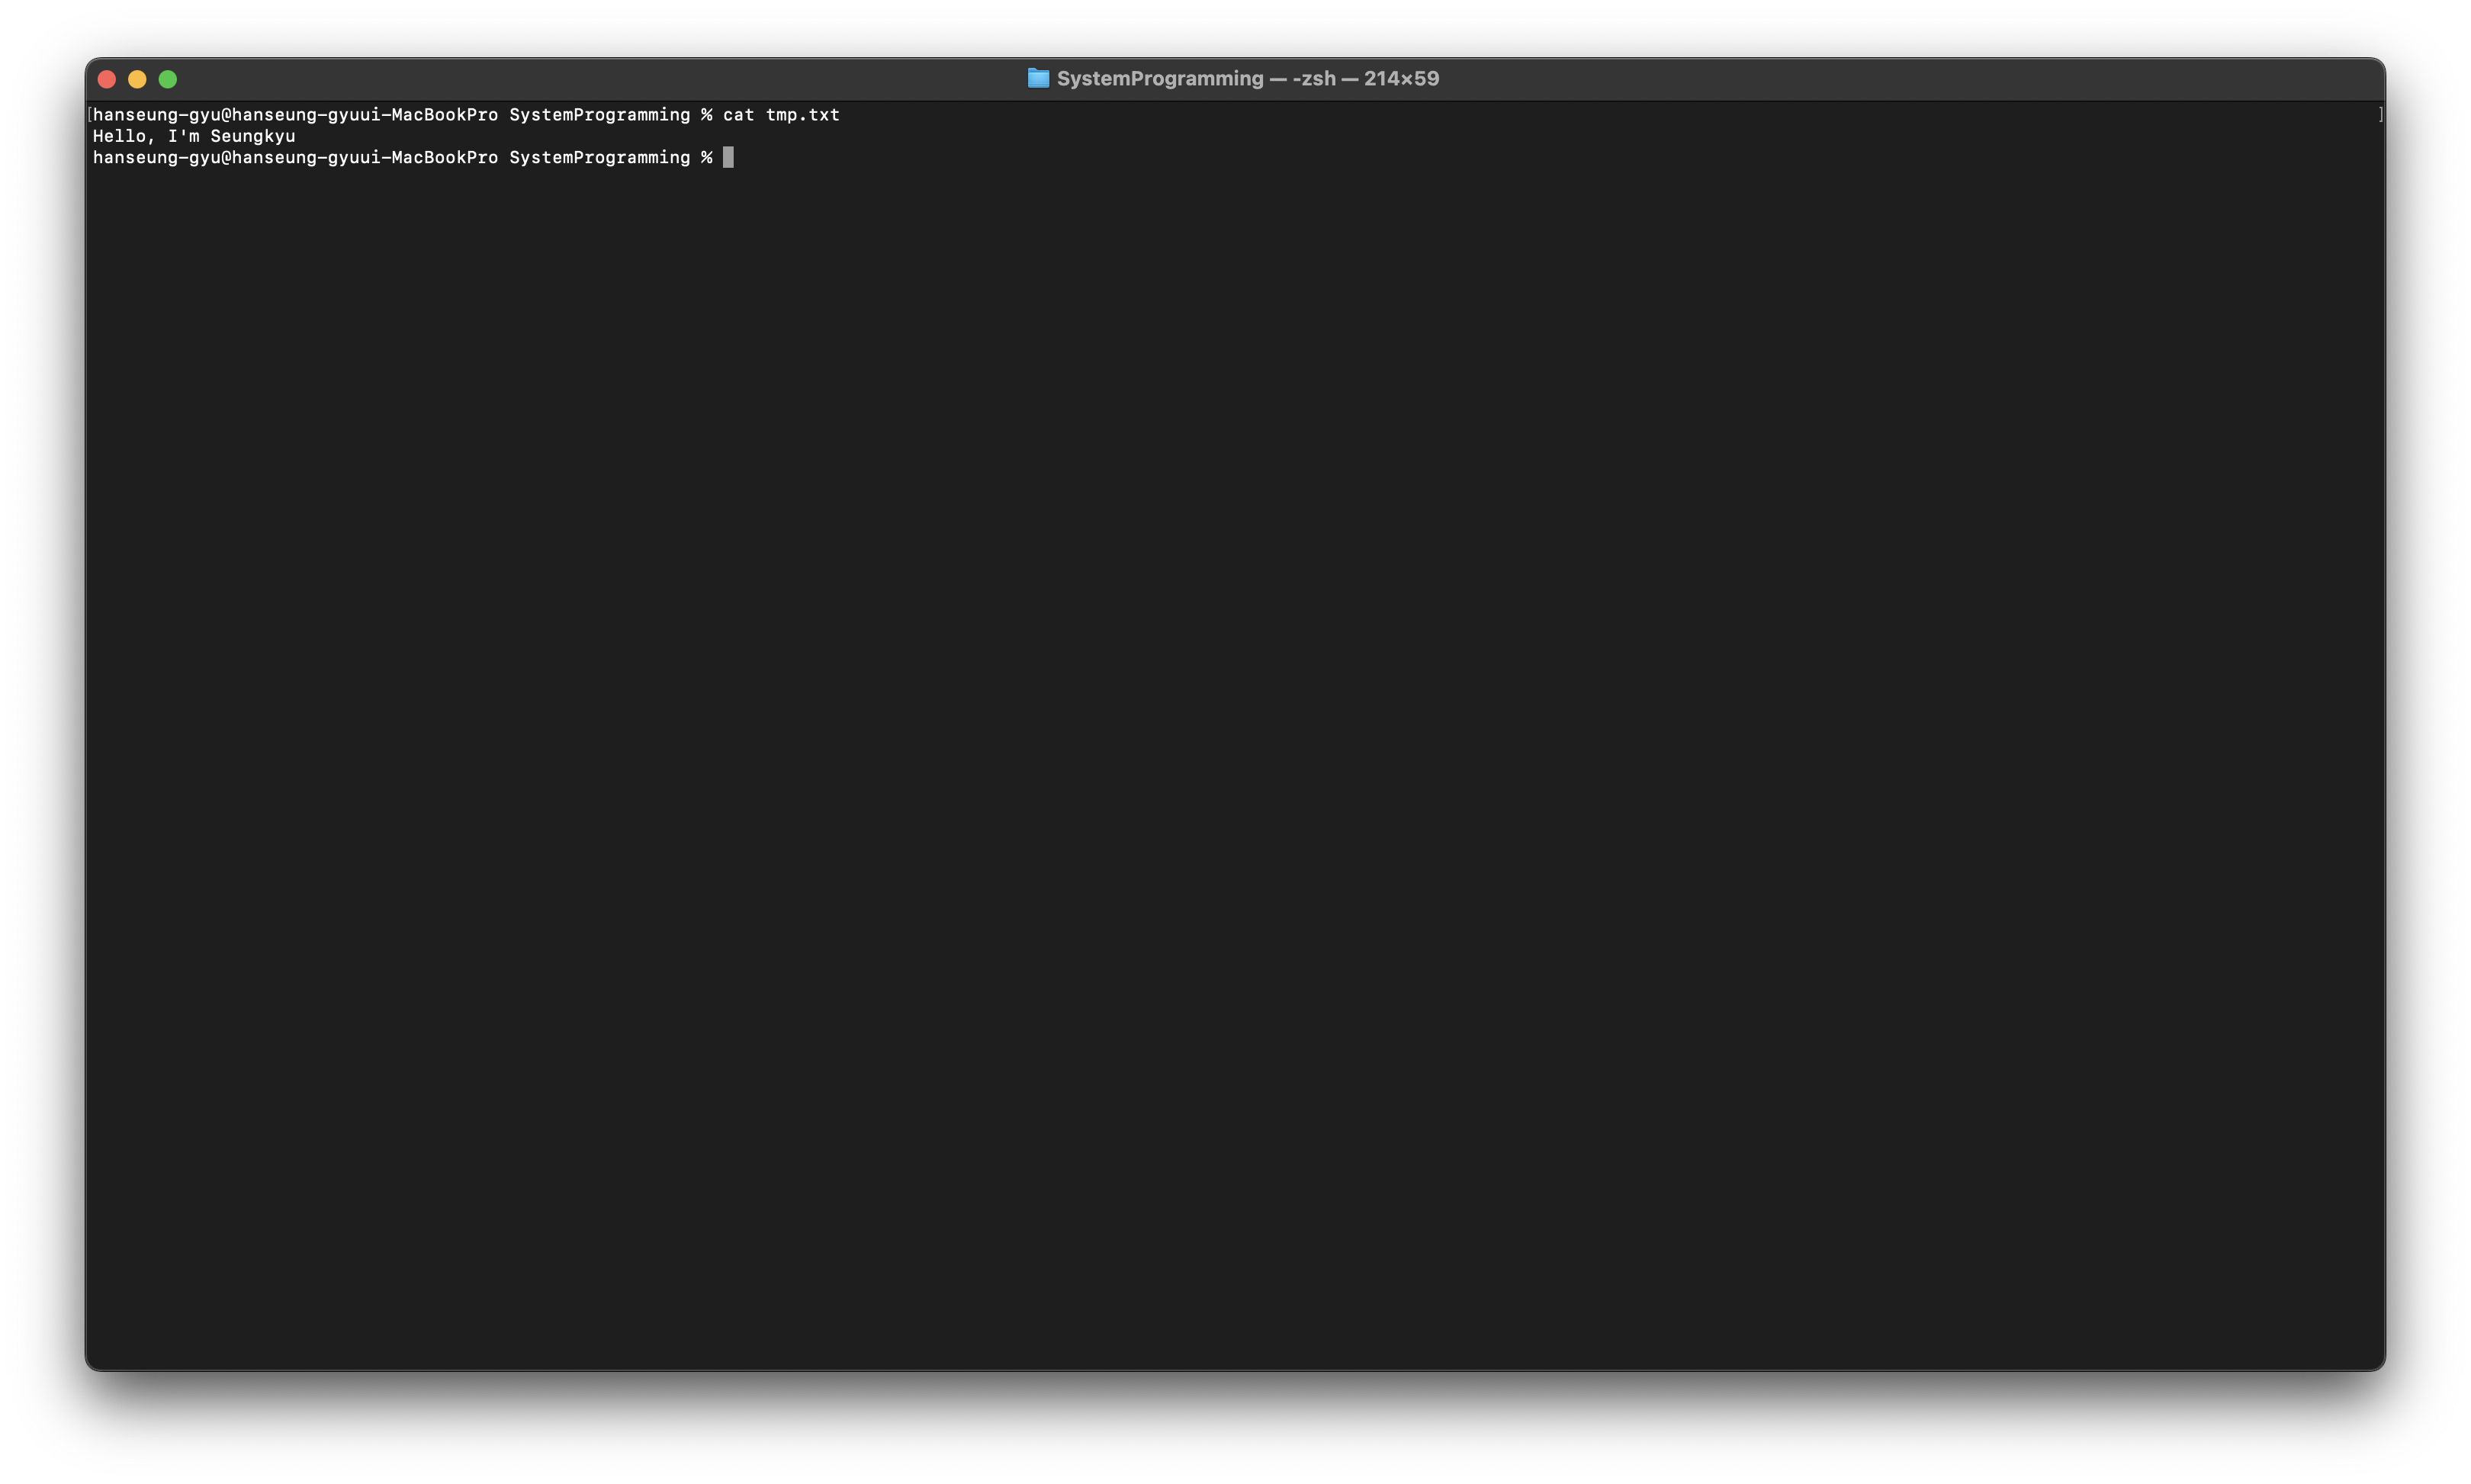
cat: 파일 내용 출력
ex) cat a.txt
more: 파일 내용을 쪽 단위로 출력
ex) more a.txt
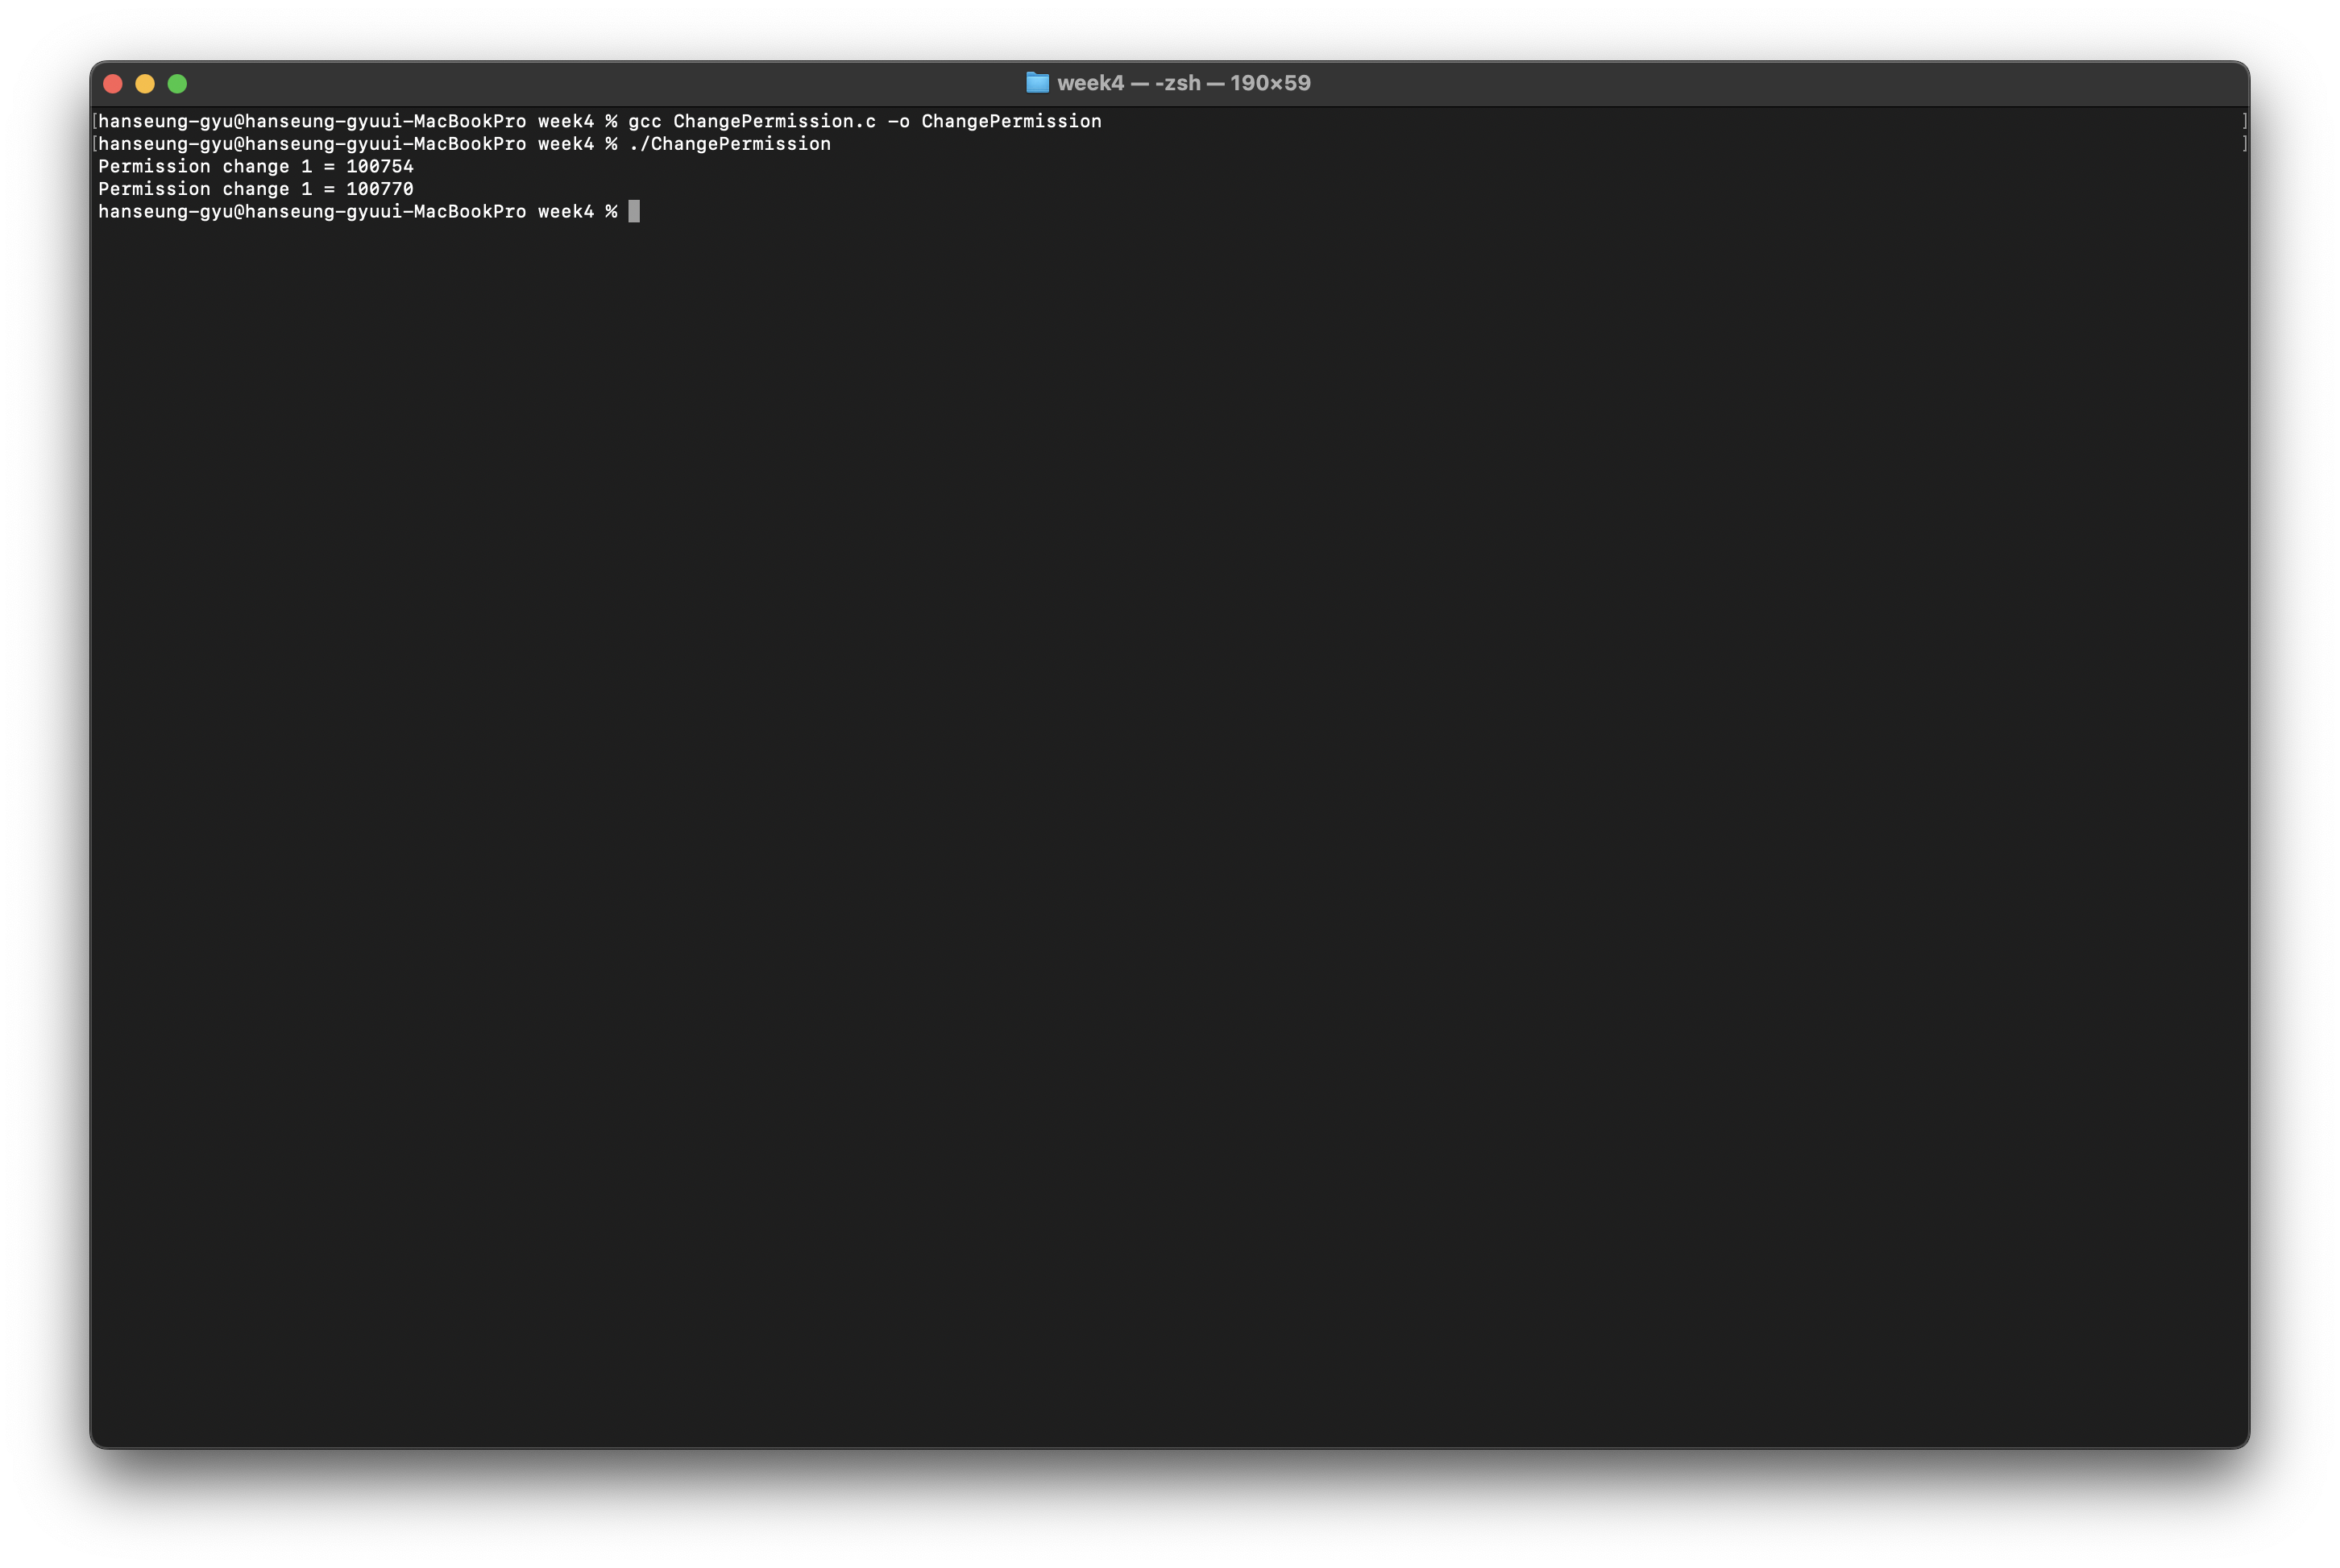
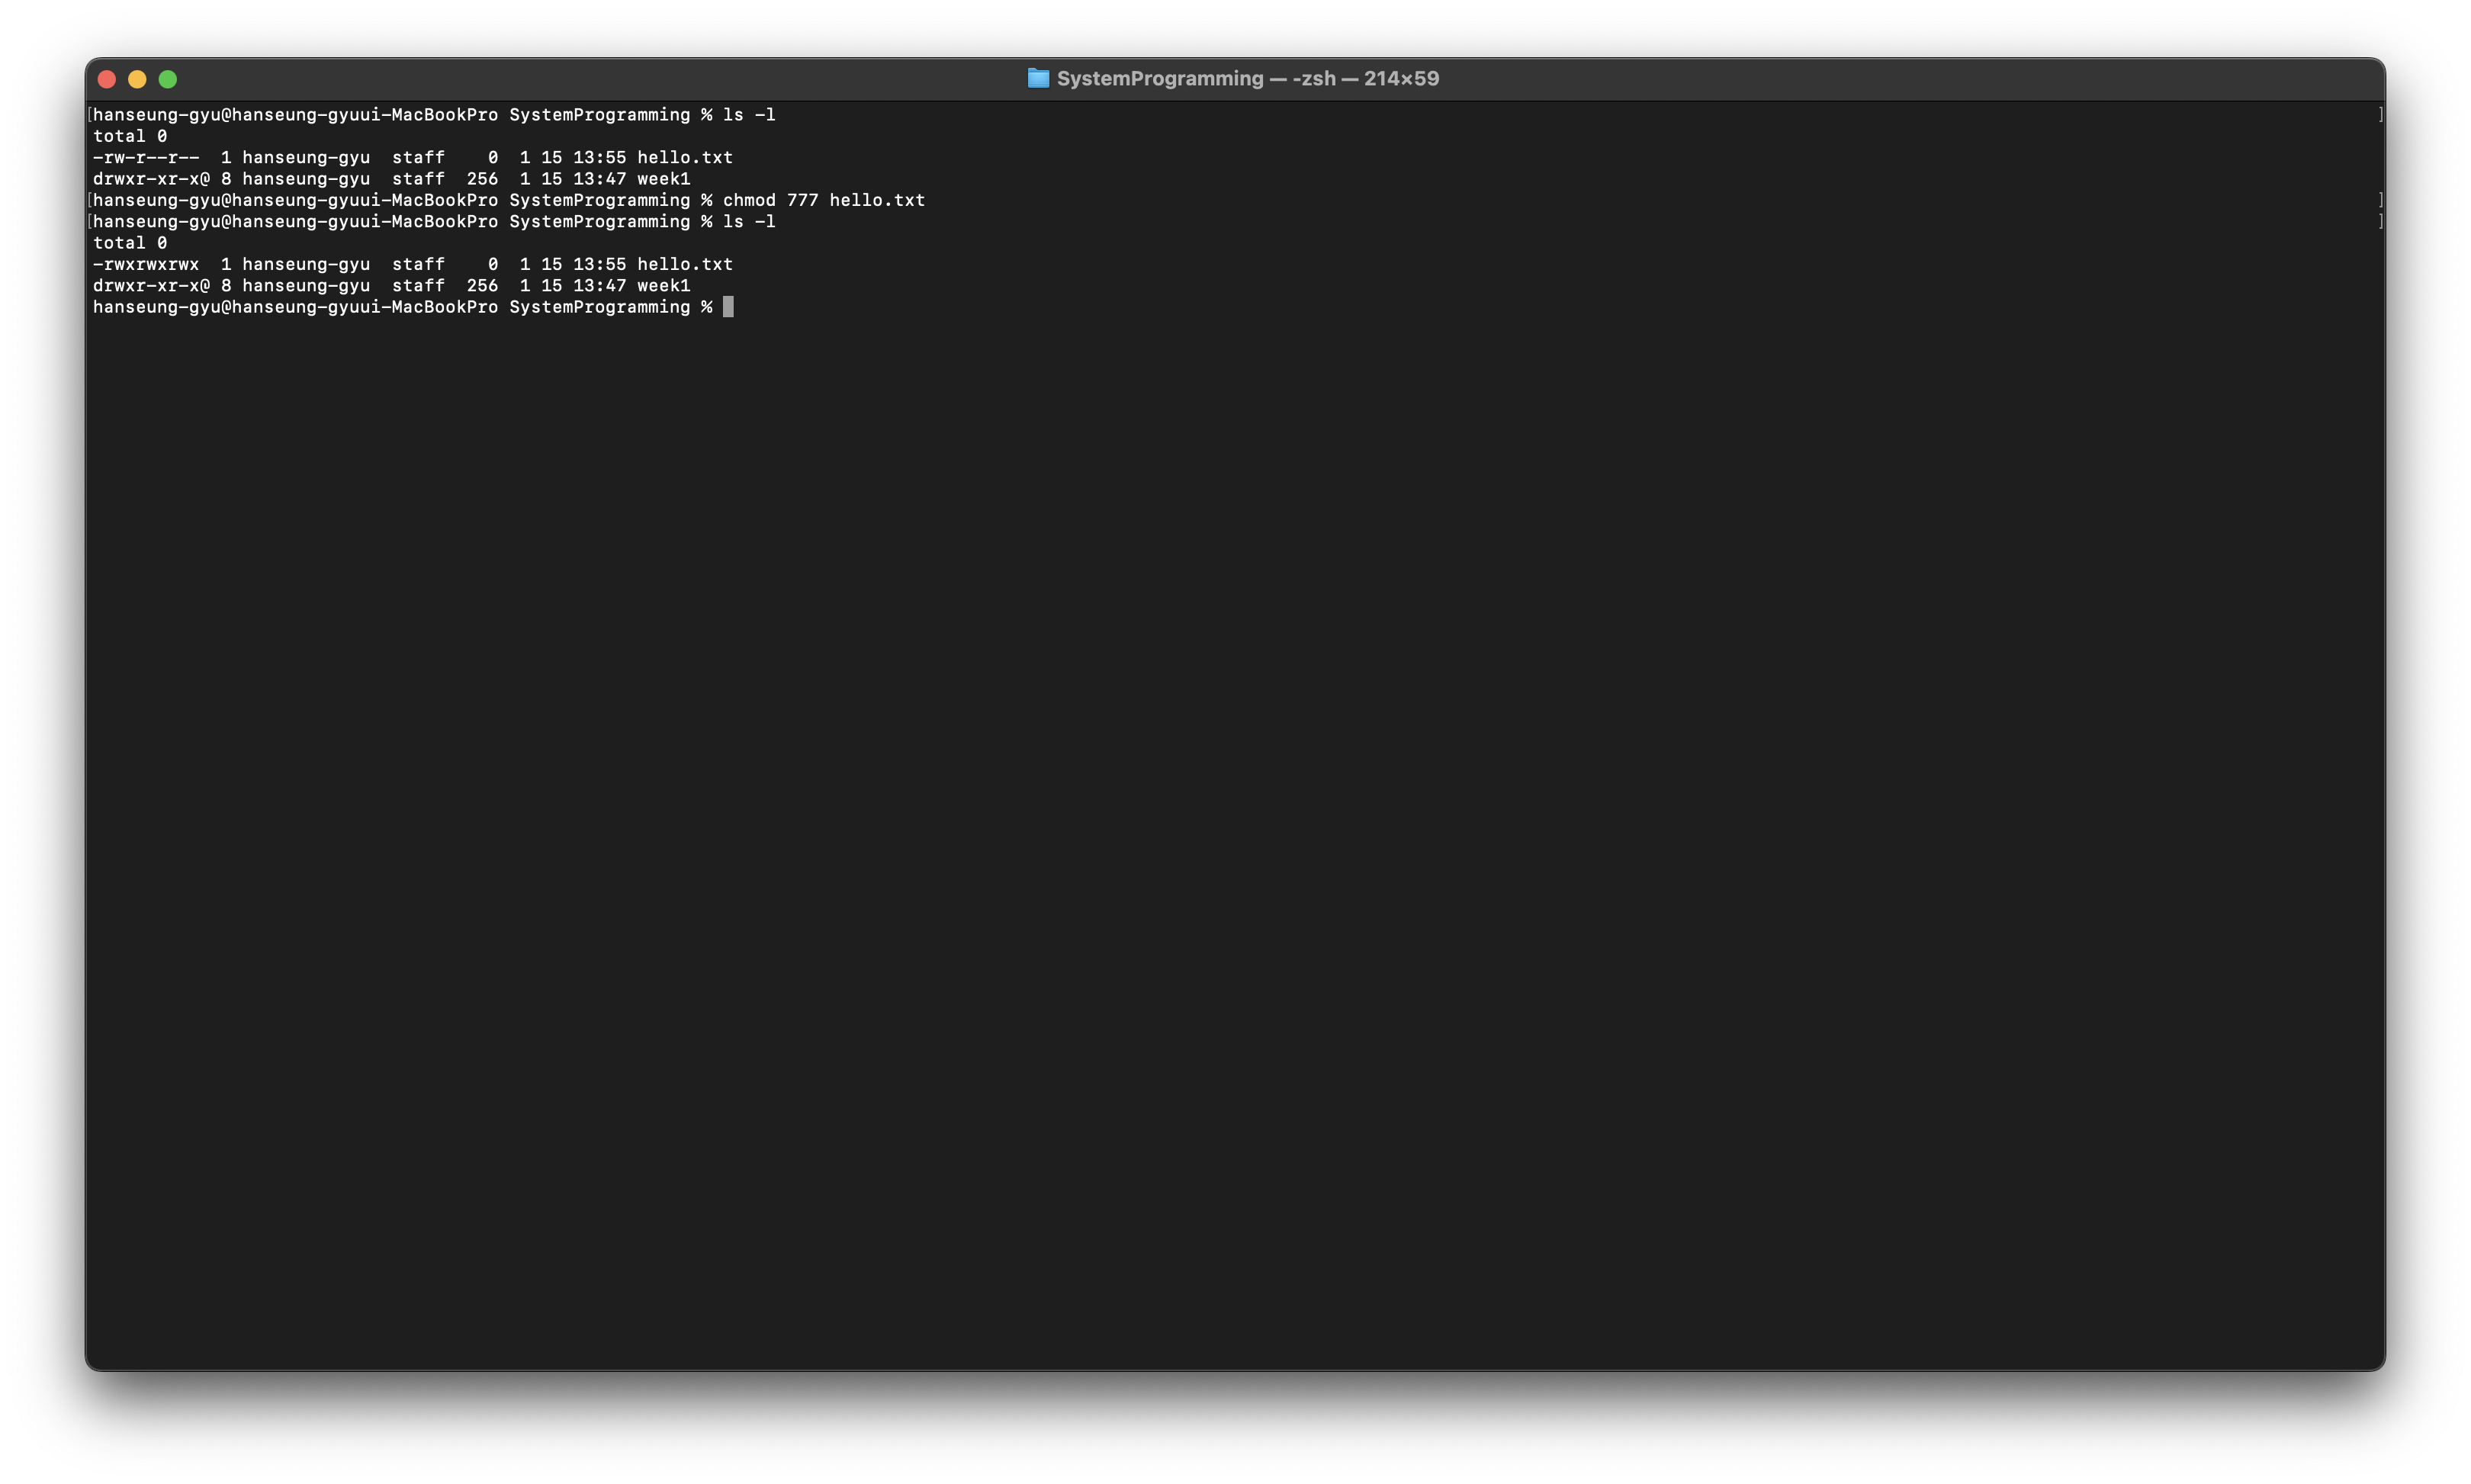
chmod: 파일 접근권한 변경
ex) chmod 777 a.txt
grep: 패턴 검색
ex)grep abcd a.txt
- Others
su: 사용자 계정 변경
ex) su -seungkyu
tar: 파일/디렉토리 묶기
ex) tar cvf a.tar *
whereis: 파일 위치 검색
Man Page
Unix/Linux 시스템 사용 설명서로
Shell command, System Call, Standard library에 대한 설명을 제공
man [options][section] page
의 명령어를 입력하여 사용한다.
VI editor
Linux를 사용하다보면 VI editor를 굉장히 많이 사용할 것이다.
일단 배운 명령어들로 실습을 할 디렉토리를 만들고 들어가준다.
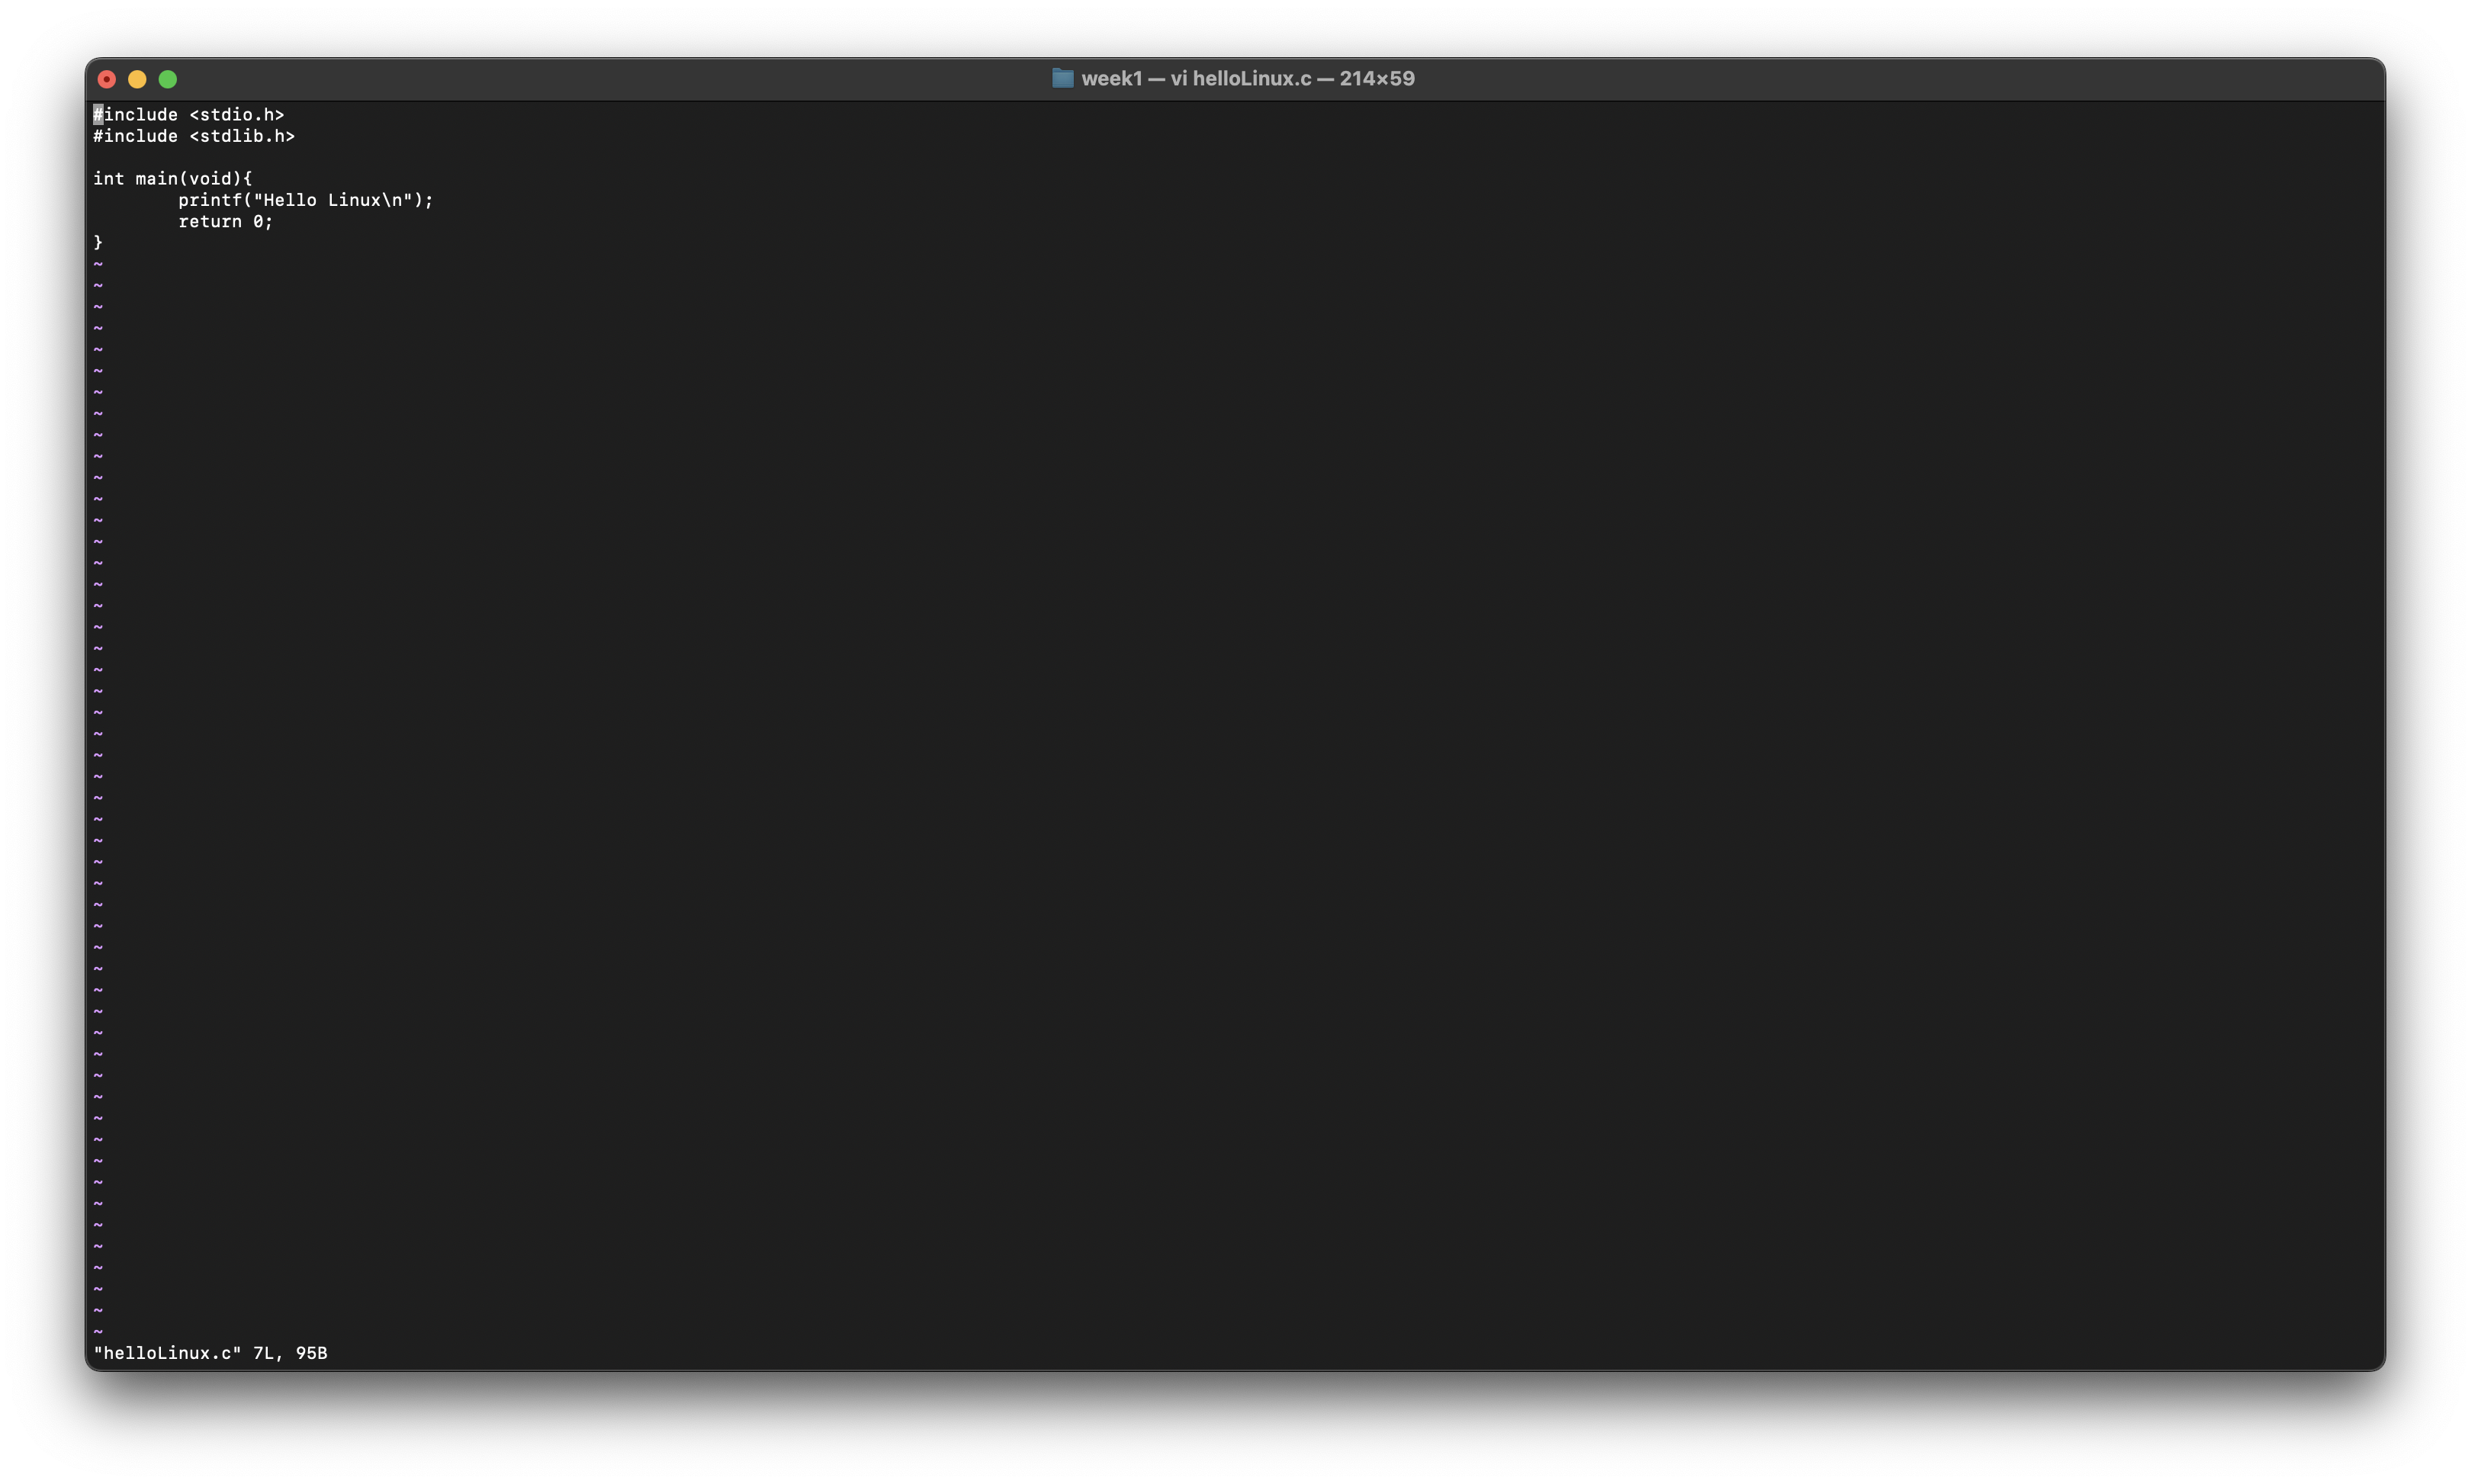
그럼 이 실습 디렉토리에서 vi helloLinux.c 라는 명령어를 입력하여 VI 에디터를 실행해보자
VI 에디터로 helloLinux.c라는 C 소스코드 파일을 작성하겠다는 명령어이다.
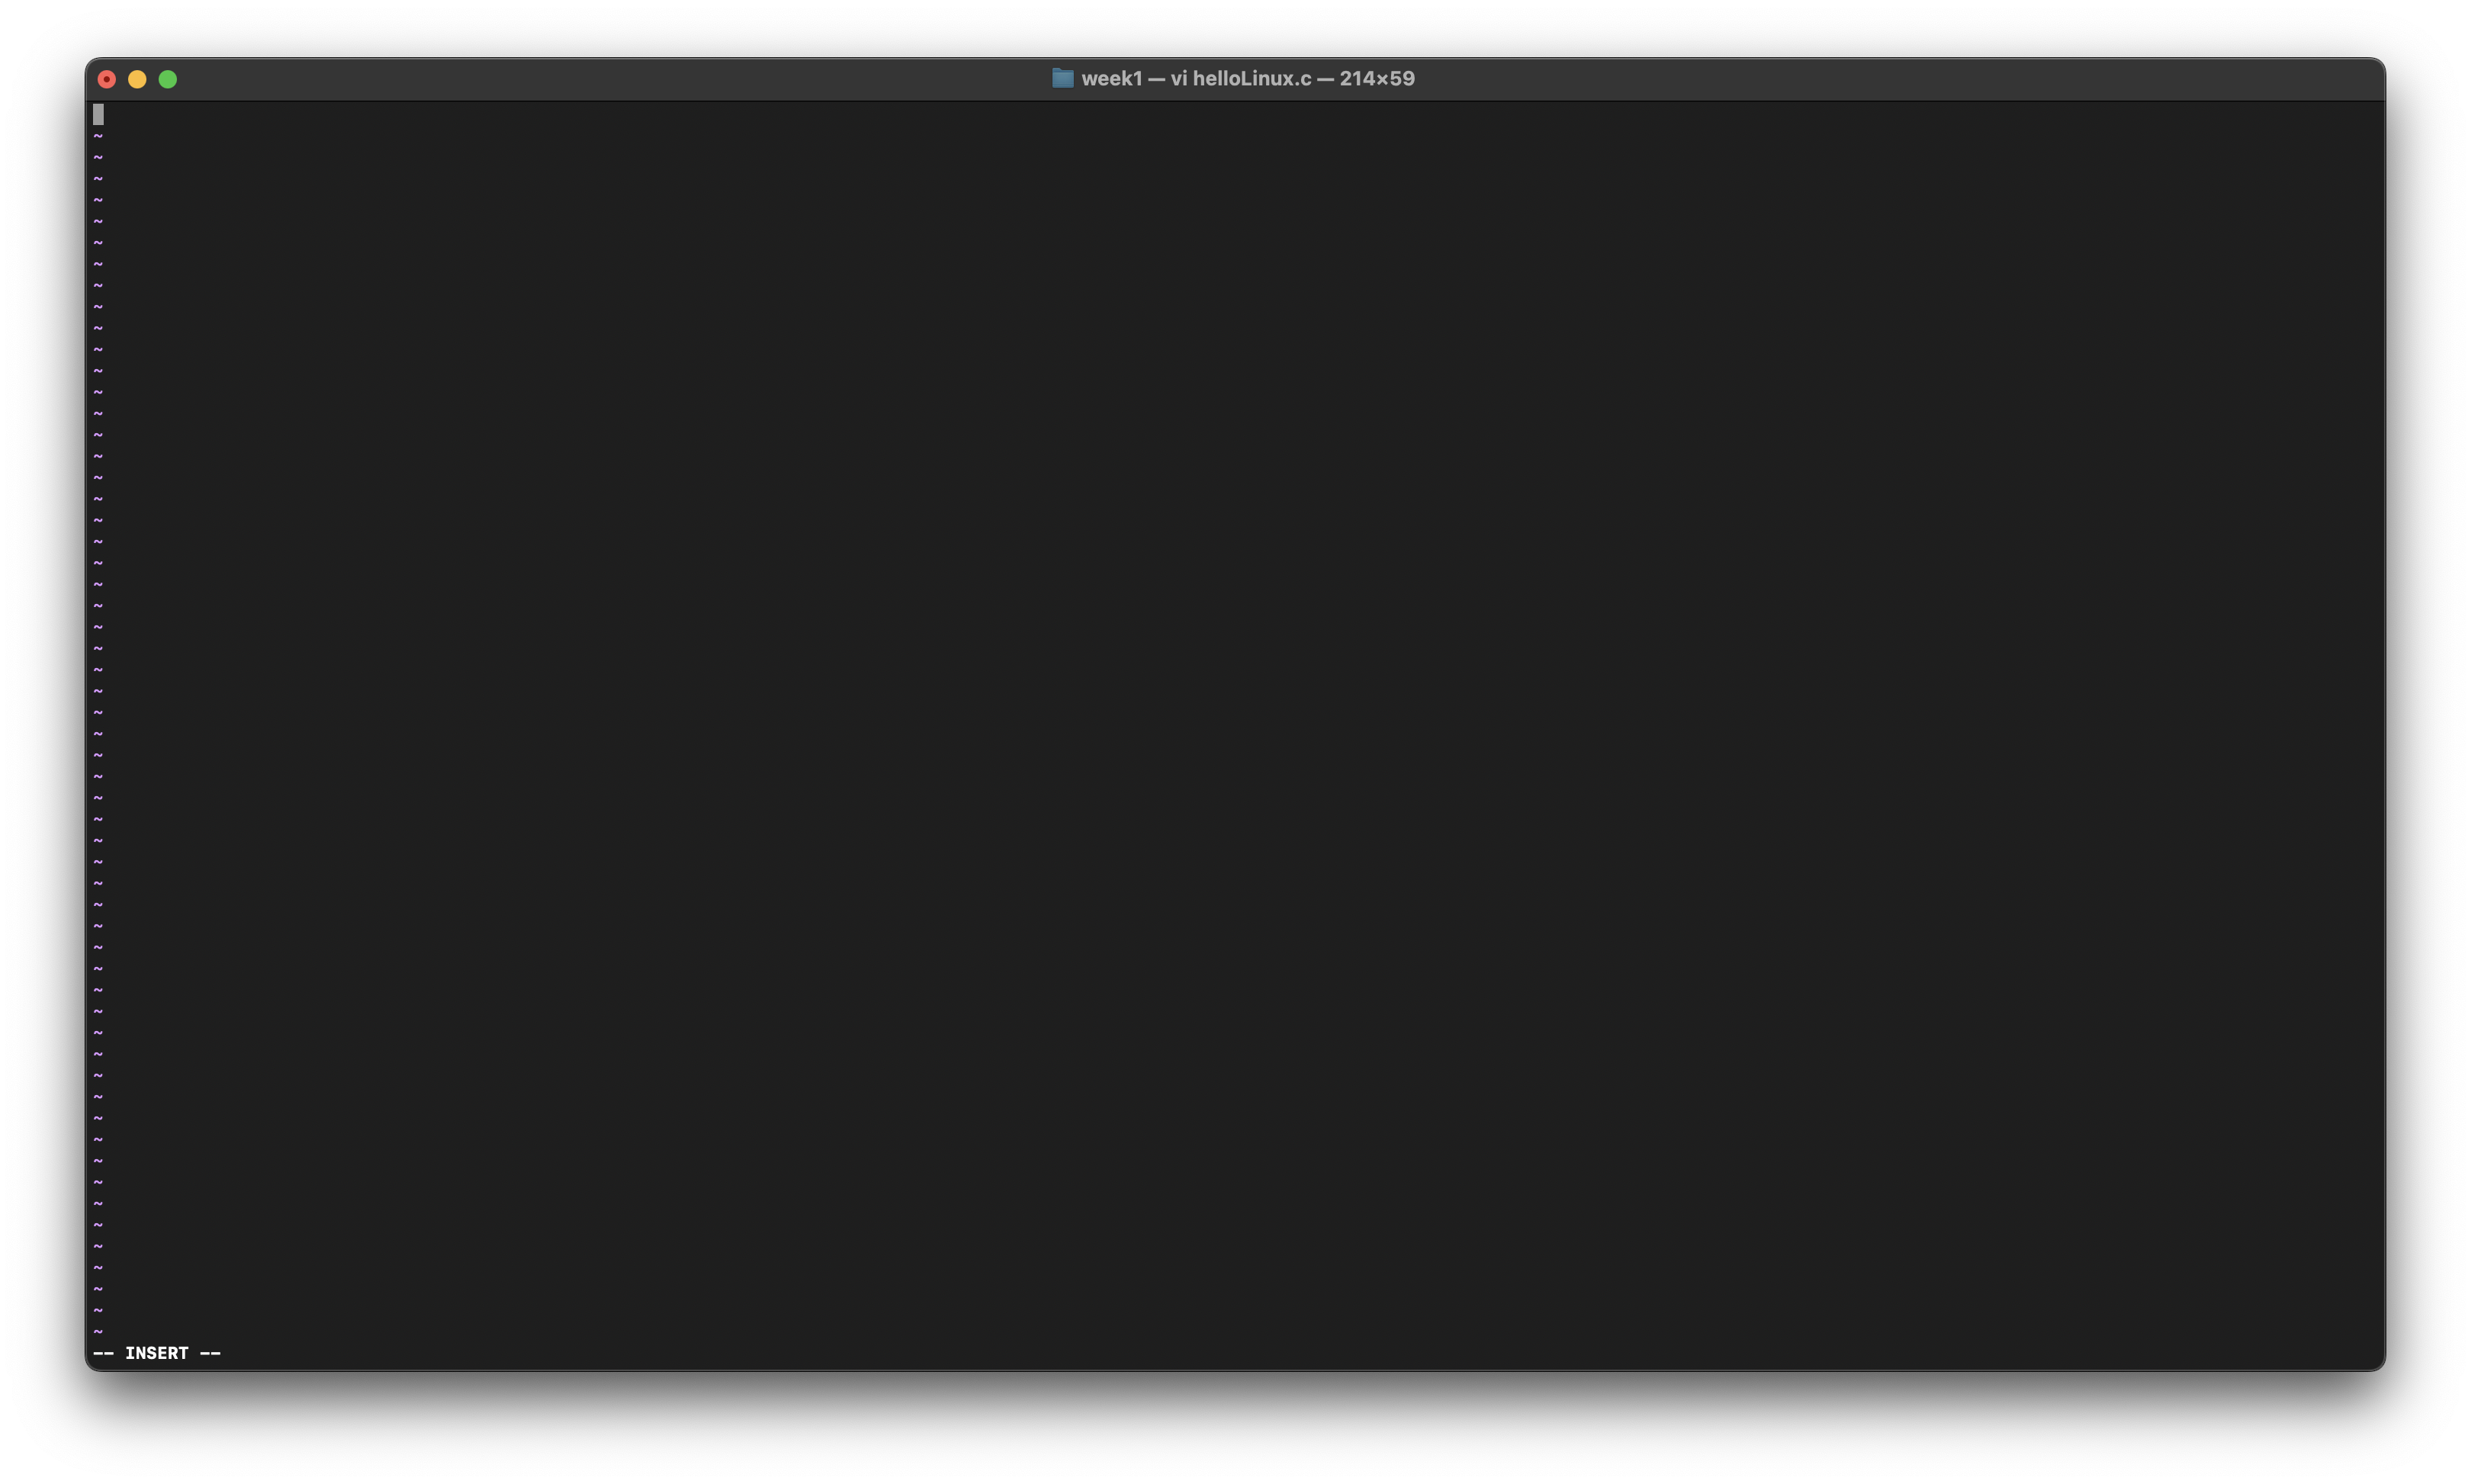
그러면
이런 창이 나타나게 된다.
윈도우에서의 메모장이라고 생각하면 된다.
VI Editor의 명령어들이다.
입력모드 전환: i, a, o, O
한글자 수정: r
단어수정: cw
붙이기: p
글자삭제: x
명령취소: u, U
복사: y
행삭제: d
저장하고 종료: wq!
저장하지 않고 종료: :q!
명령어들은 외우려고 하기 보다 쓰다보면 자연스럽게 익혀지기 때문에 많이 사용해보는 것이 좋다.
정리하는 단계이니 일일이 소개하지는 않고
바로 프로그램을 만들어보도록 하겠다.
이렇게 작성을 하고 이 코드를 컴파일해보자
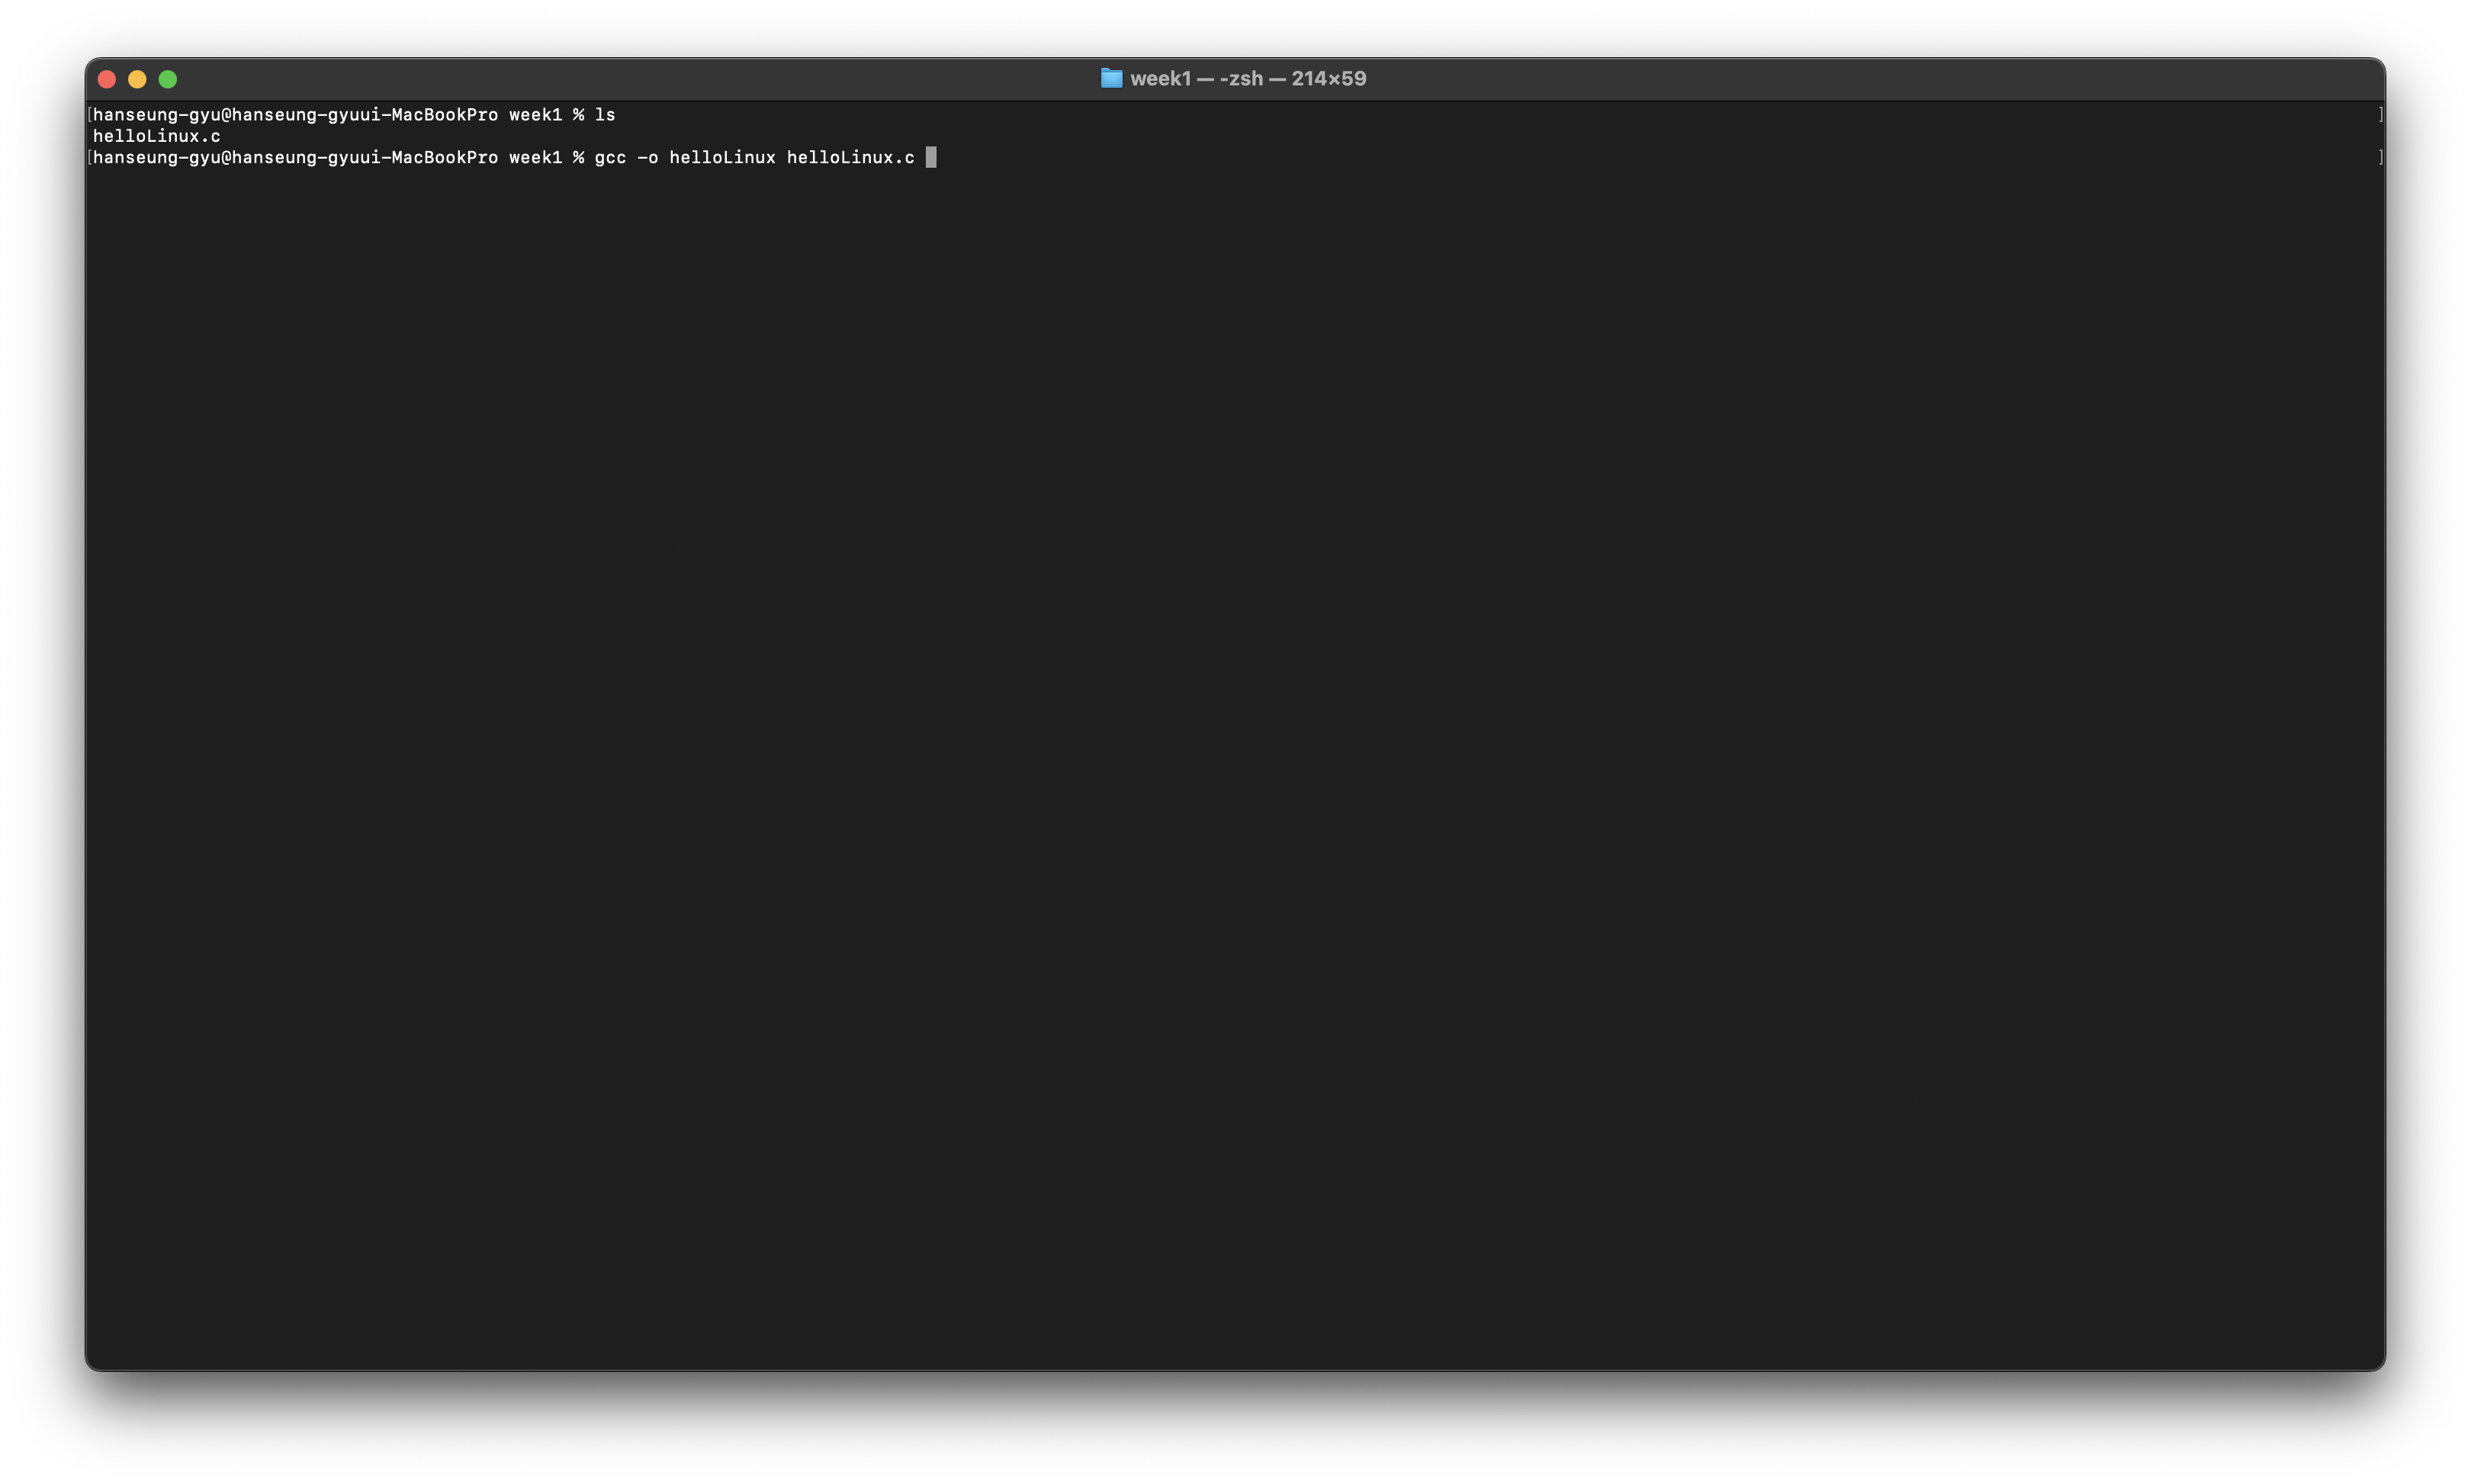
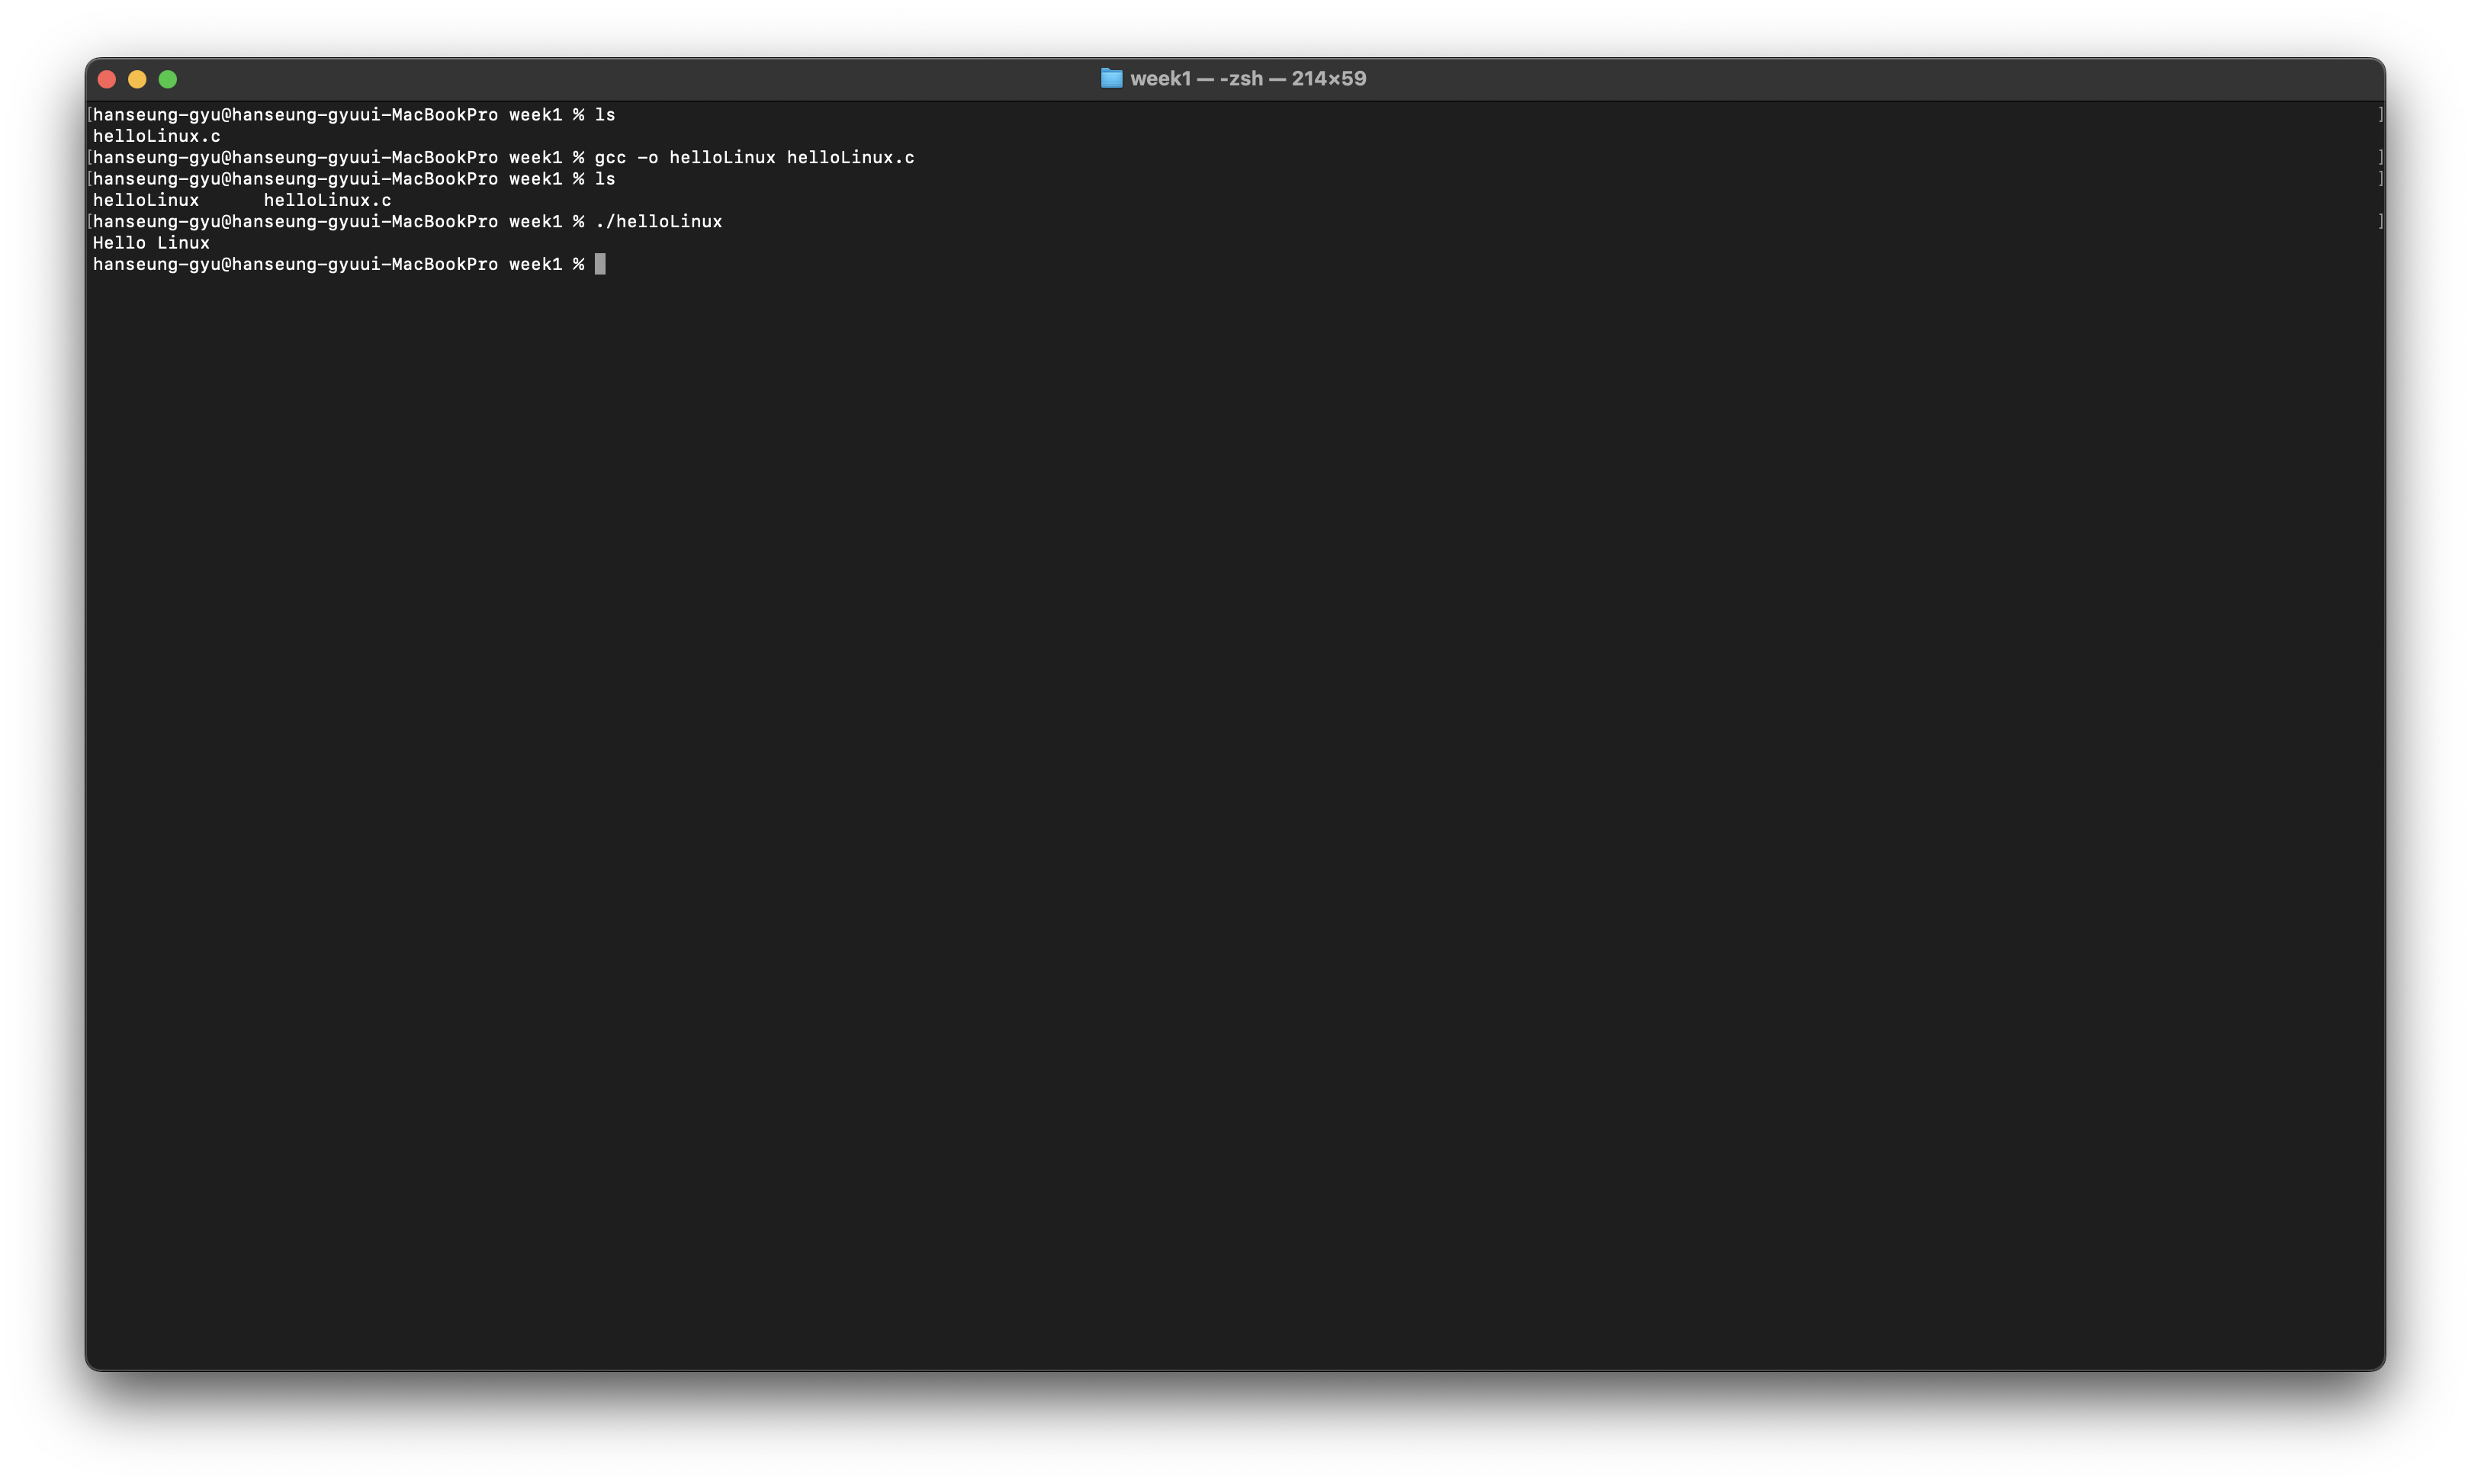
gcc -o helloLinux helloLinux.c
gcc를 이용해서 컴파일을 한다.
이렇게 입력을 하면 컴파일이 되고
./helloLinux를 이용해 컴파일이 된 프로그램을 실행할 수 있다.
Makefile
GNU C compiler는 Unix/Linux에서 가장 기본이 되는 compiler이다.
위에서 대충 사용해봤겠지만 자세한 사용 방법은 아래와 같다.
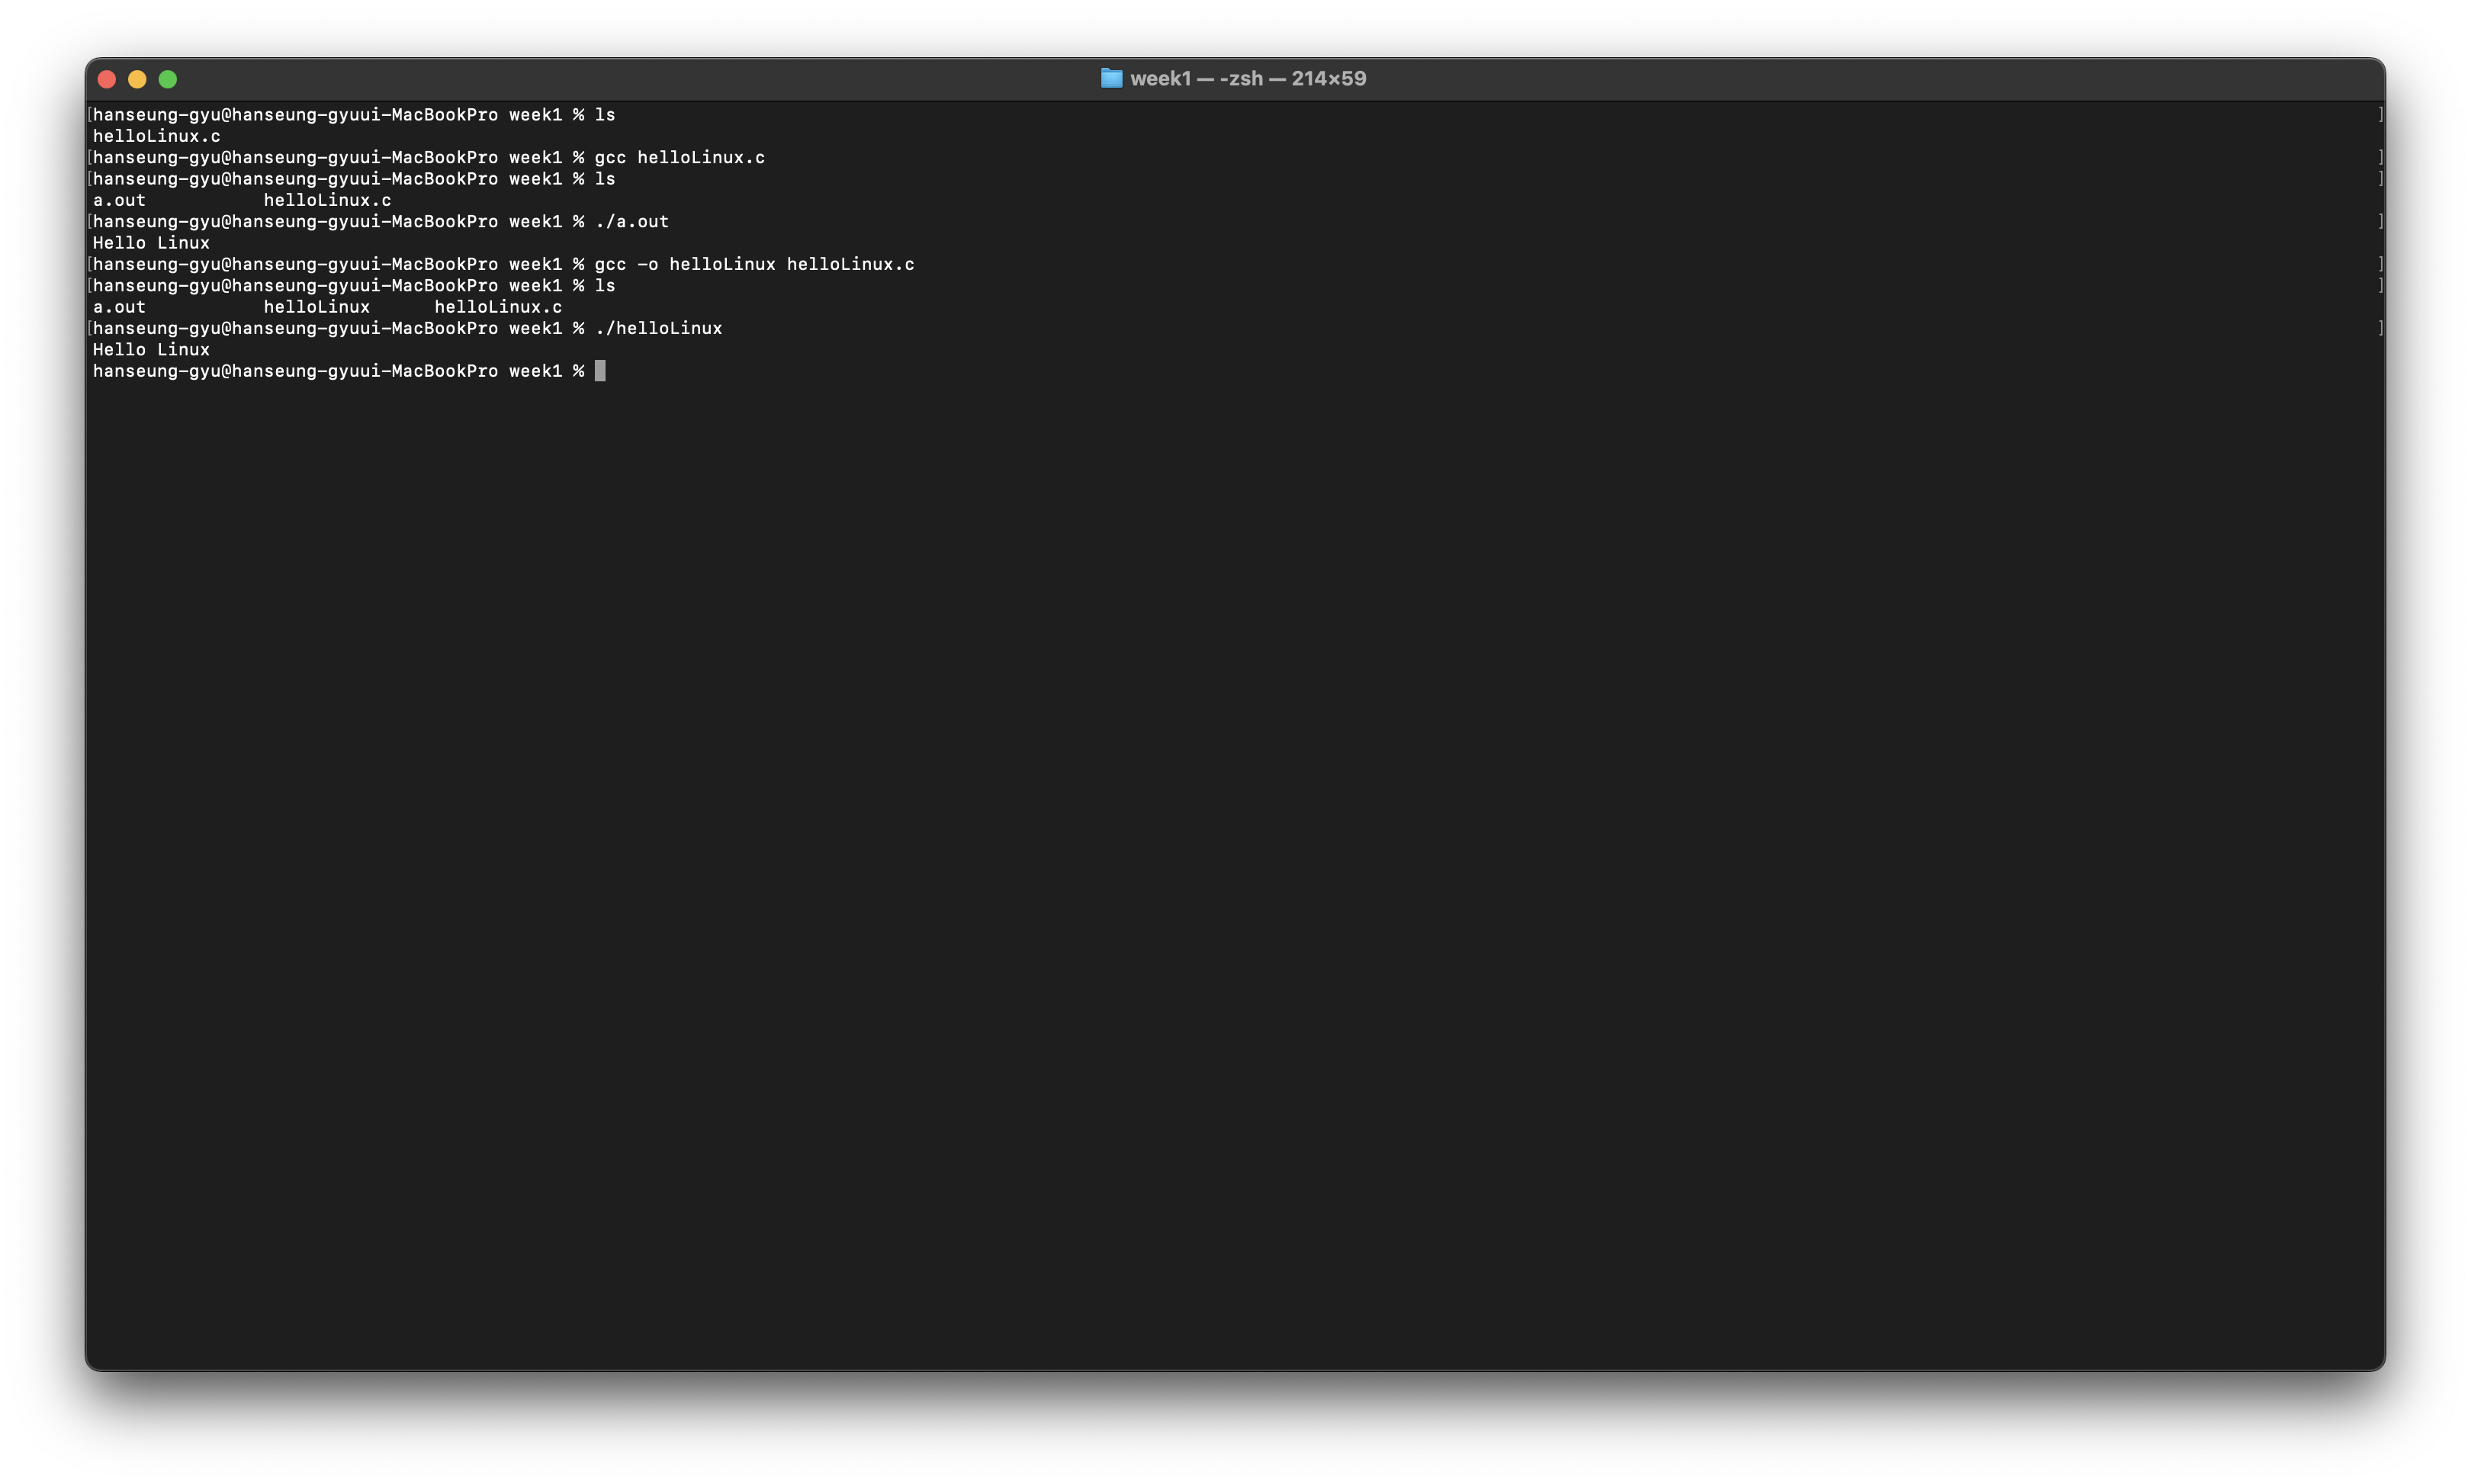
gcc [options] filename
options:
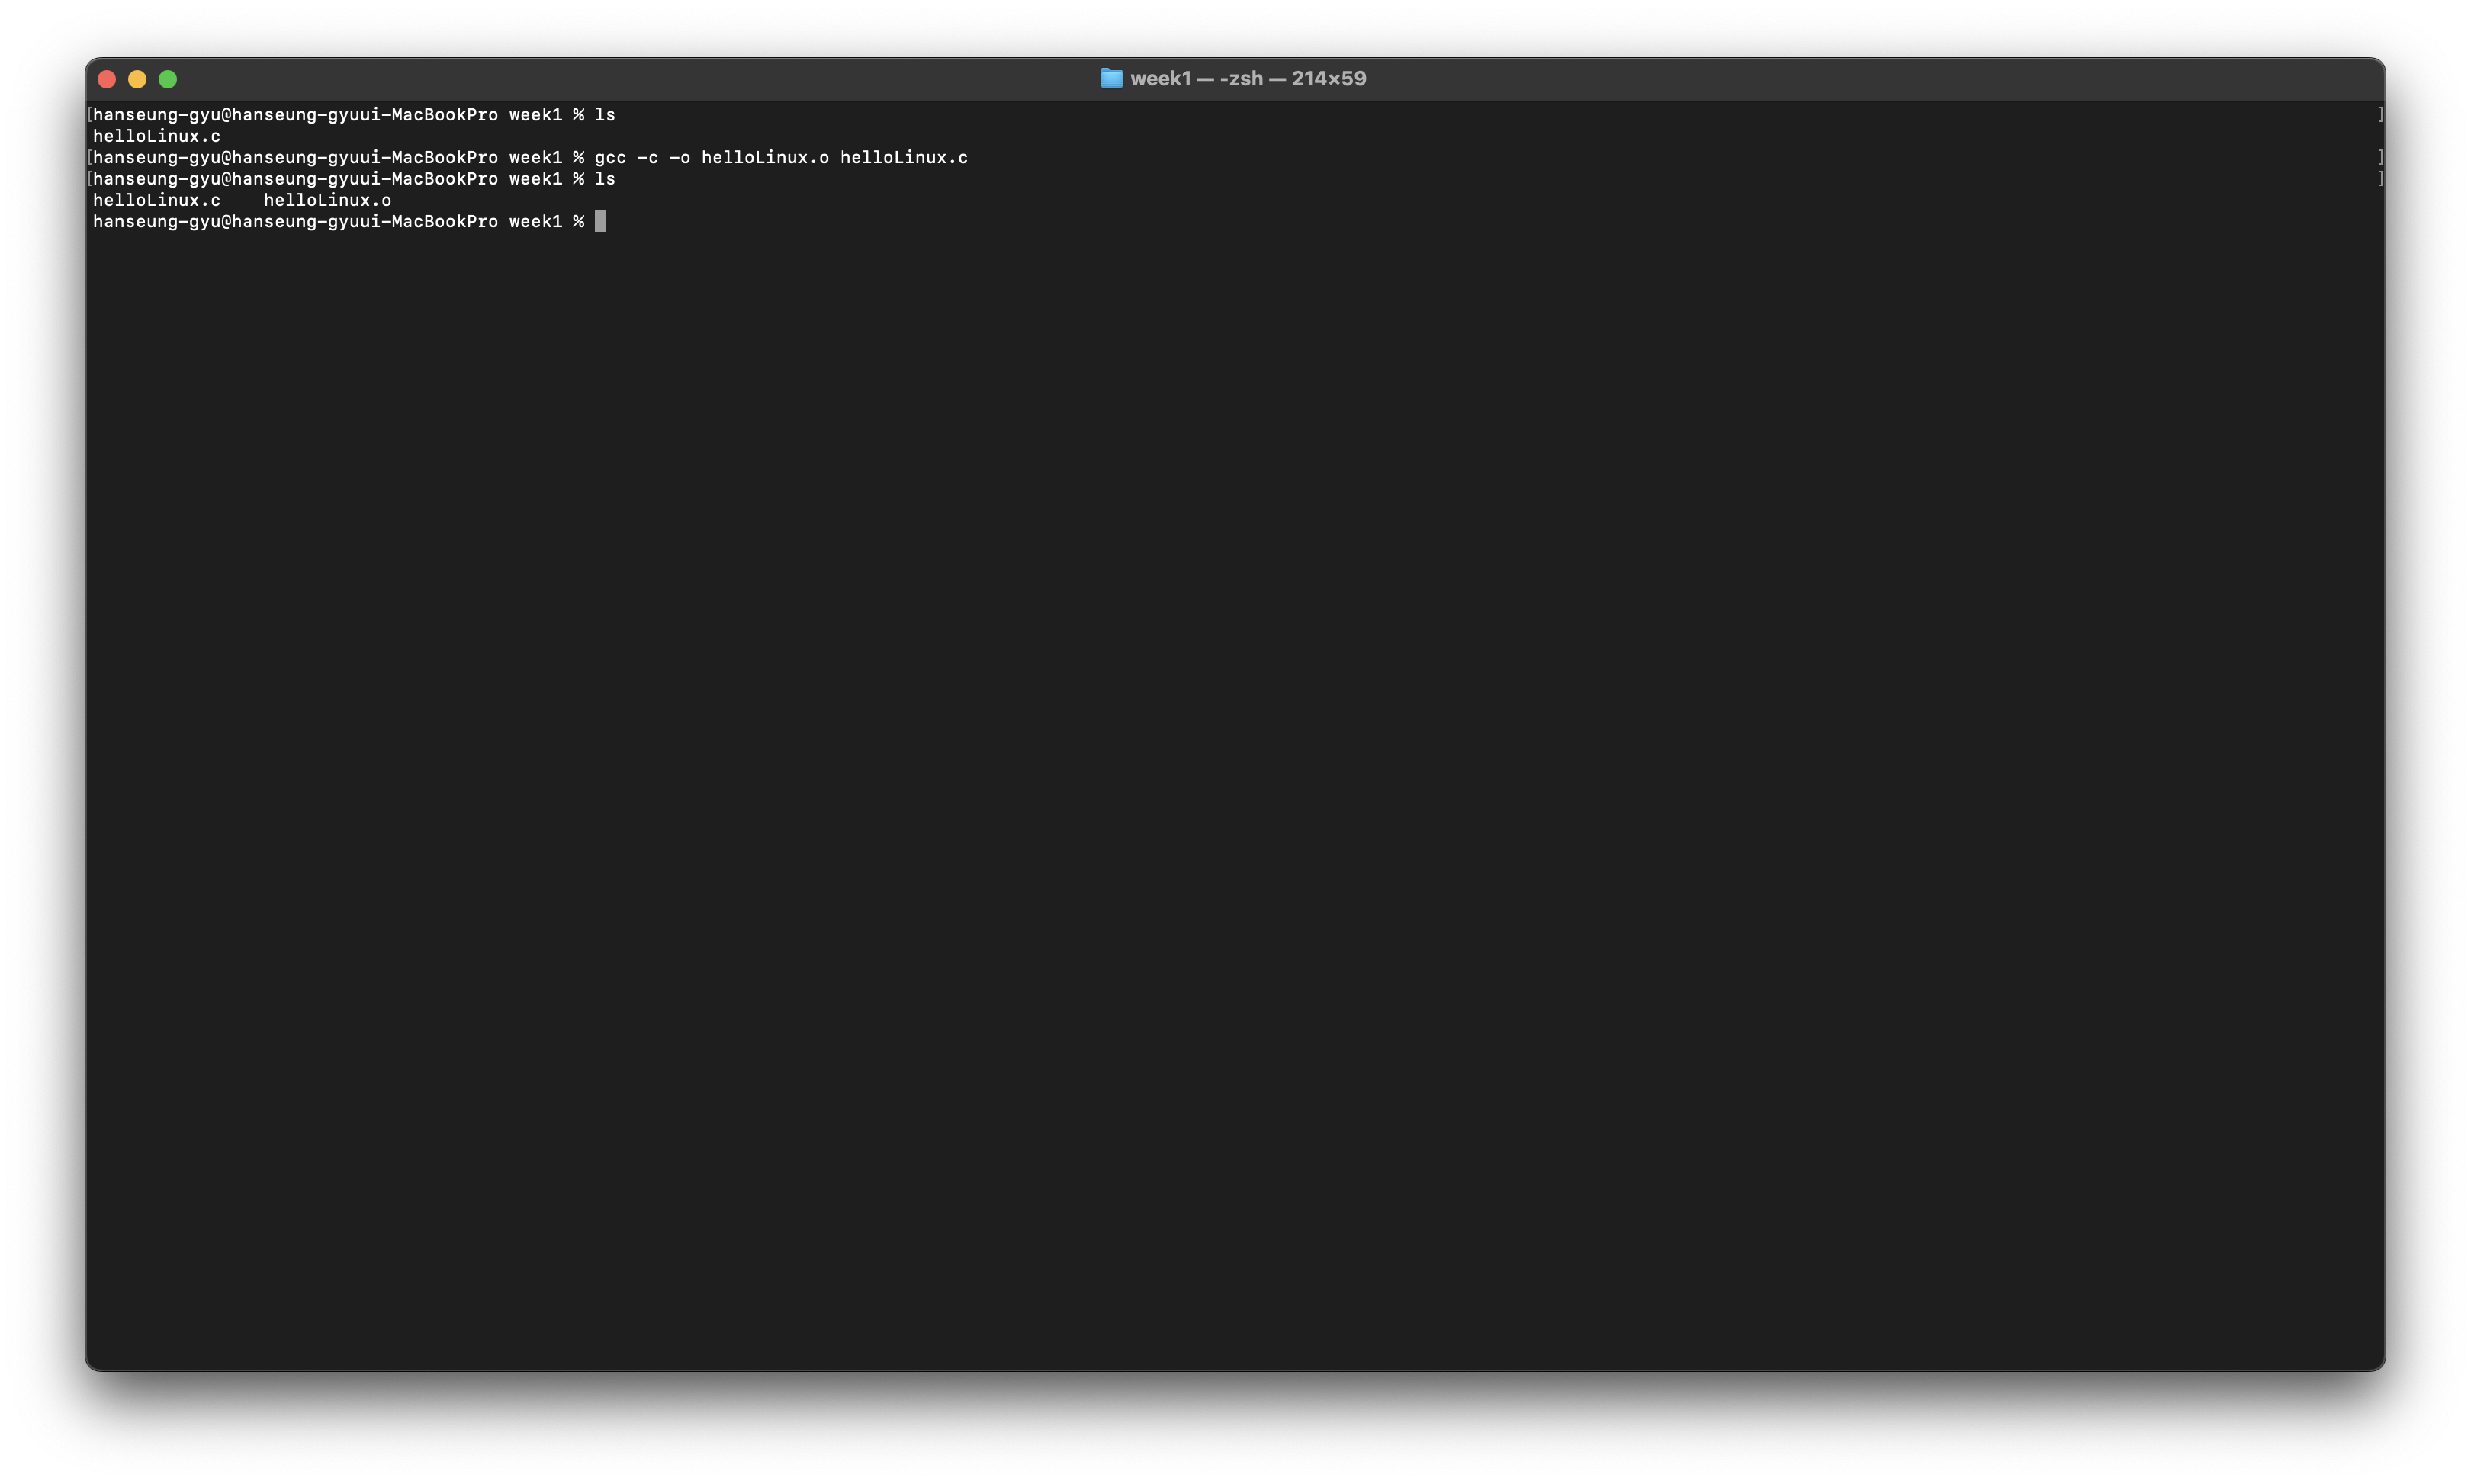
-c: object file(.o)만 생성
-o: execution file name 지정(default는 a.out이고 사용자가 이름 지정가능)
이렇게 -c 옵션을 주면 .o 파일을 만들 수도 있다.
Makefile & Make
컴파일을 도와주는 Make에 대해 알아보자
Makefile은 compile 방법을 기술 하는 파일이다.(관련 파일 정보, compile 명령, 실행 파일명 등), 여러 파일로 구성된 프로젝트 설정과 비슷한 개념
Make은 주어진 Makefile에 따라 compile을 수행하고, 실행파일을 생성. 최초 컴파일 이후에는, 변경이 있는 파일만 컴파일 함