시스템프로그래밍 5주차에는 시스템 정보에 관하여 배운다.
MAC에서는 사용자 전환이 잘 안되어서... groom으로 진행하겠습니다.
- 시스템 정보
시스템에 설치된 운영체제에 관한 정보, 호스트명 정보, 하드웨어 종류에 대한 정보 등을 얻는 방법을 알아보자.
uname
shell에 uname을 사용하면 시스템의 기본 정보를 출력한다.
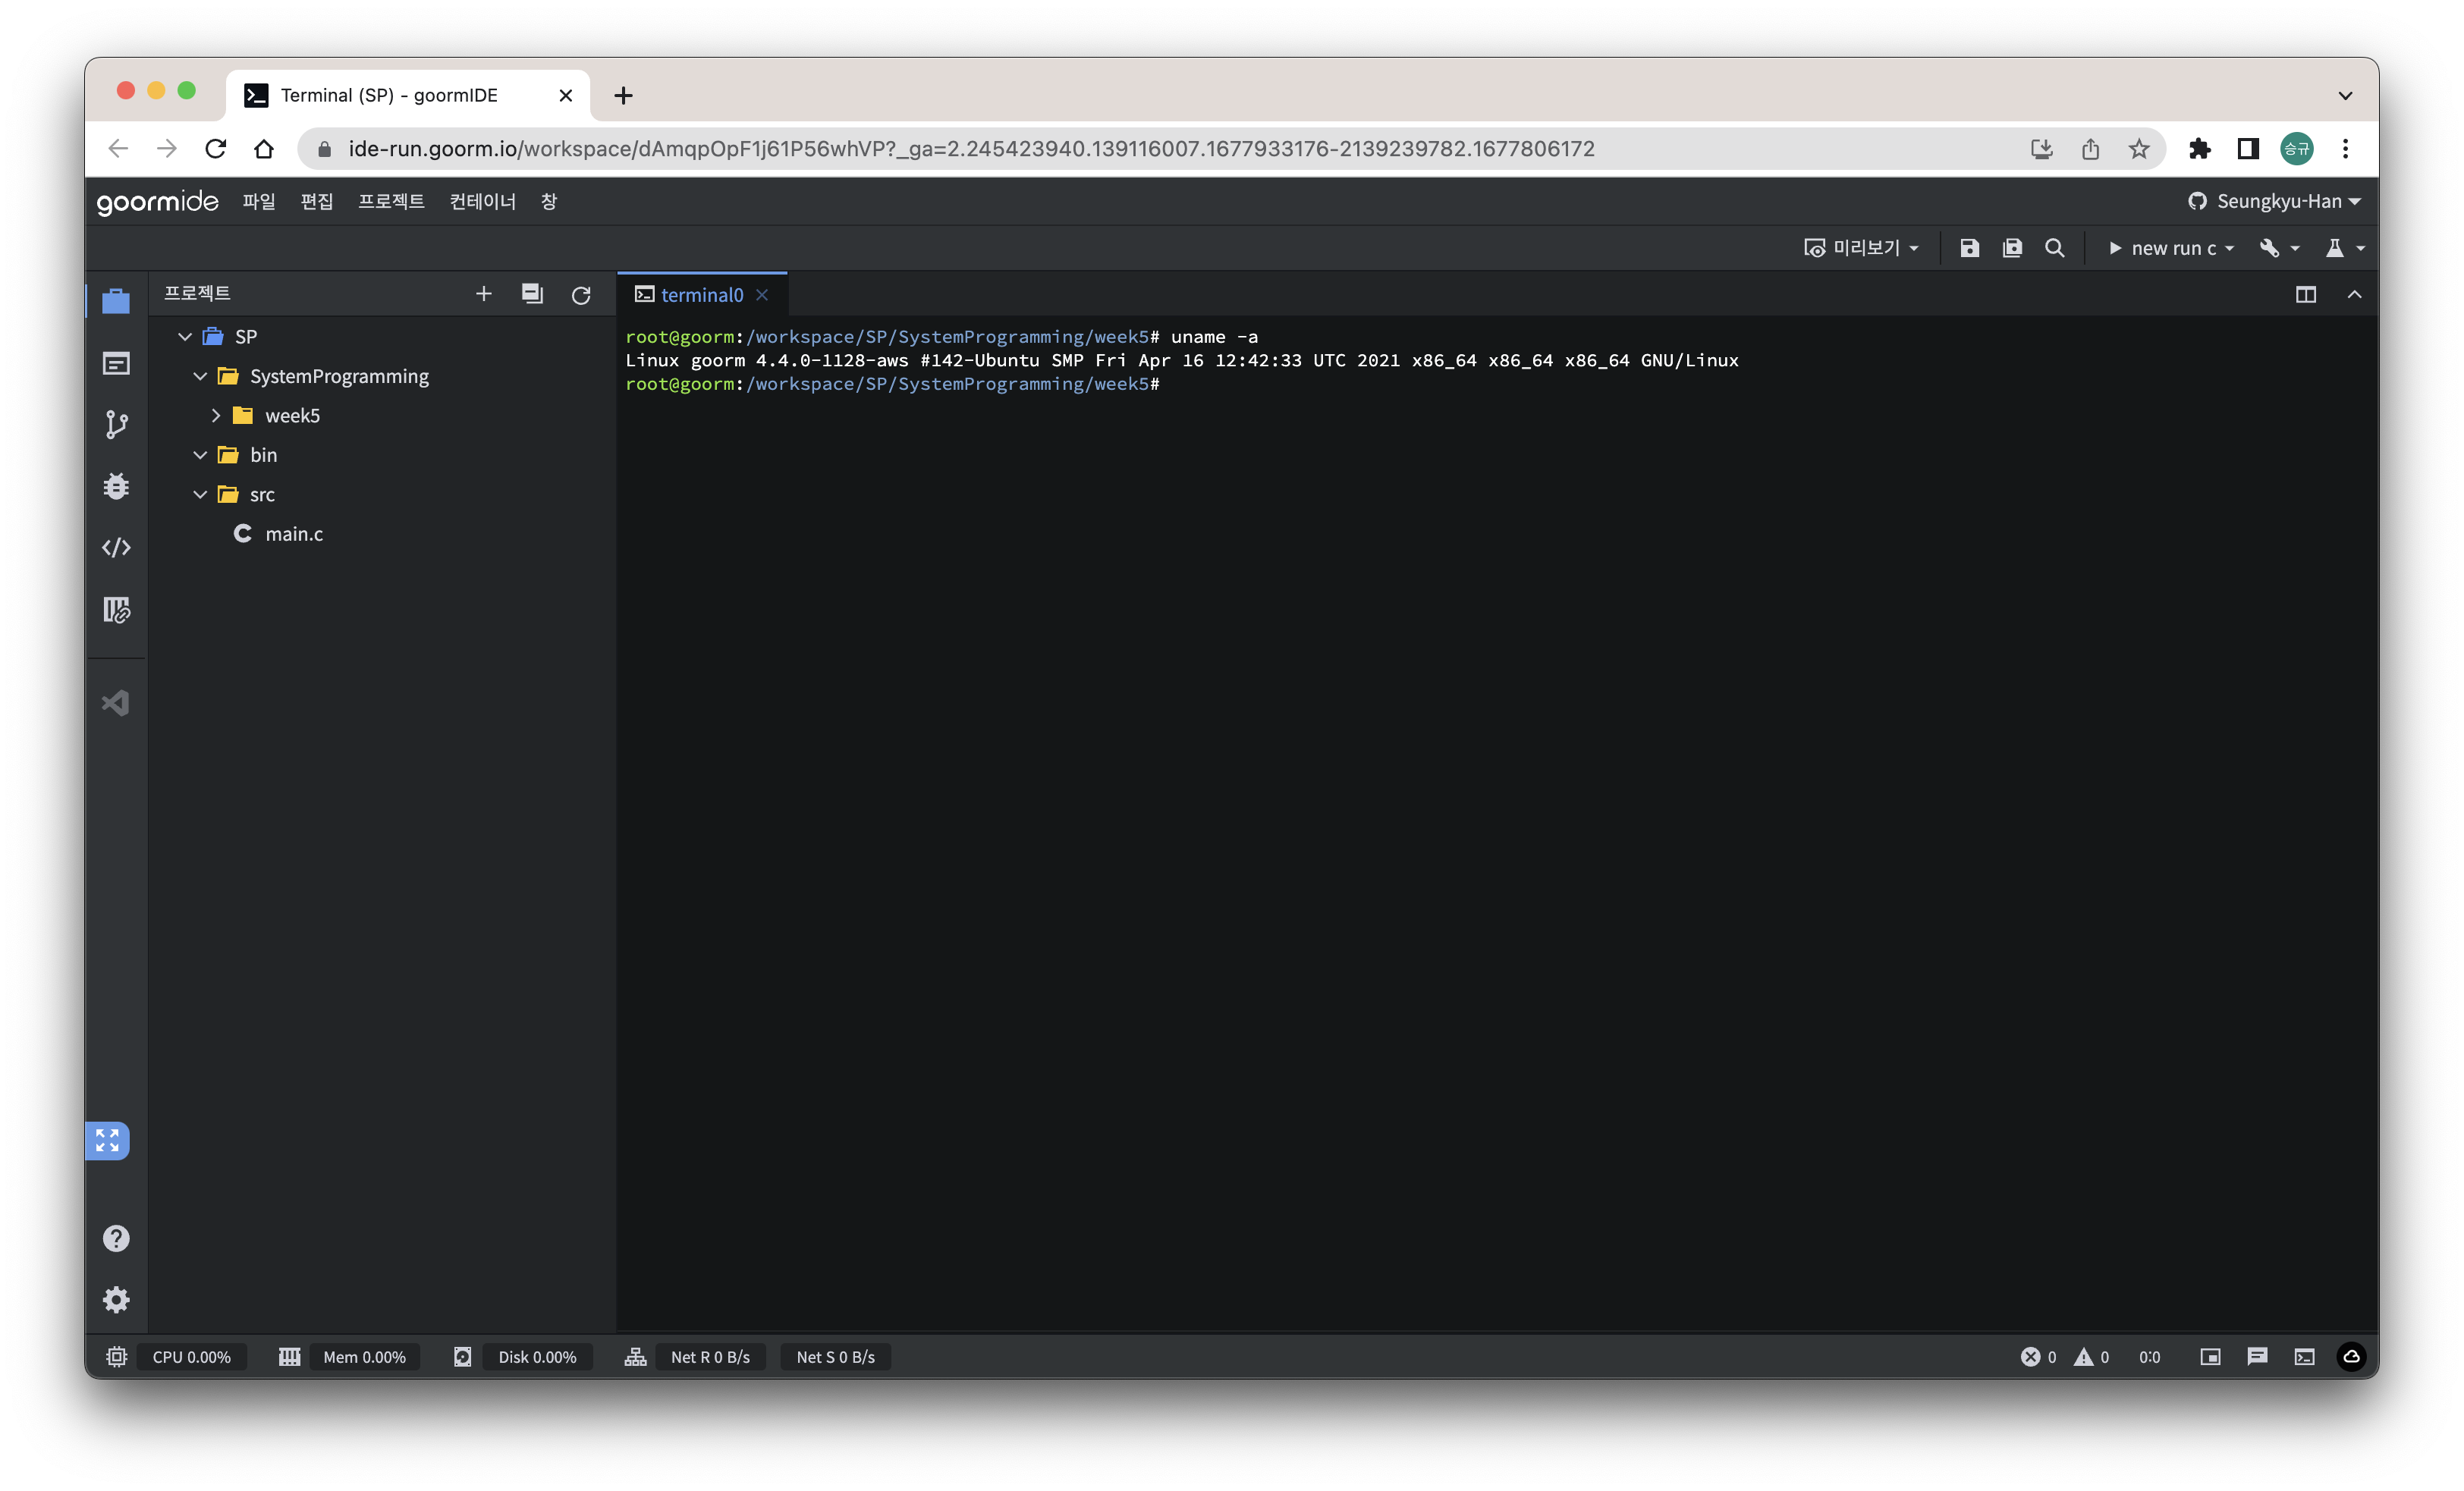
system call로 알아보자
#include <sys/utsname.h>

int uname(struct utsname *buf);
-buf
읽은 정보를 저장할 utsname 구조체의 포인터
return: 0(success), -1(error)
여기에 들어가는 utsname 구조체에 대해 살펴보면
struct utsname {
char sysname[_SYS_NAMELEN]; /* [XSI] Name of OS */
char nodename[_SYS_NAMELEN]; /* [XSI] Name of this network node */
char release[_SYS_NAMELEN]; /* [XSI] Release level */
char version[_SYS_NAMELEN]; /* [XSI] Version level */
char machine[_SYS_NAMELEN]; /* [XSI] Hardware type */
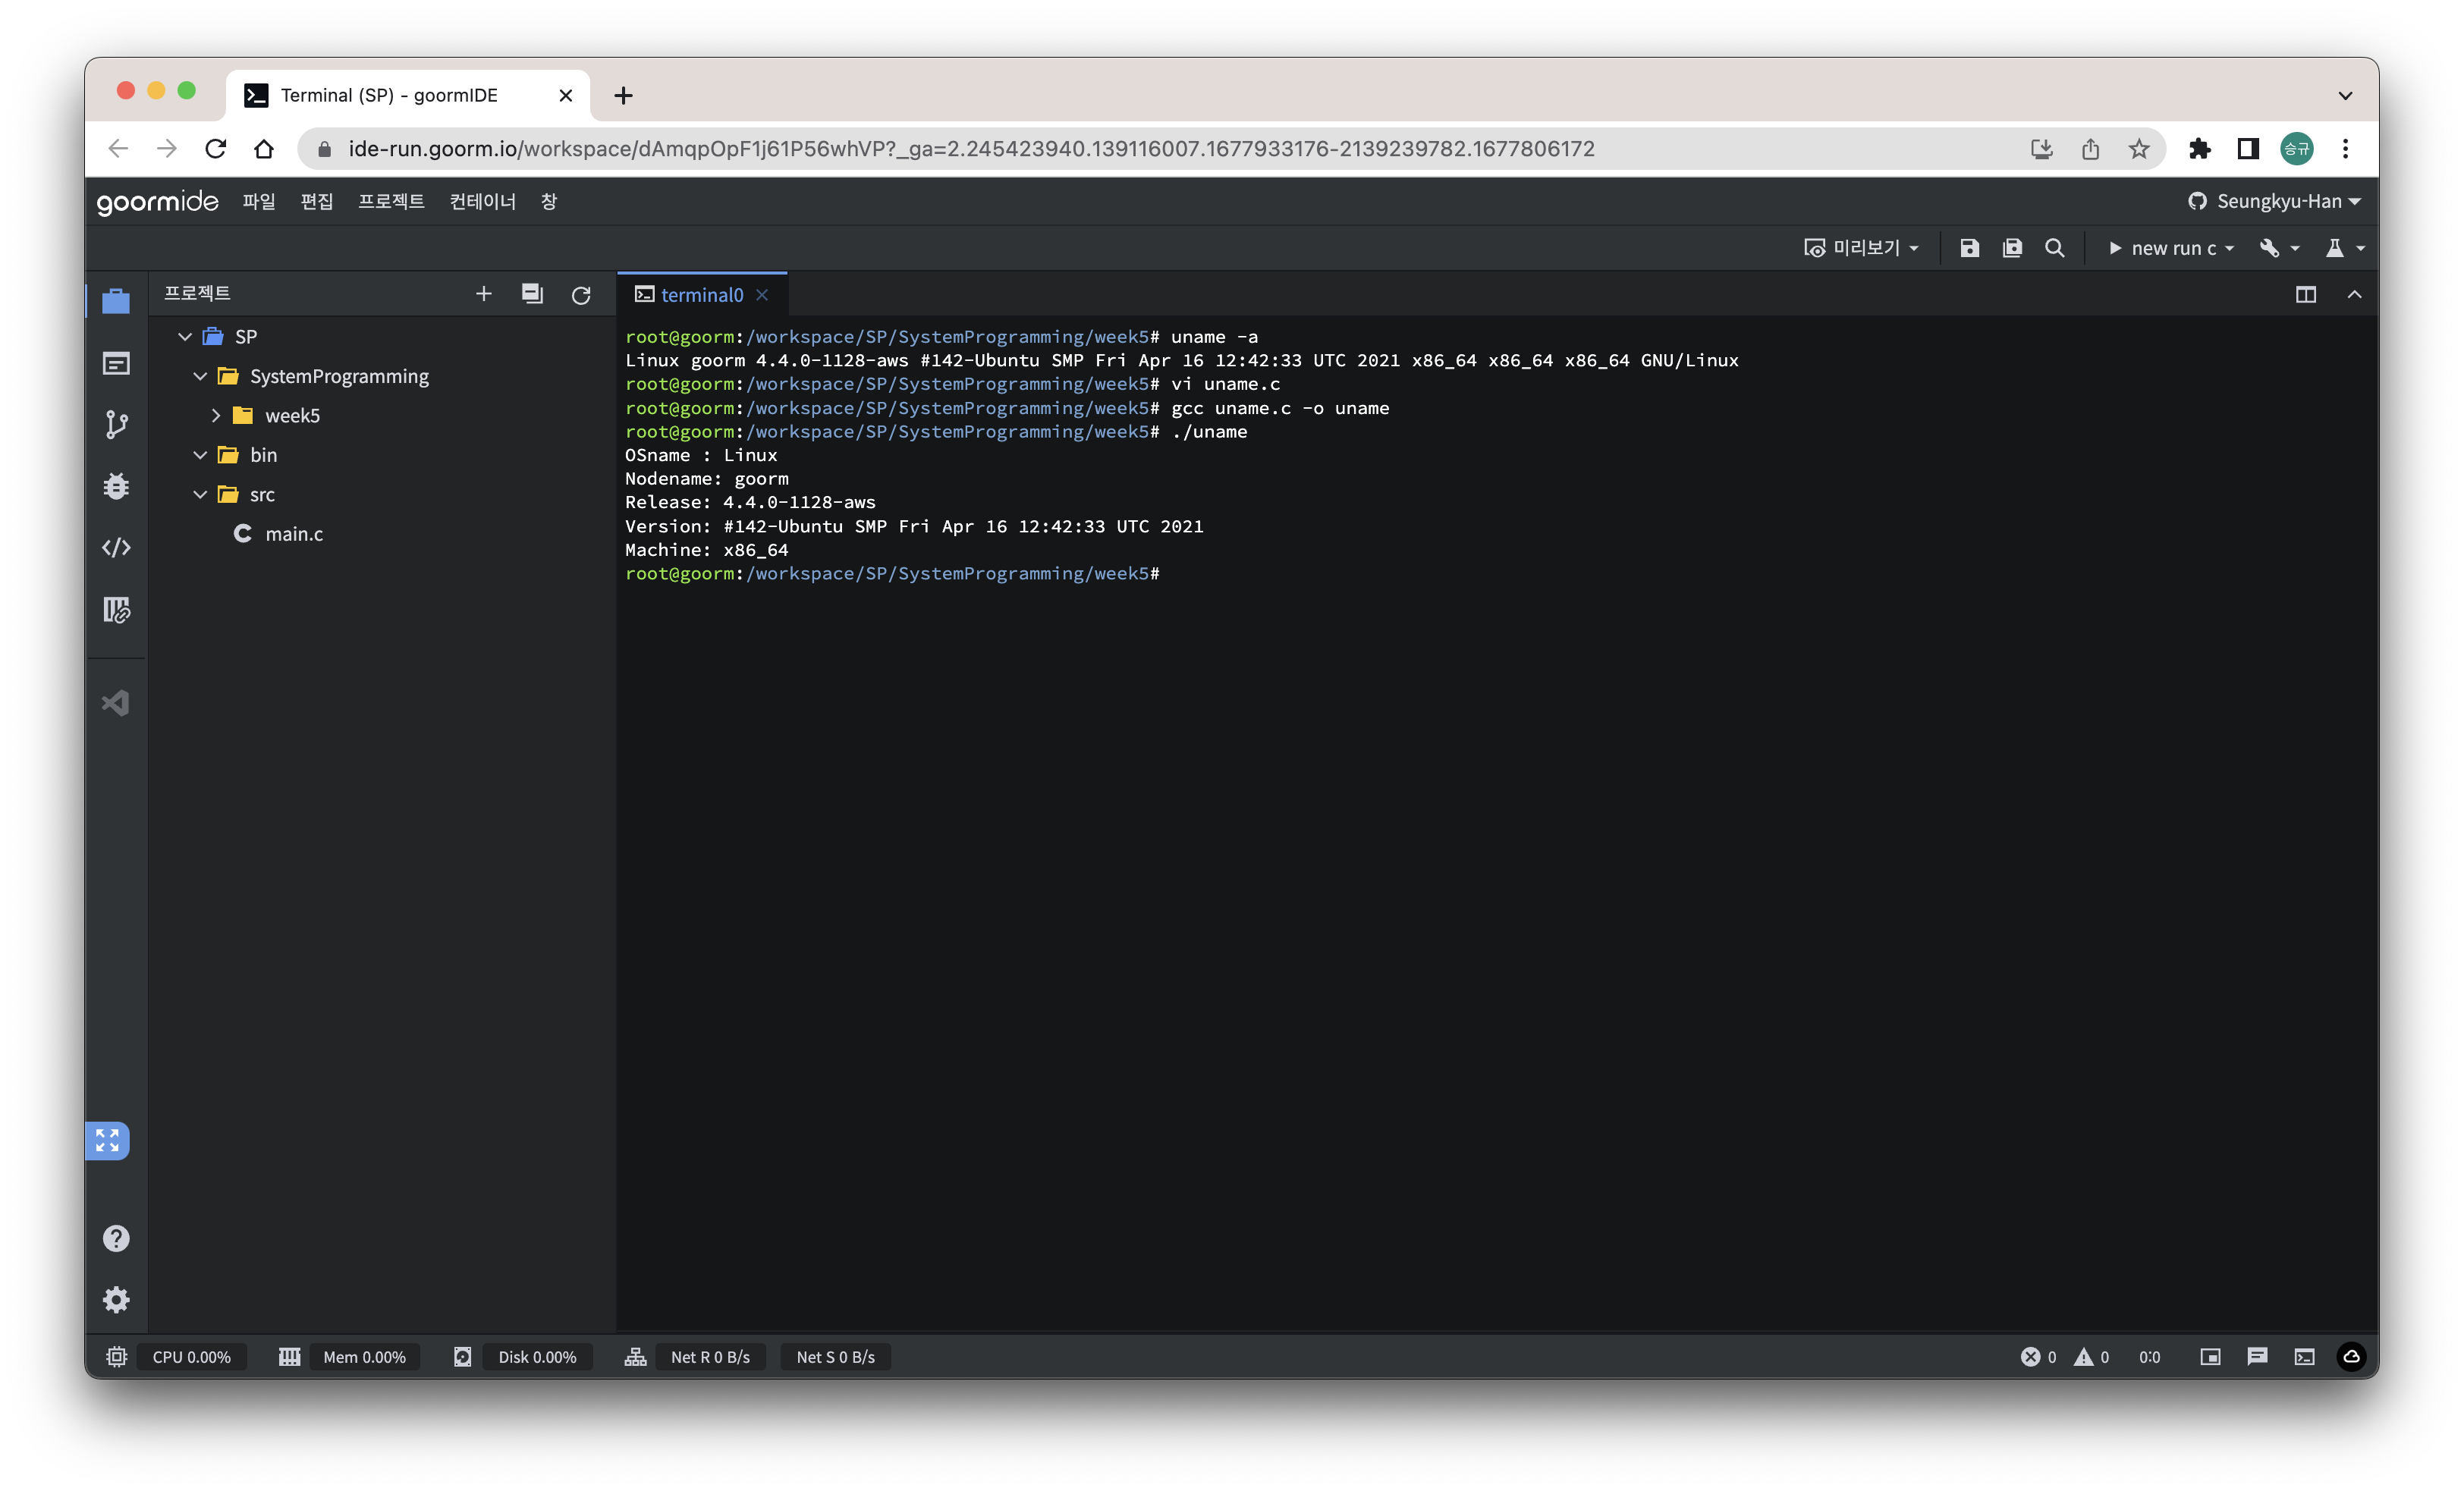
};이고 이 구조체를 이용하여 시스템의 기본 정보를 가져오는 코드를 작성해보자.
#include <sys/utsname.h>
#include <stdlib.h>
#include <stdio.h>

int main(void){
	struct utsname uts;

	if(uname(&uts) == -1){
		perror("uname");
		exit(1);
	}

	printf("OSname : %s\n", uts.sysname);
	printf("Nodename: %s\n", uts.nodename);
	printf("Release: %s\n", uts.release);
	printf("Version: %s\n", uts.version);
	printf("Machine: %s\n", uts.machine);

	return 0;
}
sysinfo
sysinfo를 사용해서 다른 정보들을 가져올 수도 있다.
#include <sys/sysinfo.h>

int sysinfo(struct sysinfo *info);
-info
읽은 정보를 저장할 sysinfo 구조체의 포인터
return: 0(success), -1(error)
sysconf
#include <unistd.h>

long sysconf(int name);
-name
검색할 정보를 지칭하는 상수
return: 요청한 정보의 값, -1(error)
이번엔 리소스의 정보를 가져오는 system call이다.
상수의 예
| 상수 | 설명 |
| _SC_ARG_MAX(1) | argv[]와 envp[]를 합한 최대 크기로, 바이트 단위로 표시한다. |
| _SC_CHILD_MAX(2) | 한 UID에 허용되는 최대 프로세스 개수를 나타낸다. |
| _SC_CLK_TCK(3) | 초당 클록 틱 수를 나타낸다. |
| _SC_OPEN_MAX(5) | 프로세스당 열 수 있는 최대 파일 개수를 나타낸다. |
| _SC_VERSION(8) | 시스템이 지원하는 POSIX.1의 버전을 나타낸다. |
| _SC_PASS_MAX(9) | 패스워드의 최대 길이를 나타낸다. |
| _SC_LOGNAME_MAX(10) | 로그인명의 최대 길이를 나타낸다. |
| _SC_PAGESIZE(11) | 시스템 메모리의 페이지 크기를 나타낸다. |
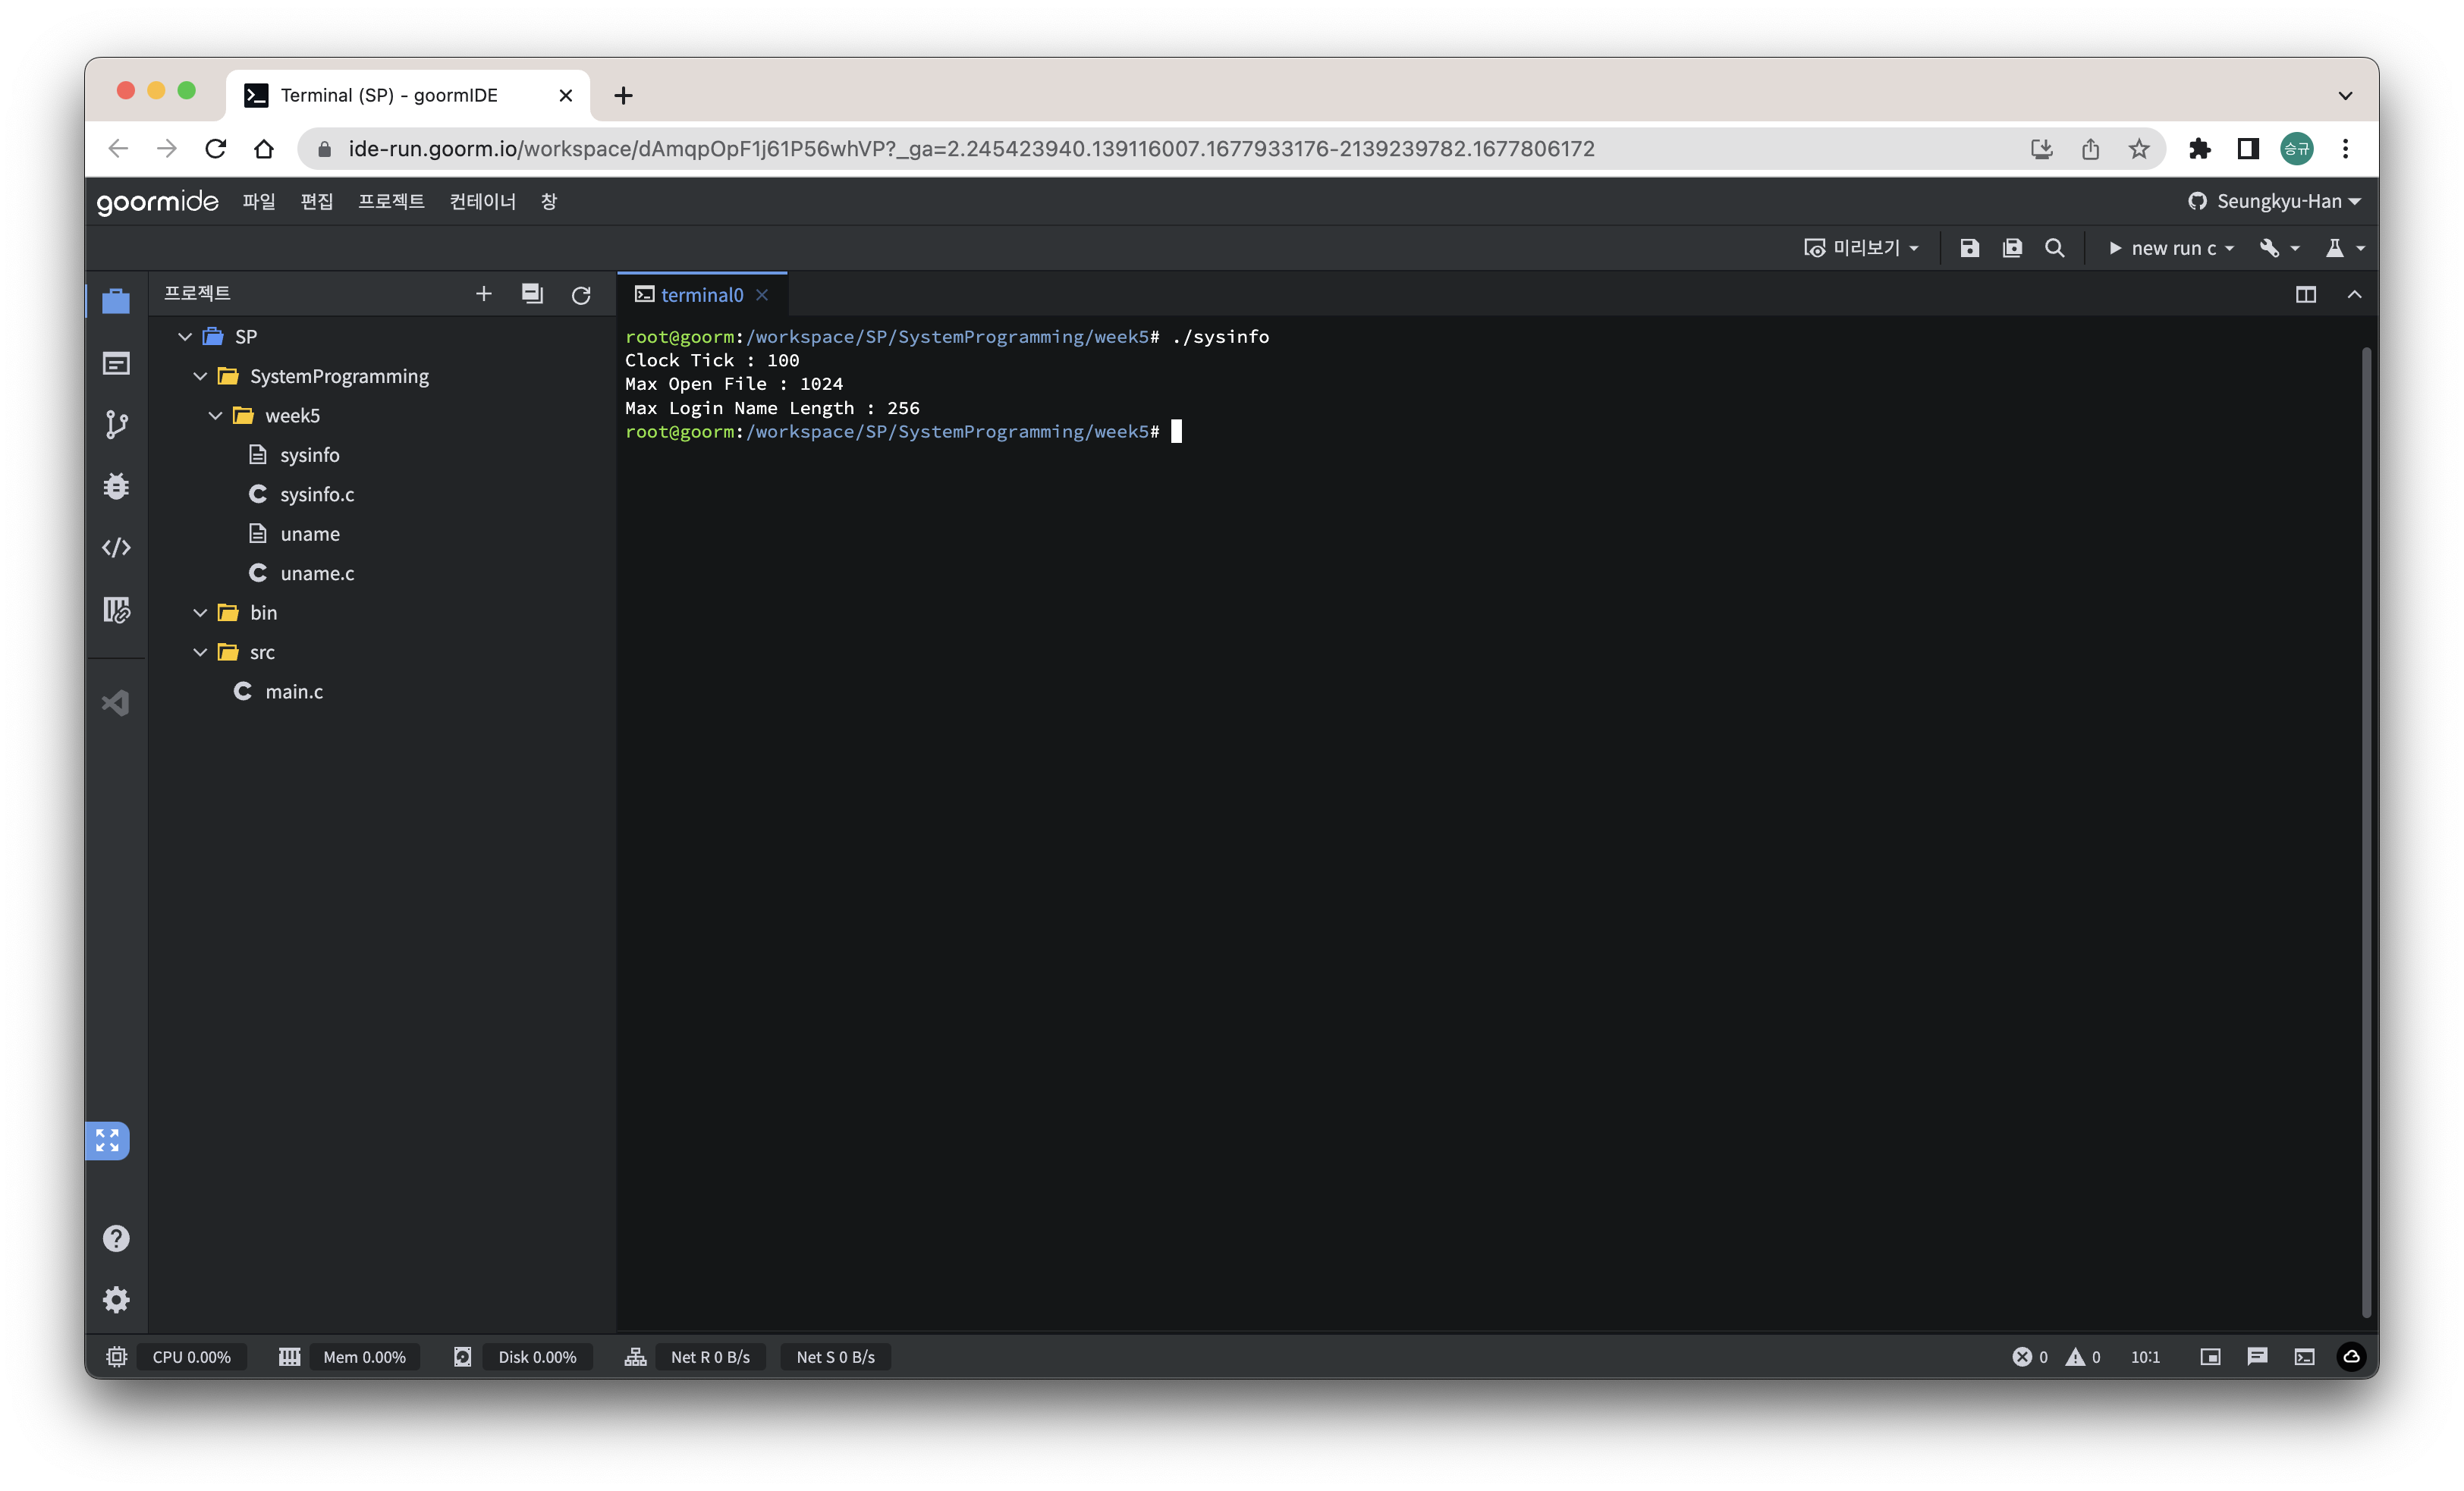
sysconf를 이용해서 리소스의 정보를 출력해보자면
#include <unistd.h>
#include <stdio.h>

int main(void){
	printf("Clock Tick : %ld\n", sysconf(_SC_CLK_TCK));
	printf("Max Open File : %ld\n", sysconf(_SC_OPEN_MAX));
	printf("Max Login Name Length : %ld\n", sysconf(_SC_LOGIN_NAME_MAX));

	return 0;
}
- 사용자 정보
사용자를 추가하거나 권한을 관리하는 방법들이다.
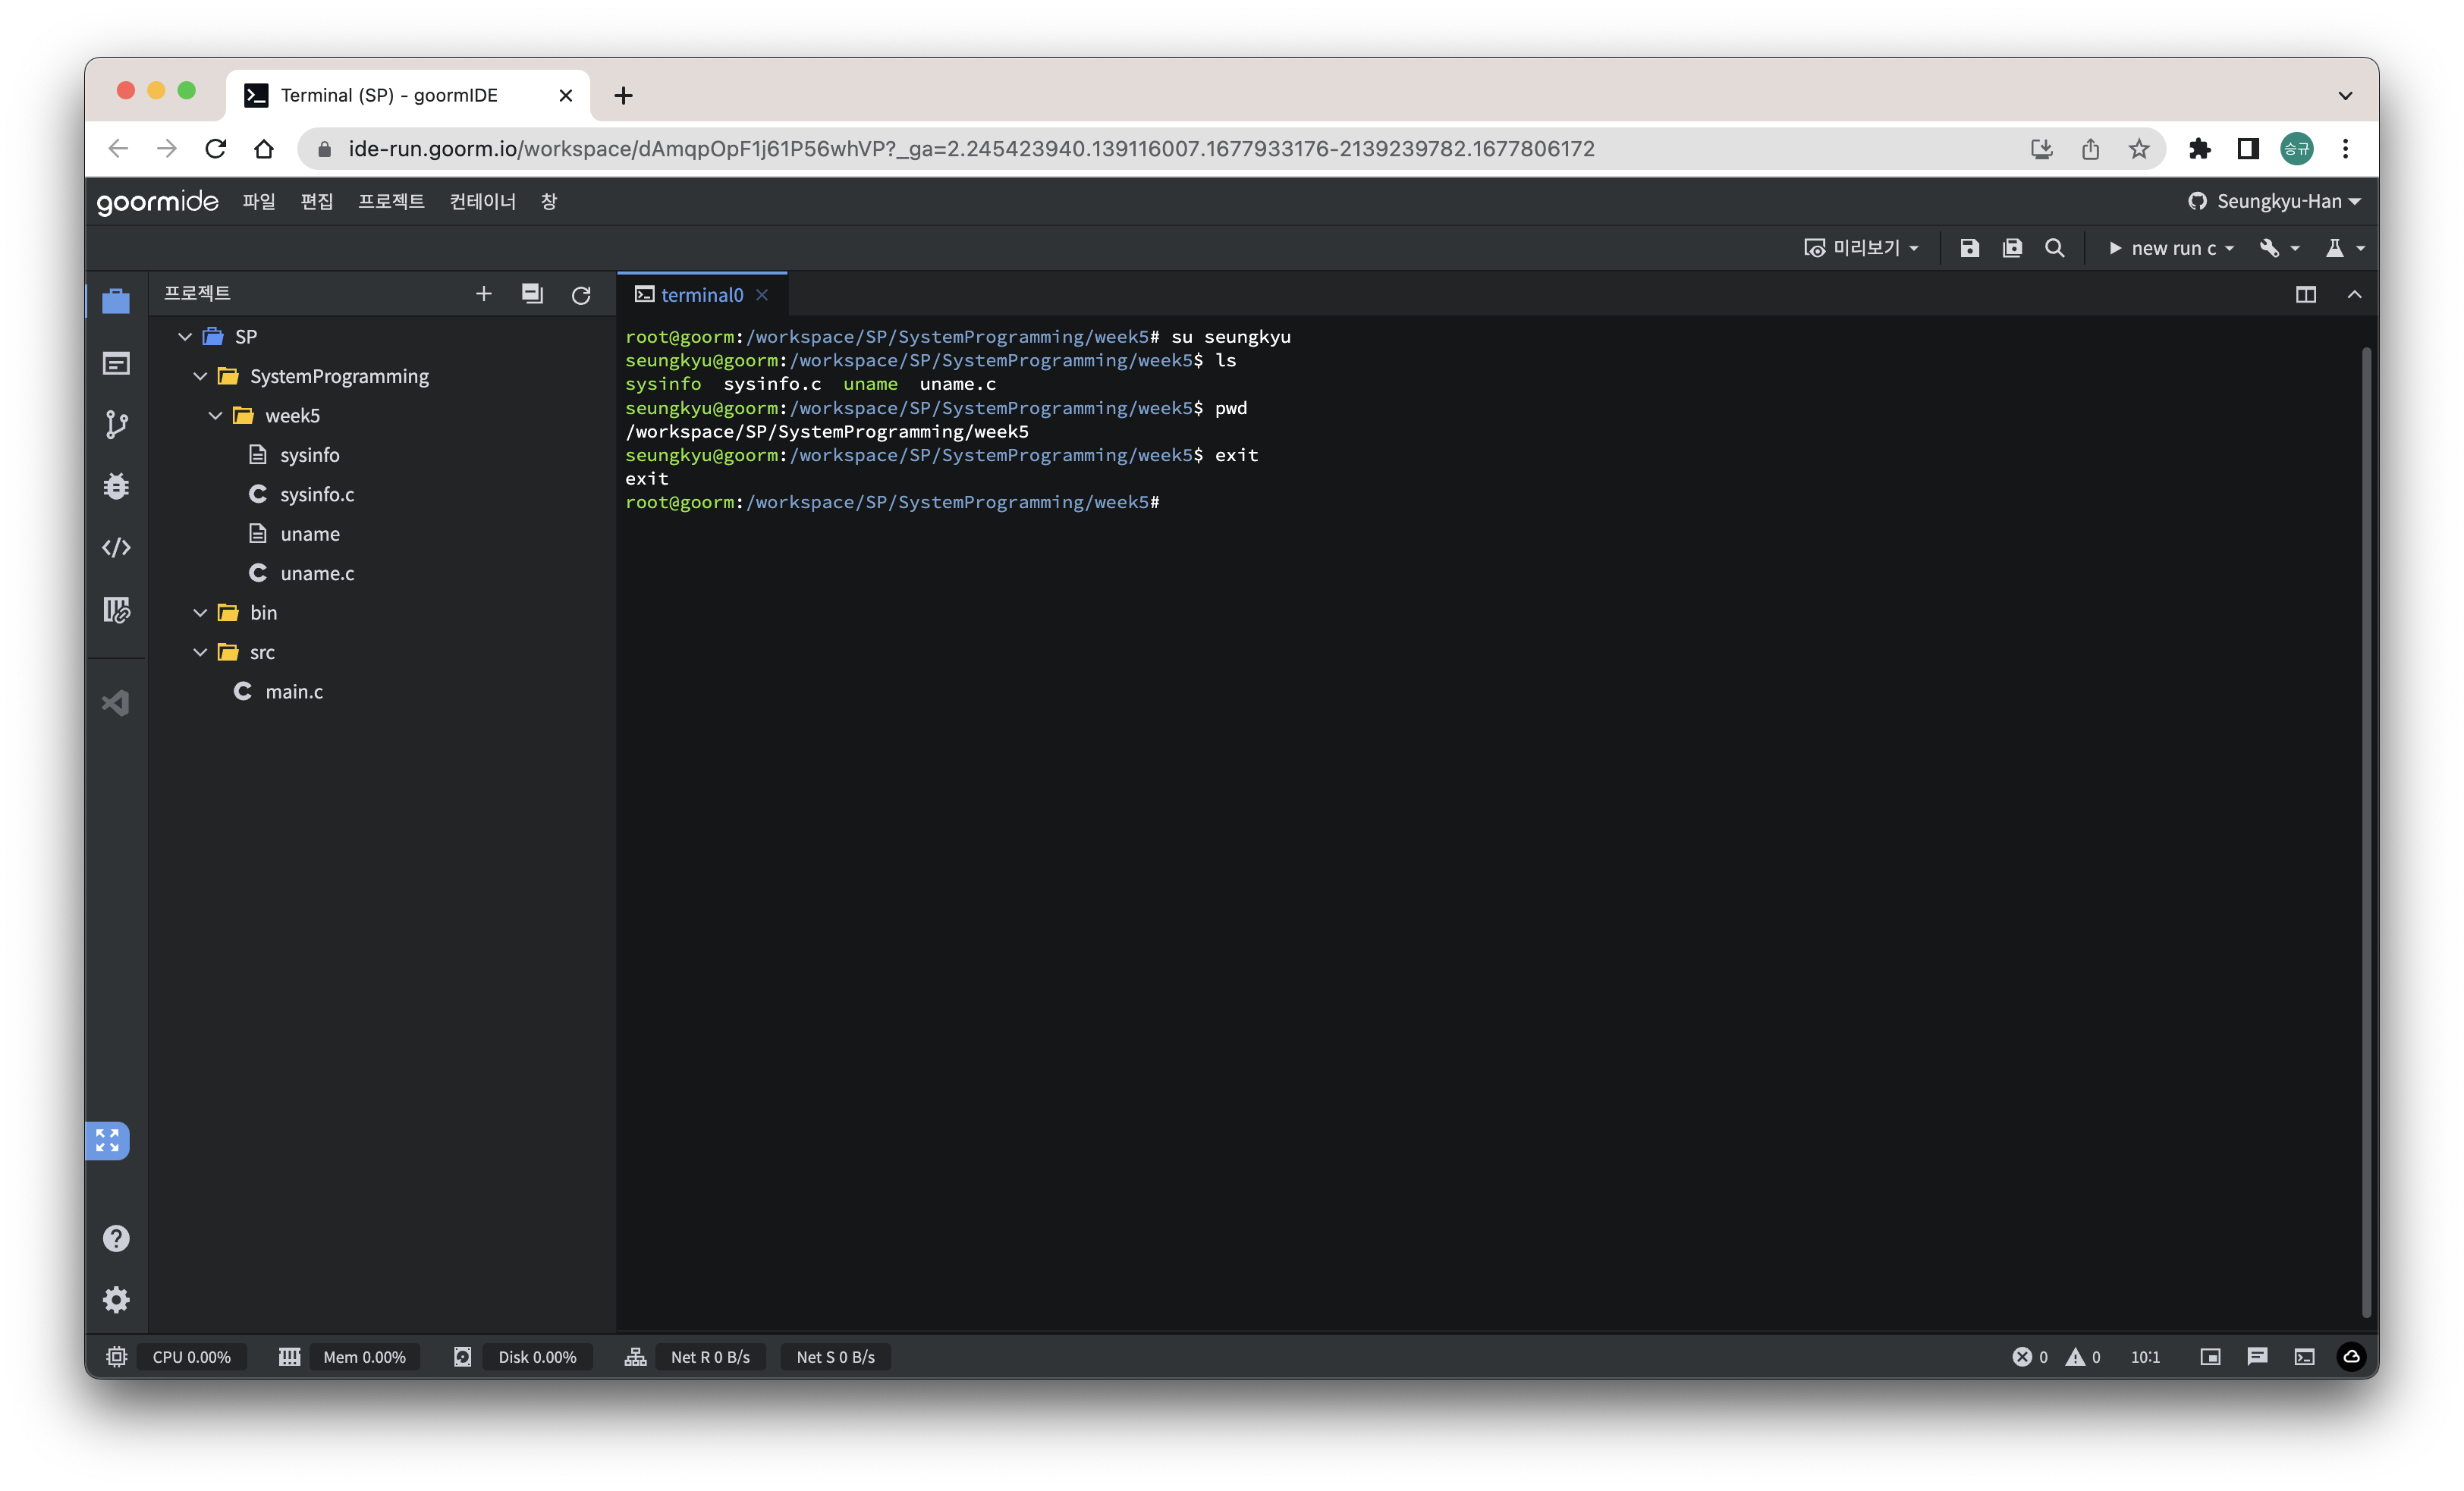
우선 shell에서 사용자(seungkyu)를 추가해보자.
sudo adduser [사용자 이름]을 입력하면 된다.
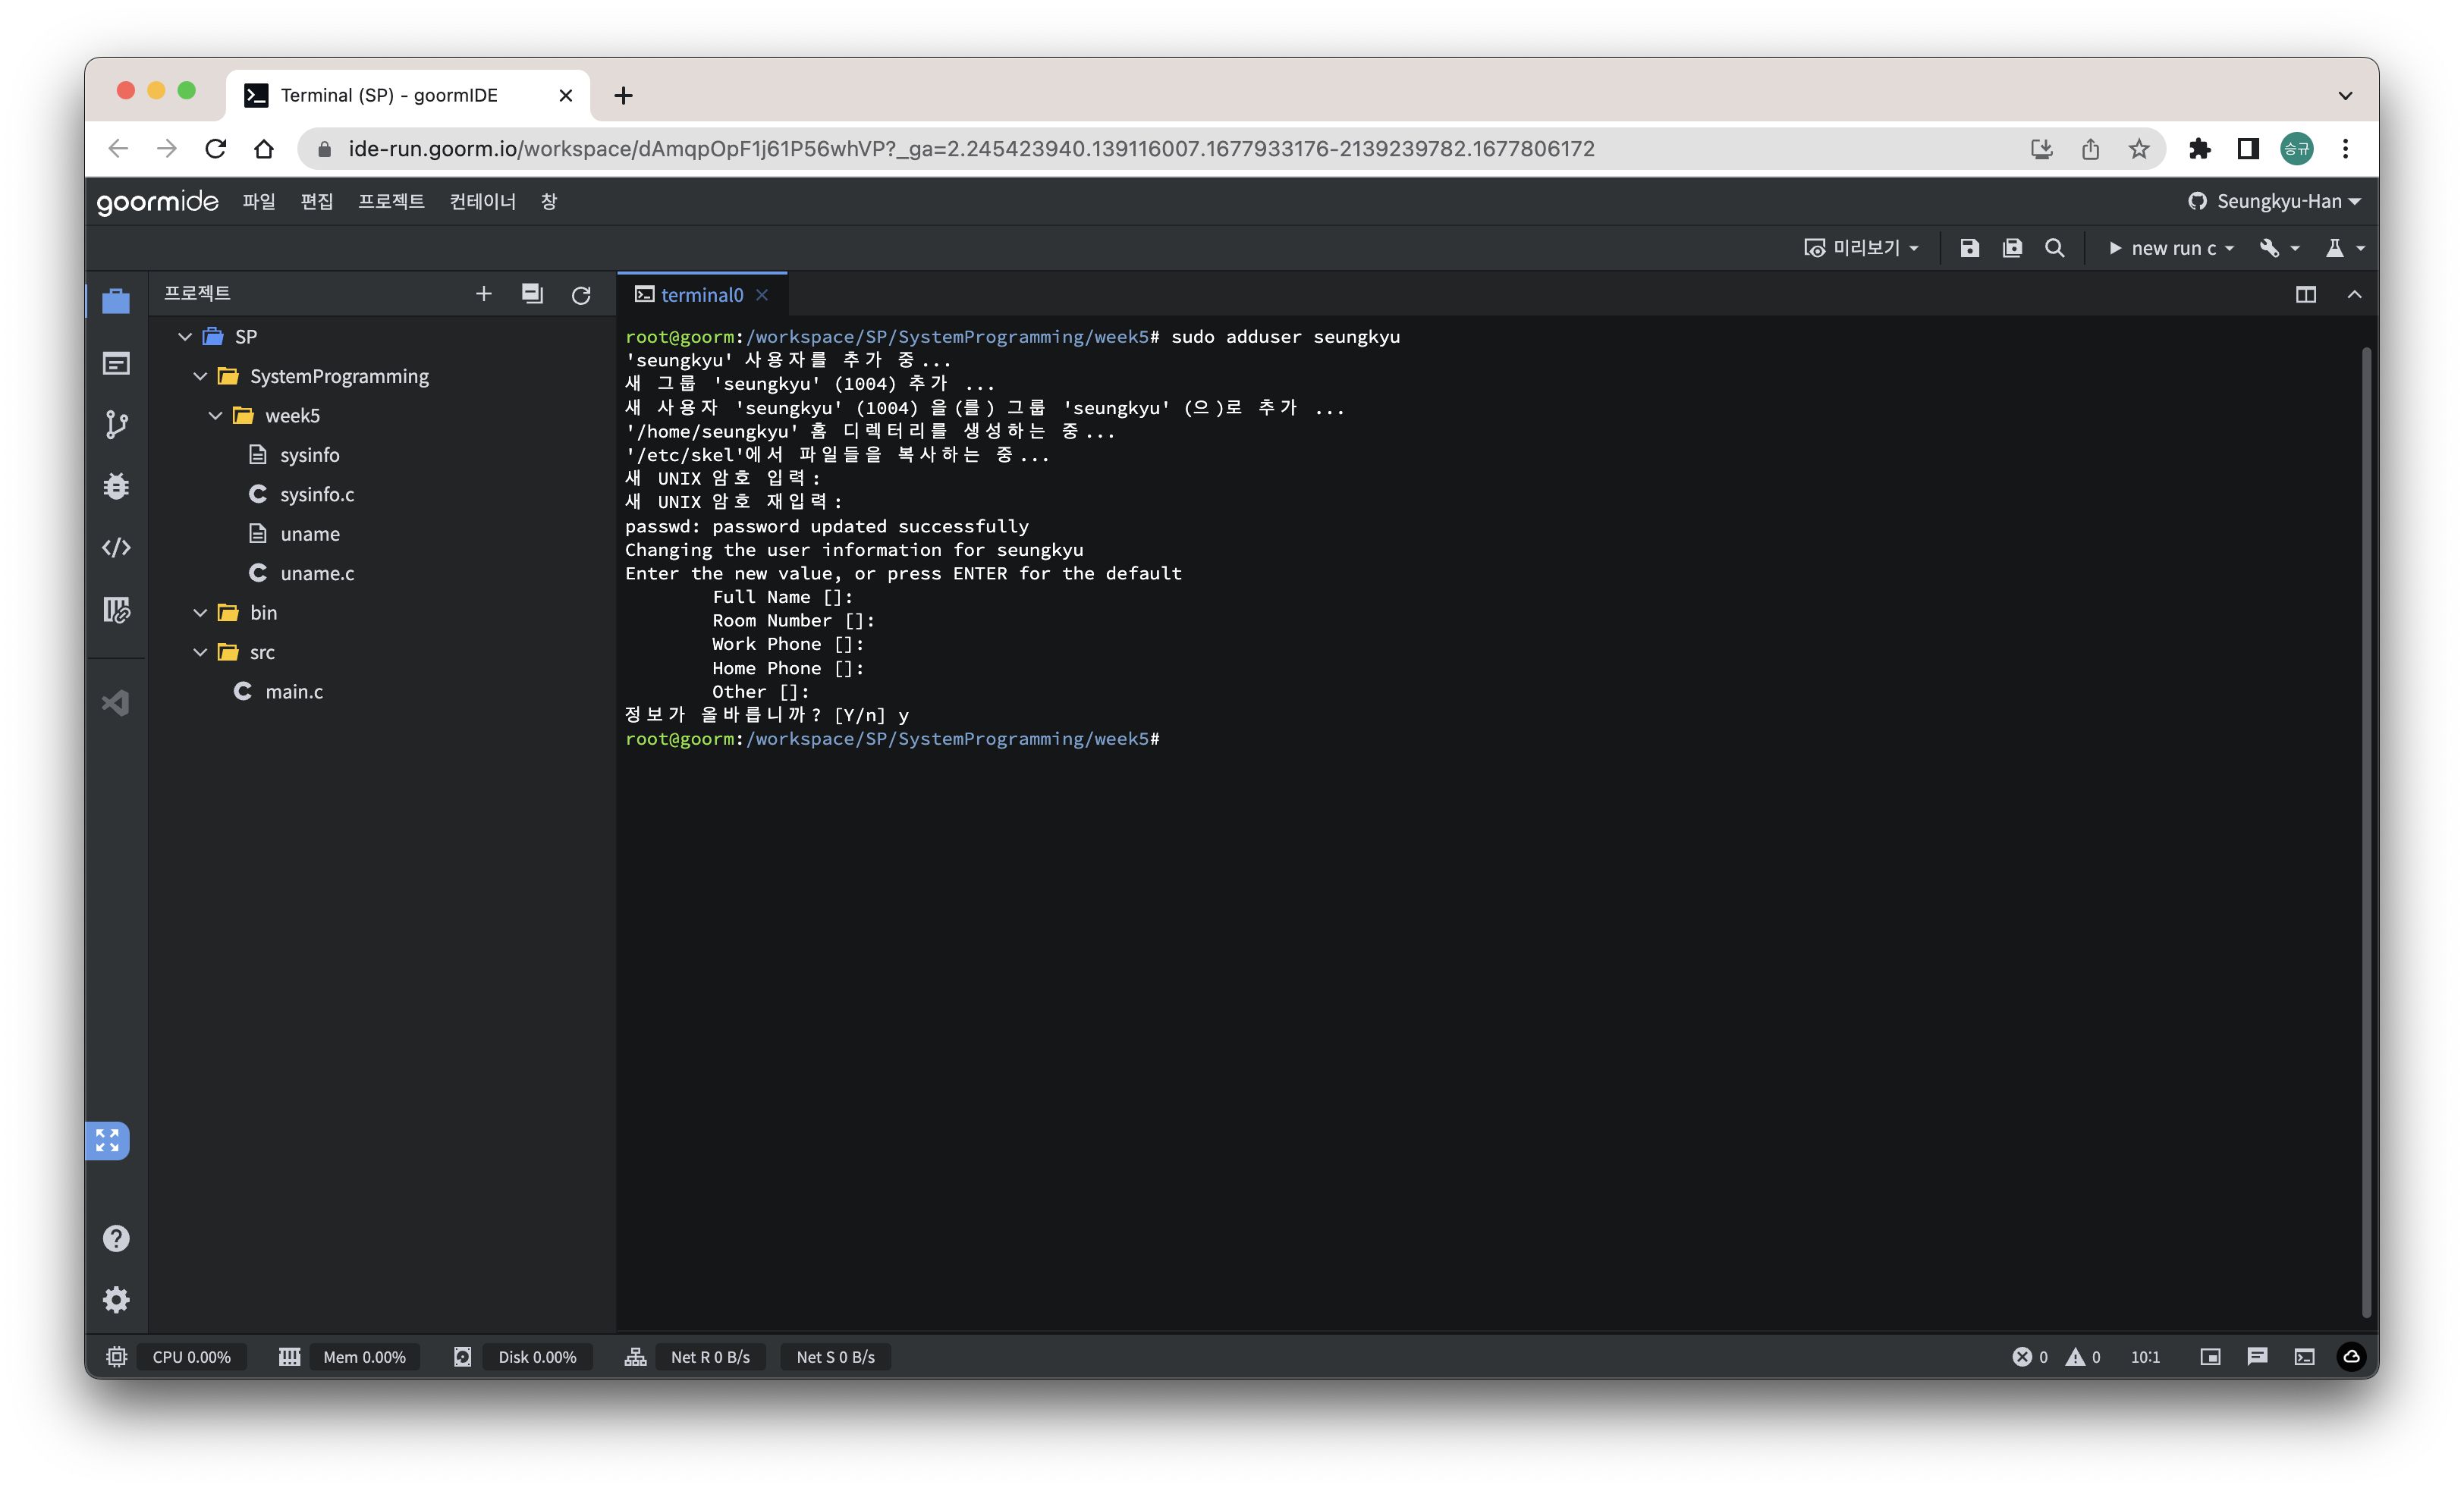
일단 이렇게 모두 디폴트로 설정을 하면 된다.
해당 사용자로 접근을 해보자.
su [사용자 이름] 명령어를 사용하면 해당 사용자로 접근할 수 있다.
exit로 나갈 수 있다.
UID는 그 사용자에게 부여된 ID 번호이며, Login name은 문자 형태의 사용자 이름이다.
이렇게 id [사용자 이름]으로 확인 할 수 있다.
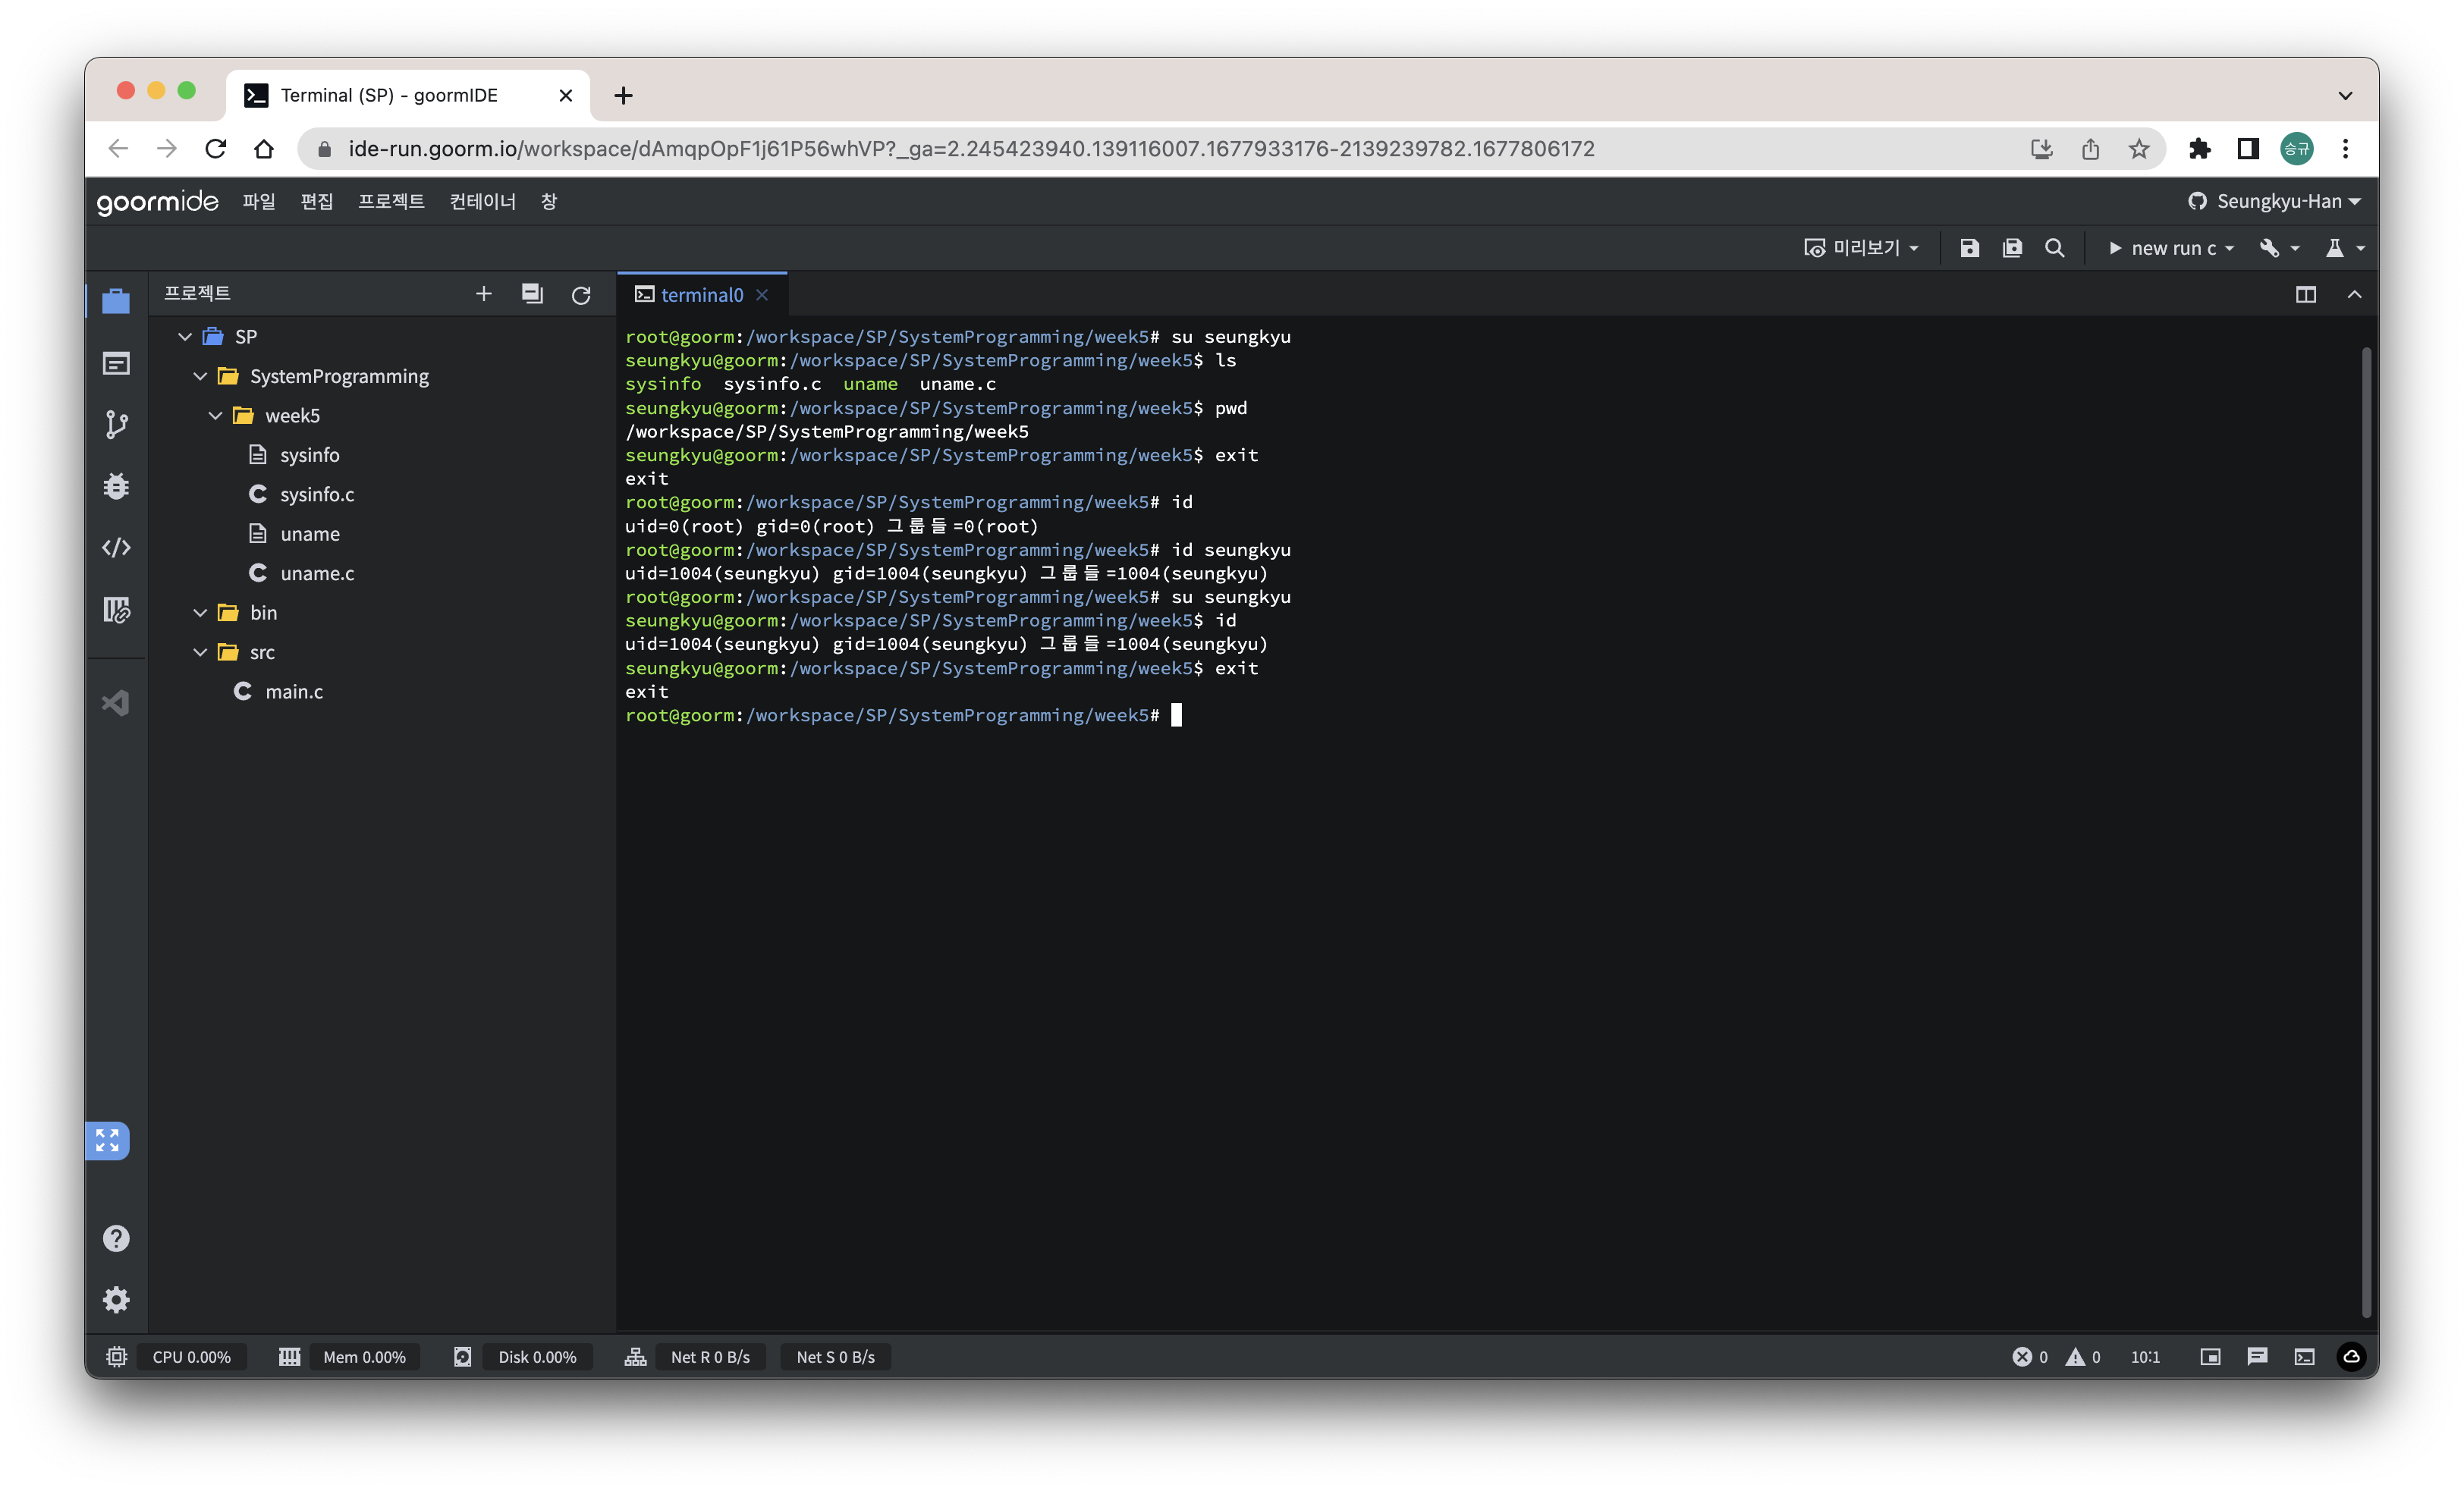
Process에 입장 할 때의 사용자에 대해 알아보자.
- Real user ID
최초에 Process를 실행한 user의 UID
- Effective user ID
현재 Process가 행사하는 UID
- Saved user ID
Process의 최초의 effective user ID
Effective User ID는 기본적으로는 Real UID와는 같다, 실행 파일의 setuid bit가 1인 경우 해당 파일 소유자의 UID가 effective UID가 된다.
Getting/Setting user IDs
#include <unistd.h>
#include <sys/types.h>

uid_t getuid(void);
uid_t geteuid(void);
return: 얻으려고 하는 uid
uid와 euid를 반환 받는 getuid와 geteuid 함수이다.
#include <sys/types.h>
#include <unistd.h>

int seteuid(uid_t uid);
Process의 EUID를 설정할 수 있는 seteuid 함수이다.
바로 실습으로 가보도록 하자.
#include <sys/types.h>
#include <unistd.h>
#include <stdio.h>

int main(void){
	uid_t uid, euid;

	uid = getuid();
	euid = geteuid();
	printf("[Init] UId = %d, EUID = %d\n", (int)uid, (int)euid);

	seteuid(getuid());
	int cur_euid = (int)geteuid();
	printf("[seteuid(uid)] UID = %d, EUID = %d\n", (int)uid, (int)cur_euid);

	seteuid(euid);
	cur_euid = (int)geteuid();
	printf("[seteuid(euid)]UID = %d, EUID = %d\n", (int)uid, (int)cur_euid);

	return 0;
}
이렇게 프로세스 내에서의 userID 변동을 살펴 볼 수 있다.
User information
우선 /etc/passwd 라는 파일을 한 번 보도록 하자.
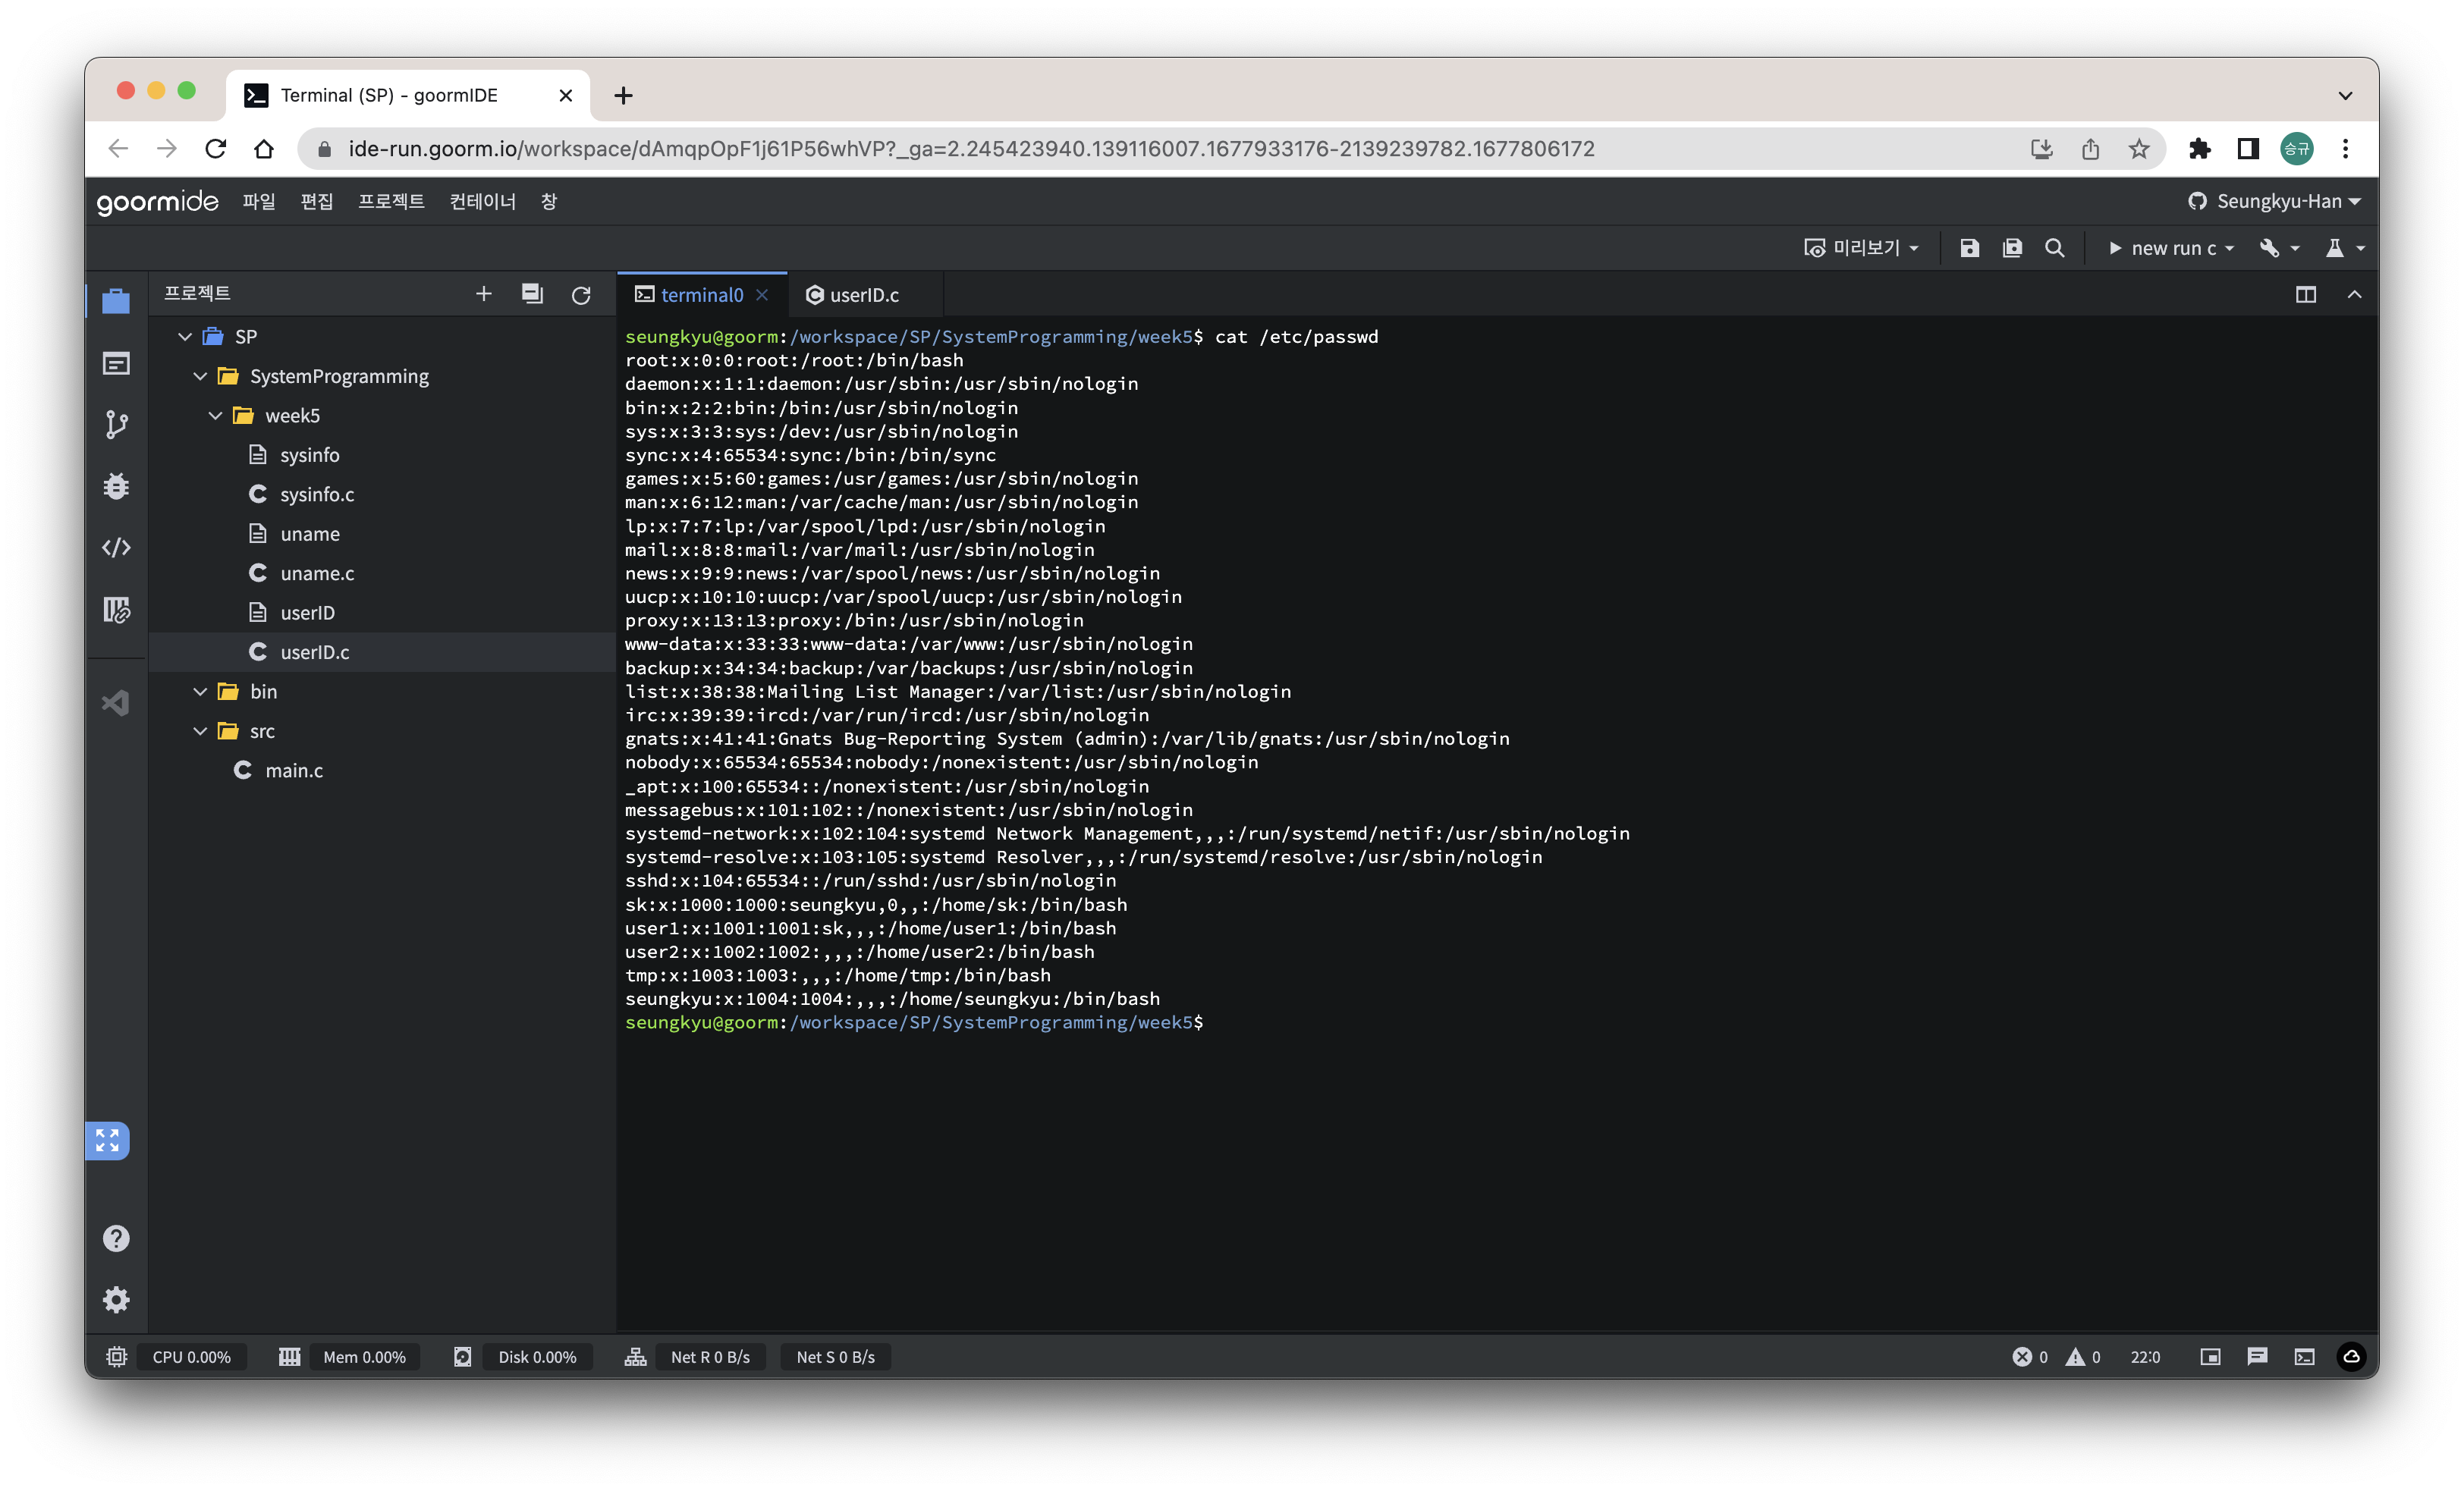
이렇게 사용자들의 정보가 쭉 나온다.
LoginID:PassWord:UID:GID:UserInfo:HomeDir의 정보로 출력이 된다.
당연히 시스템 콜에서도 사용자의 정보를 불러 올 수 있고, 사용자에 대한 구조체가 존재한다.
struct passwd {
	char	*pw_name;		/* user name */
	char	*pw_passwd;		/* encrypted password */
	uid_t	pw_uid;			/* user uid */
	gid_t	pw_gid;			/* user gid */
	char	*pw_gecos;		/* Honeywell login info */
	char	*pw_dir;		/* home directory */
	char	*pw_shell;		/* default shell */
};
이렇게 존재한다.
Reading the passwd file
#include <sys/types.h>
#include <pwd.h>

struct passwd *getpwnam(const char *name);
struct passwd *getpwuid(uid_t uid);
passwd 파일을 가져오는 함수들이다.
-name
passwd file에서 정보를 읽어올 사용자의 이름
-uid
passwd file에서 정보를 읽어올 사용자의 uid
return: 해당 사용자에 대한 passwd structure가 저장된 pointer, -1(NULL)
#include <sys/types.h>
#include <pwd.h>
#include <stdio.h>

int main(void){
	struct passwd * pw;

	pw = getpwuid(getuid());
	printf("UID : %d\n", (int)pw->pw_uid);
	printf("Login Name : %s\n", pw->pw_name);

	return 0;
}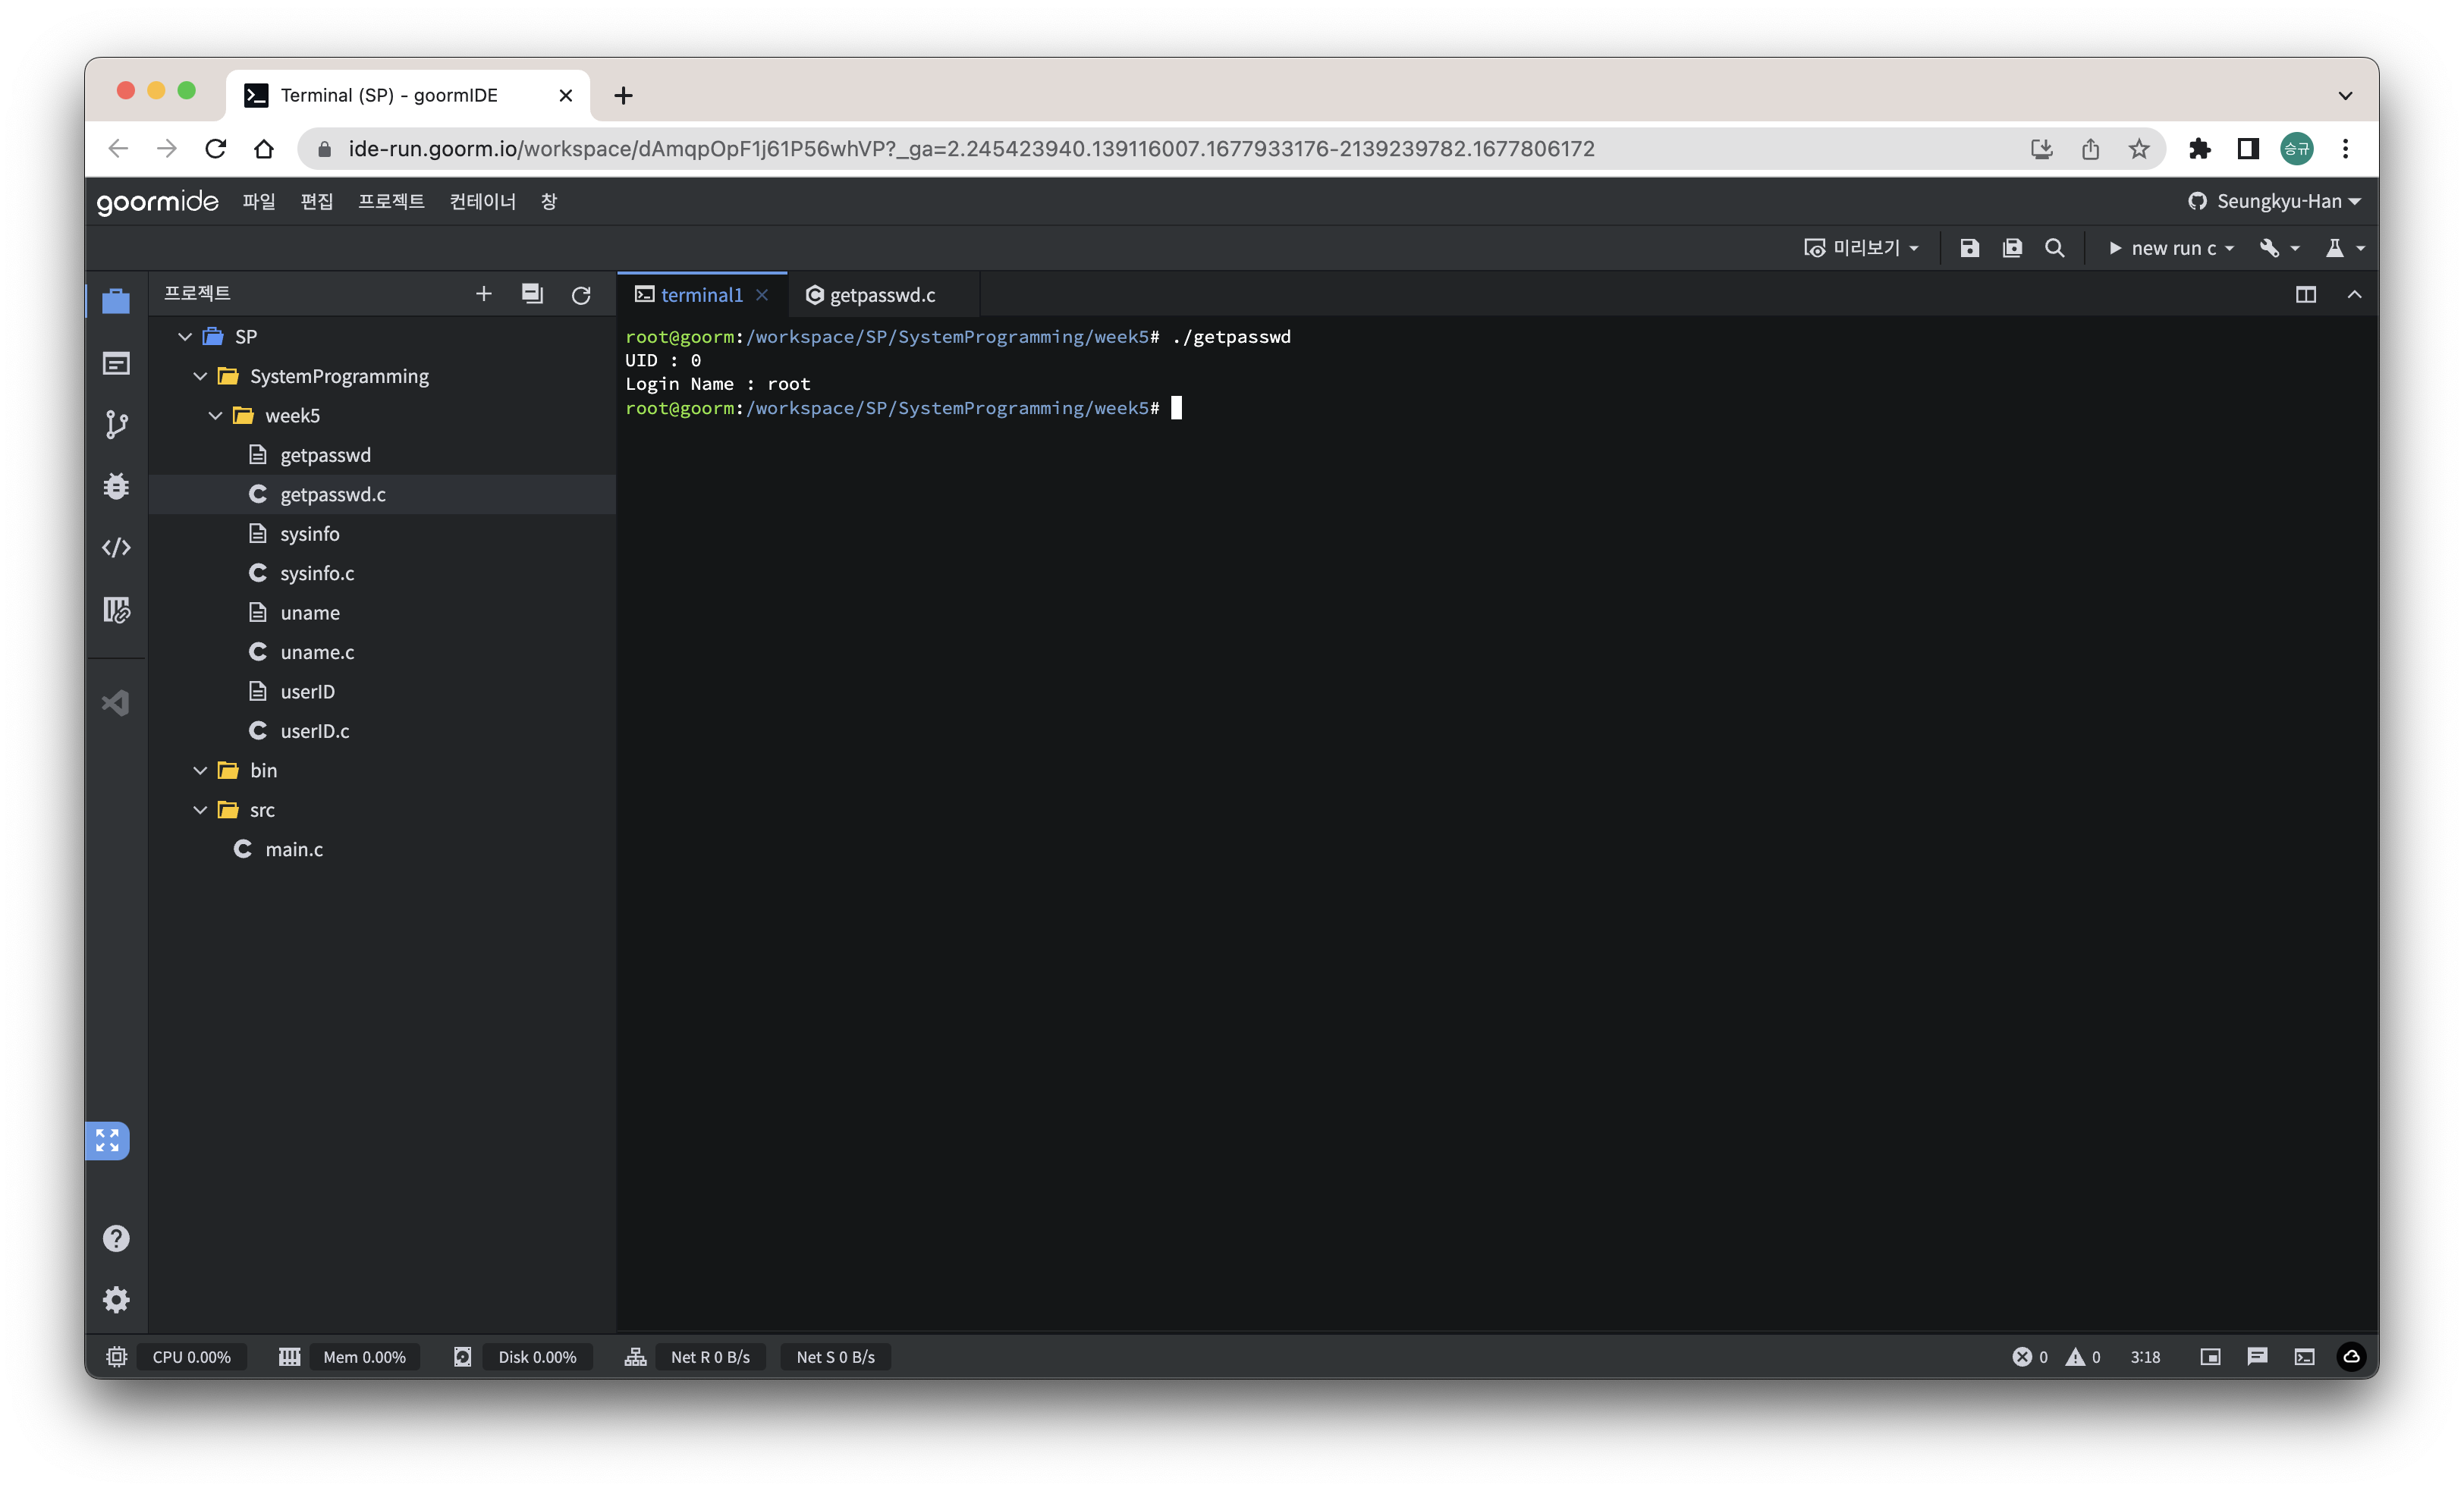
uid로 사용자를 불러온 모습이다.
Reading the group file
#include <sys/types.h>
#include <grp.h>

struct group *getgrname(const char *name);
struct group *getgrgid(gid_t gid);

struct group *getgrent(void);
void setgrent(void);
void endgrent(void);
사용자 뿐만 아니라 그룹에 대한 정보도 가져올 수 있다.
위와 비슷하고 그룹이란 것만 변경이 되었기 때문에 바로 실습으로 가보도록 하겠다.
group의 구조체는 아래와 같다.
struct group {
	char	*gr_name;		/* [XBD] group name */
	char	*gr_passwd;		/* [???] group password */
	gid_t	gr_gid;			/* [XBD] group id */
	char	**gr_mem;		/* [XBD] group members */
};
그룹에 대한 정보를 읽어오는 프로그램을 만들어보자.
#include <stdio.h>
#include <stdlib.h>
#include <grp.h>
int main(void){
struct group *grp;
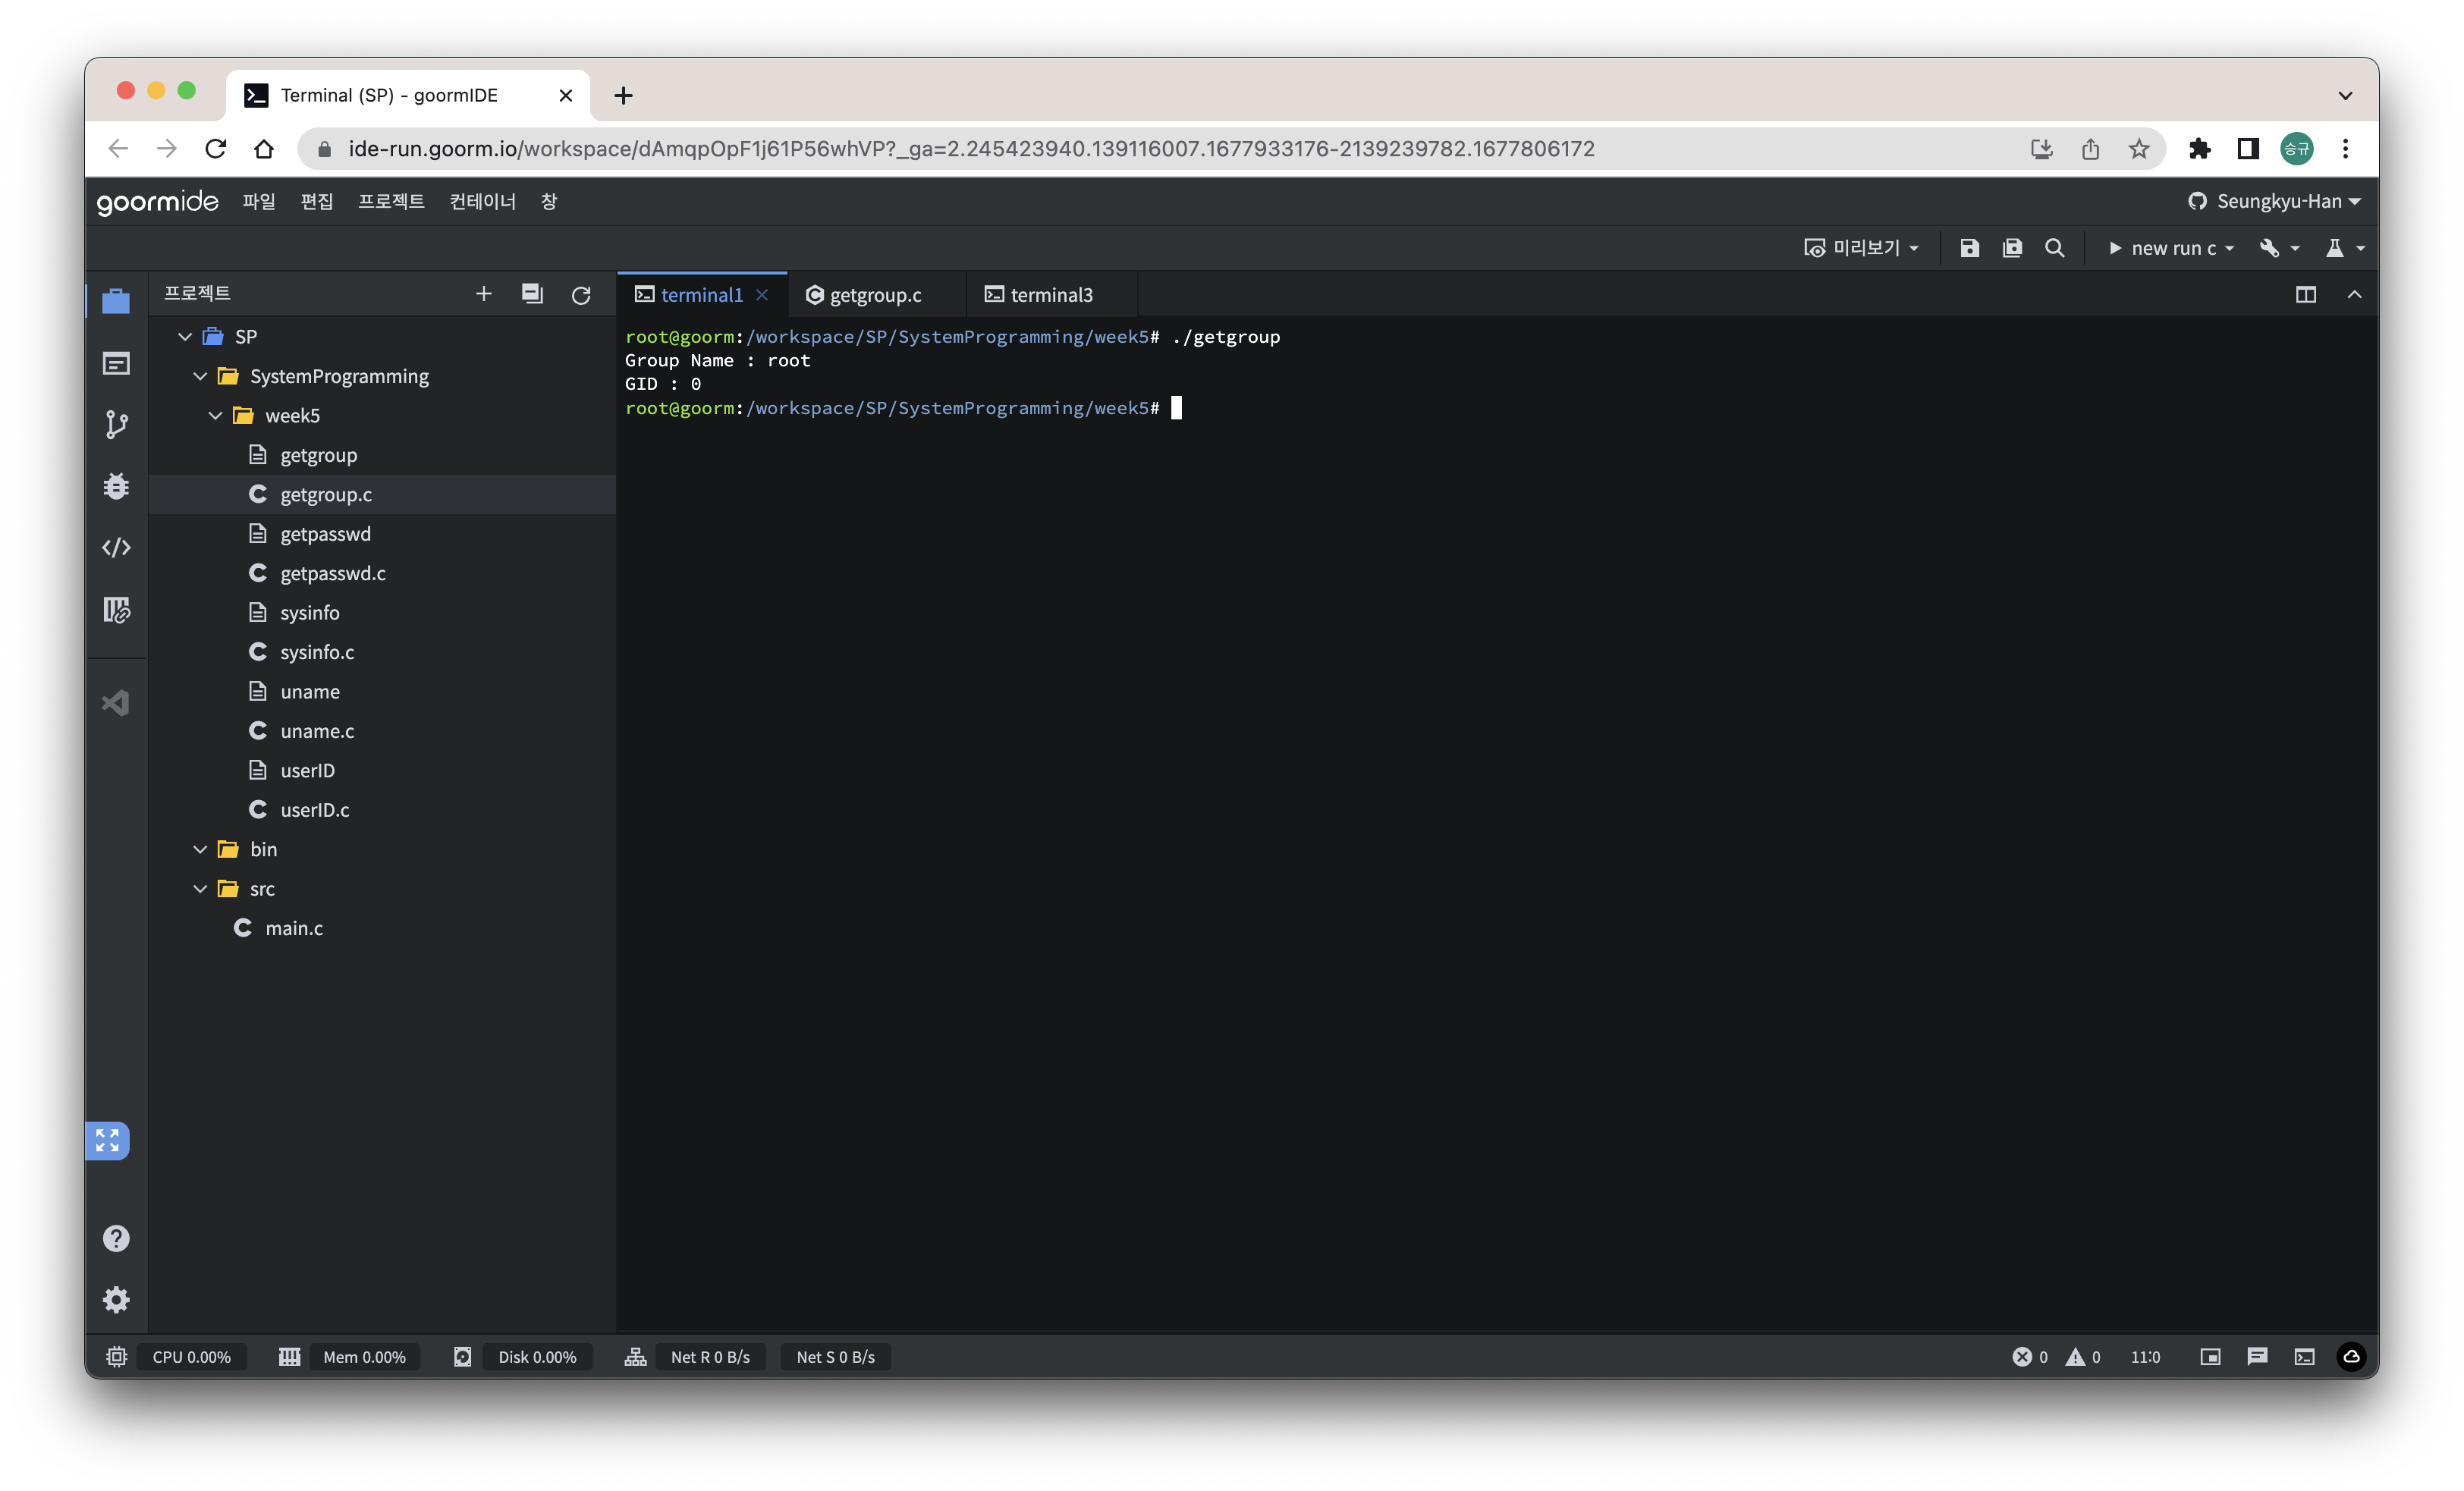
grp = getgrnam("root");
printf("Group Name : %s\n", grp->gr_name);
printf("GID : %d\n", (int)grp->gr_gid);
return 0;
}그룹의 이름을 이용해 정보를 가져왔다.
- 시간 정보
리눅스의 시간은 1970년 1월 1일 0시 0분 0초를 기준으로 흘러가며 현재까지 경과한 시간을 초 단위로 저장한다.
Getting time
#include <sys/time.h>

time_t time(time_t *tloc);
-tloc
얻어올 초를 저장할 주소
return: 얻어온 초, -1(error)
하지만 이렇게 얻어온 시간은 흘러간 초로 표현이 되기 때문에 읽기가 매우 힘들다.
그래서 이 time_t를 우리가 보기 편한 시간으로 보여주는 함수가 있고 그 시간을 저장하는 구조체가 있다.
우선 해당 구조체부터 살펴보자면
struct tm {
	int	tm_sec;		/* seconds after the minute [0-60] */
	int	tm_min;		/* minutes after the hour [0-59] */
	int	tm_hour;	/* hours since midnight [0-23] */
	int	tm_mday;	/* day of the month [1-31] */
	int	tm_mon;		/* months since January [0-11] */
	int	tm_year;	/* years since 1900 */
	int	tm_wday;	/* days since Sunday [0-6] */
	int	tm_yday;	/* days since January 1 [0-365] */
	int	tm_isdst;	/* Daylight Savings Time flag */
};
이렇게 연부터 초들이 들어가게 되고
Seconds <-> tm struct
#include <time.h>

struct tm *gmtime(const time_t *timep);
struct tm *localtime(const time_t *timep);

time_t mktime(struct tm *tm);
-*timep
변환하려는 time_t 구조체
return: 변환된 tm 구조체
-tm
변환하려는 tm 구조체
return: 변환된 time_t 구조체
변환하여 출력해보자.
#include <time.h>
#include <stdio.h>

int main(void){
	struct tm *tm;
	time_t t;

	time(&t);
	printf("Time(sec) : %d\n", (int)t);

	tm = gmtime(&t);
	printf("GMTIME=Y:%d", tm->tm_year);
	printf("M:%d ", tm->tm_mon);
	printf("D:%d ", tm->tm_mday);
	printf("H:%d ", tm->tm_hour);
	printf("M:%d ", tm->tm_min);
	printf("S:%d\n", tm->tm_sec);

	tm = localtime(&t);
	printf("LOCALTIME=Y:%d", tm->tm_year);
	printf("M:%d ", tm->tm_mon);
	printf("D:%d ", tm->tm_mday);
	printf("H:%d ", tm->tm_hour);
	printf("M:%d ", tm->tm_min);
	printf("S:%d\n", tm->tm_sec);

	return 0;
}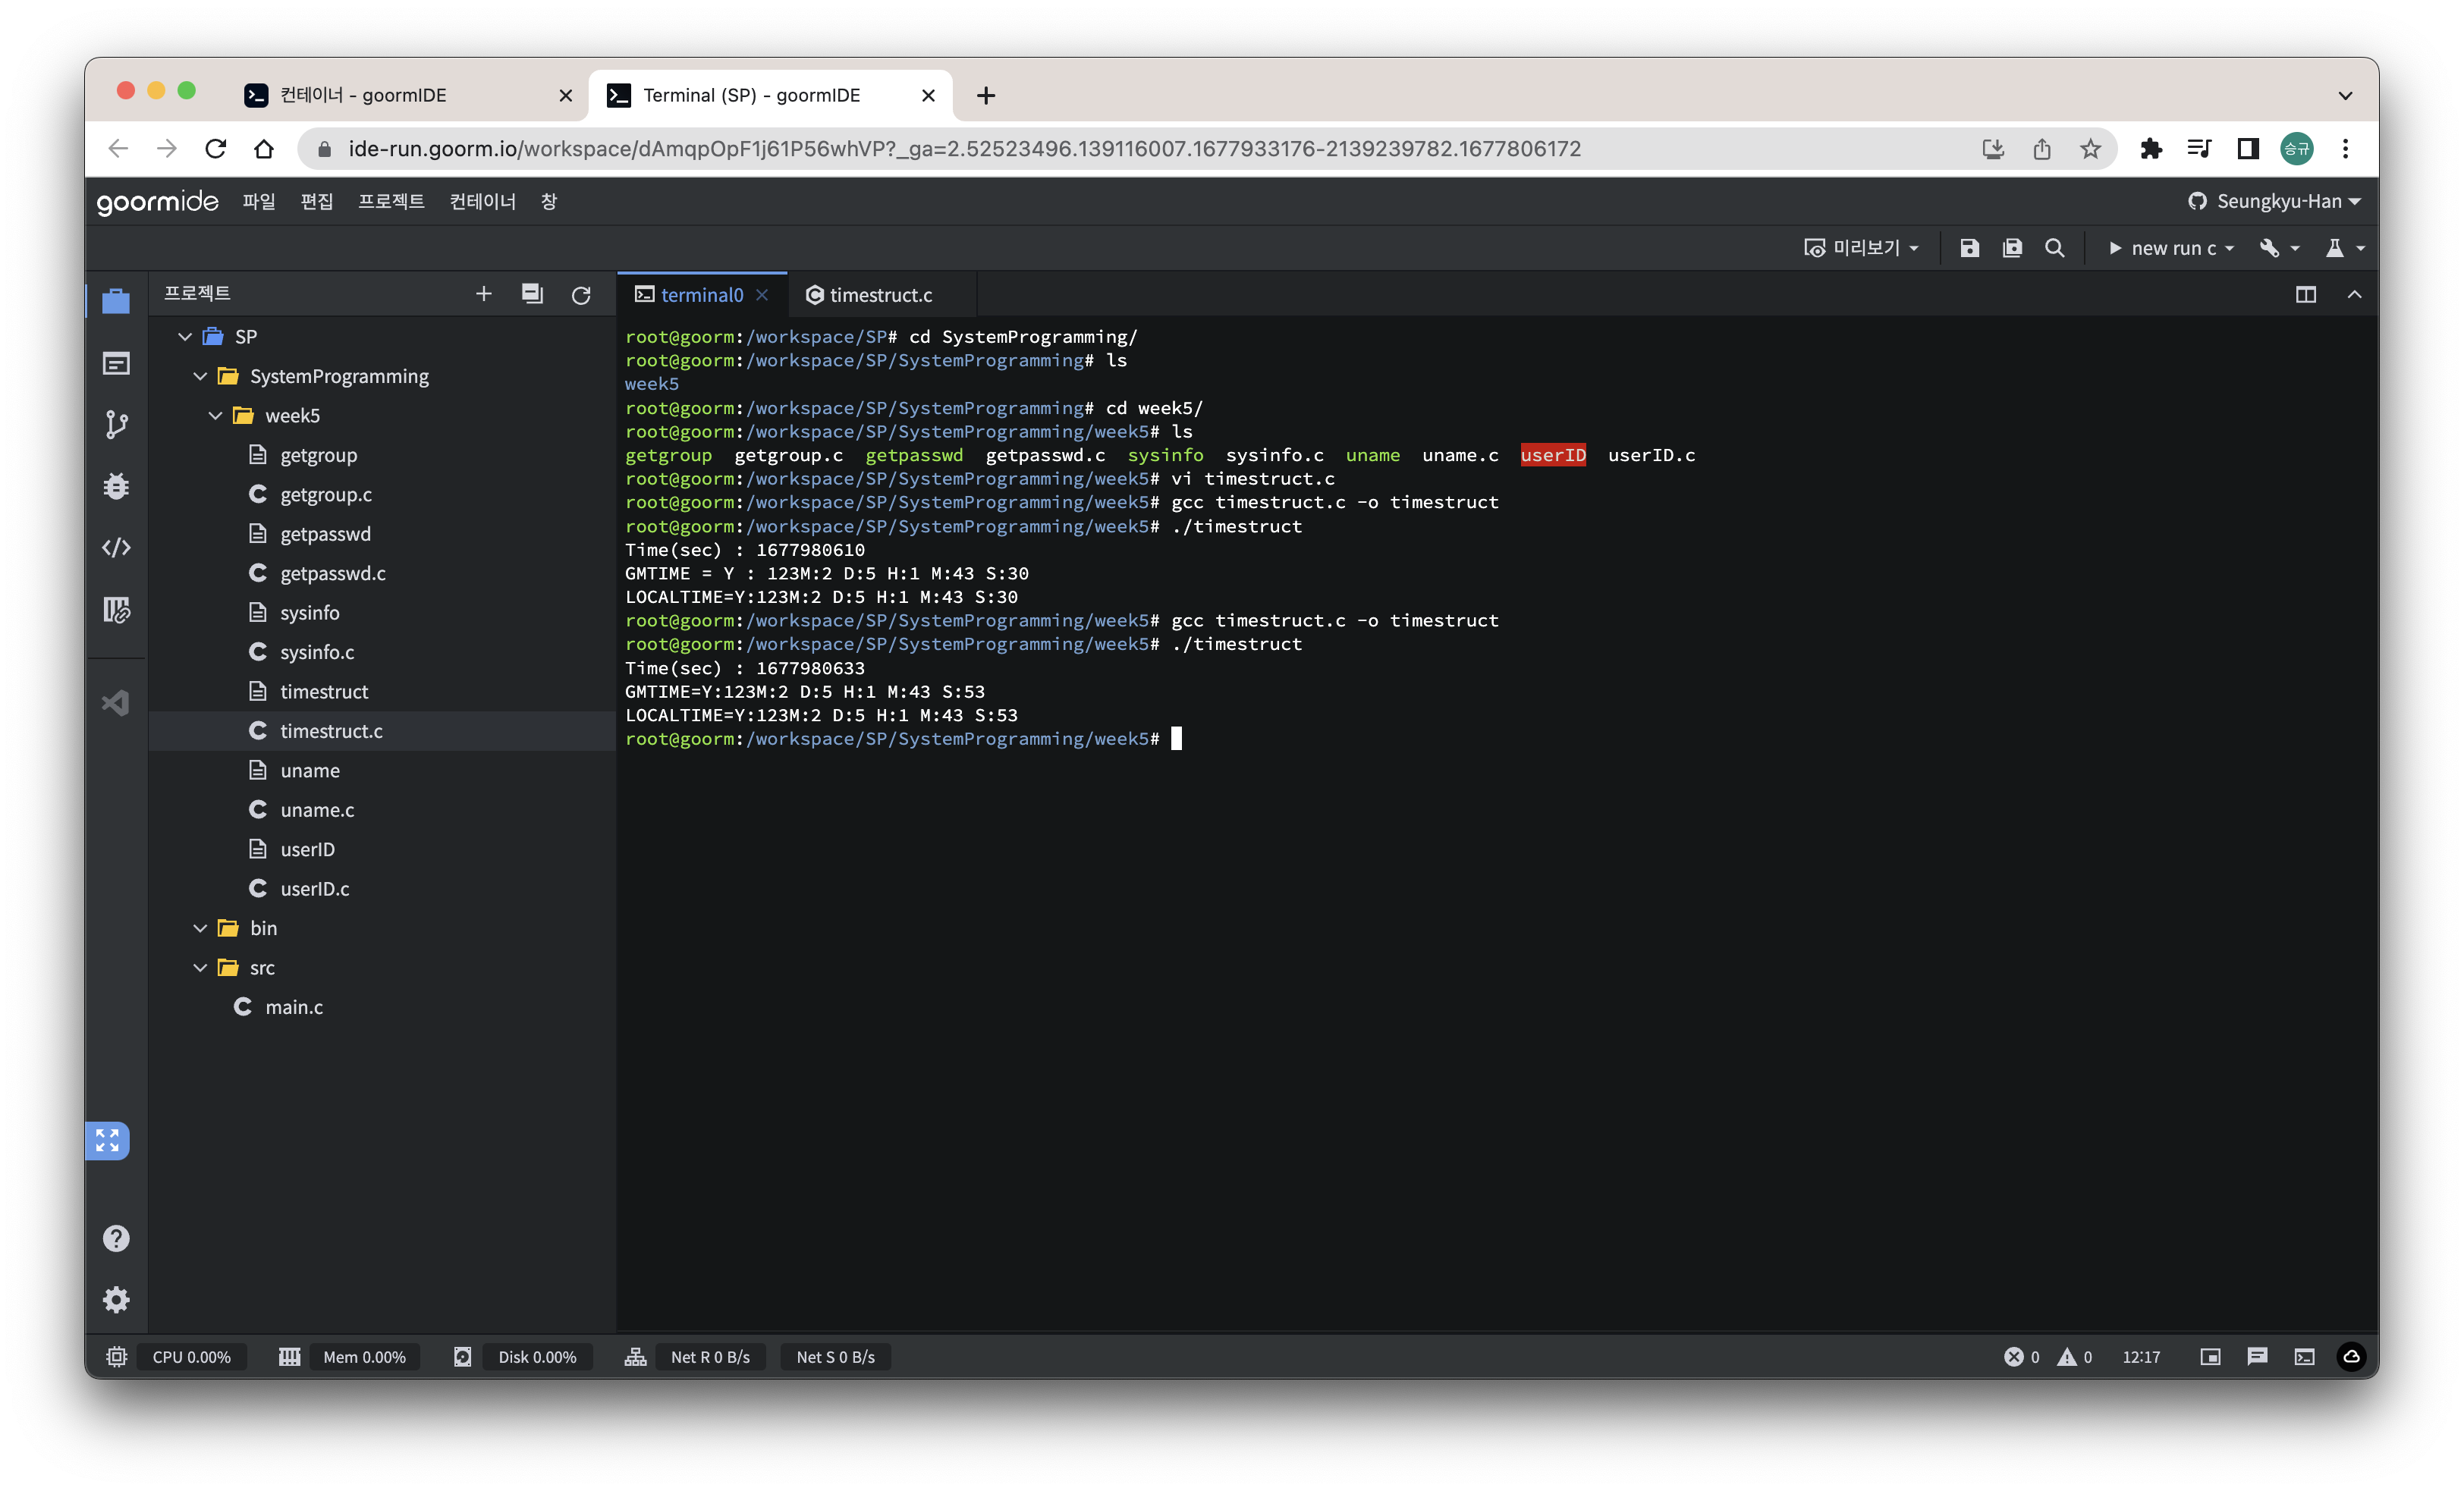
이렇게 tm과 time_t 간에 변환이 된 모습이다.
'학교 생활 > 시스템 프로그래밍' 카테고리의 다른 글
| 시스템 프로그래밍 6주차 (0) | 2023.03.07 |
|---|---|
| 시스템 프로그래밍 4주차 (0) | 2023.03.02 |
| 시스템 프로그래밍 3주차 (0) | 2023.01.16 |
| 시스템 프로그래밍 2주차 (2) | 2023.01.15 |
| 시스템 프로그래밍 1주차 (0) | 2023.01.14 |