Netflix에서 구현한 Reactive Stream이라고 한다.
Flowable
0..n개의 item을 전달한다.
에러가 발생하면 error signal을 전달하고 종료하며, 모든 item을 전달하면 complete signal을 전달하고 종료한다.
중요한 backPressure를 지원한다고 한다.
이거까지만 보면 Flux와 굉장히 비슷해 보이는 거 같다.
덕분에 다행이도 저번에 작성했던 subscriber를 사용할 수 있다.

- subscribe - Flowable
저번에 사용했던 코드와 크게 다르지 않다.
@Slf4j
public class FlowableExample {

    public static void main(String[] args) {
        log.info("start main");

        getItems()
                .subscribe(new SimpleSubscriber<>(Integer.MAX_VALUE));

        log.info("end main");
    }

    private static Flowable<Integer> getItems(){
        return Flowable.fromIterable(List.of(1, 2, 3, 4, 5));
    }
}
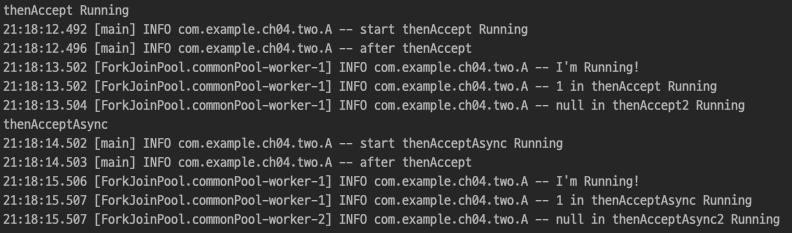
딱 생각했던 대로 출력이 된다.
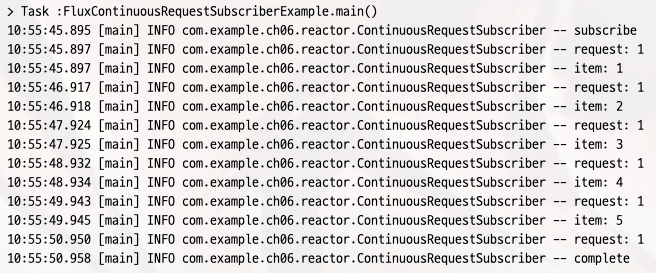
- backPressure - Flowable
전에 작성했던 ContinuousRequestSubscriber를 사용해서 backPressure를 확인해보자.
@Slf4j
public class FlowableContinuousRequestSubscriberExample {

    public static void main(String[] args) {
        log.info("start main");
        getItems()
                .subscribe(new ContinuousRequestSubscriber<>());
        log.info("end main");
    }

    private static Flowable<Integer> getItems(){
        return Flowable.fromIterable(List.of(1, 2, 3, 4, 5));
    }
}
이렇게 요청에 따라 데이터를 주는 것을 볼 수 있다.
Observable
0..n개의 item을 전달한다.
에러가 발생하면 error signal을 전달하고 종료하며, 모든 item을 전달하면 complete signal을 전달하고 종료한다.
하지만 backPressure를 지원하지는 않는다고 한다.
subscriber가 요청하지 않더라도 item을 전달하는 형식이다.
간단하게 작성하여 실행해 보았는데, request를 하지 않아도 지속적으로 데이터를 주는 것을 볼 수 있었다.
Single
1개의 item을 전달 후 바로 onComplete signal wjsekf
1개의 item이 없다면 onError signal을 전달하고, 에러가 발생해도 onError signal을 전달한다.
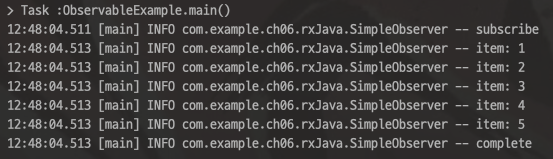
@Slf4j
public class SimpleObserver implements Observer {

    private Disposable disposable;

    @Override
    public void onSubscribe(@NonNull Disposable d) {
        log.info("subscribe");
        this.disposable = d;
    }

    @Override
    public void onNext(@NonNull Object o) {
        log.info("item: {}", o);
    }

    @Override
    public void onError(@NonNull Throwable e) {
        log.error("error: {}", e.getMessage());
    }

    @Override
    public void onComplete() {
        log.info("complete");
    }
}
이렇게 Oberser를 작성하고 예제를 실행해보자.
@Slf4j
public class SingleExample {

    public static void main(String[] args) {
        getItem()
                .subscribe(new SimpleSingleObserver<>());

        getNullItem()
                .subscribe(new SimpleSingleObserver<>());
    }

    private static Single<Integer> getItem(){
        return Single.create(singleEmitter -> {
            singleEmitter.onSuccess(1);
        });
    }

    private static Single<Integer> getNullItem(){
        return Single.create(singleEmitter -> {
            singleEmitter.onSuccess(null);
        });
    }
}
위에 코드는 성공이고, 밑의 코드는 null을 반환한다.
Single에서는 null을 반환하면 에러가 뜨는 것을 확인 할 수 있다.

Maybe
1개의 Item을 전달 수 바로 OnComplete signal을 전달한다.
1개의 Item이 없어도 onComplete signal 전달 가능
에러가 발생했다면 onError signal 전달
@Slf4j
public class SimpleMaybeObserver<T> implements MaybeObserver<T> {

    private Disposable disposable;

    @Override
    public void onSubscribe(@NonNull Disposable d) {
        this.disposable = d;
        log.info("subscribe");
    }

    @Override
    public void onSuccess(@NonNull T t) {
        log.info("item: {}", t);
    }

    @Override
    public void onError(@NonNull Throwable e) {
        log.error("error: {}", e.getMessage());
    }

    @Override
    public void onComplete() {
        log.info("complete");
    }
}
바로 onComplete를 전달 할 수도 있어서, 해당 메서드도 implements가 된 것을 볼 수 있다.
@Slf4j
public class MaybeExample {

    public static void main(String[] args) {
        maybeGetItem()
                .subscribe(new SimpleMaybeObserver<>());

        maybeGetNullItem()
                .subscribe(new SimpleMaybeObserver<>());

    }

    private static Maybe<Integer> maybeGetItem(){
        return Maybe.create(maybeEmitter -> {
            maybeEmitter.onSuccess(1);
        });
    }

    private static Maybe<Integer> maybeGetNullItem(){
        return Maybe.create(maybeEmitter -> {
           maybeEmitter.onComplete();
        });
    }
}
바로 onComplete 호출이 가능한 것을 확인 할 수 있다.

Completable
onComplete 혹은 onError signal만 전달한다.
값이 아닌 사건을 전달해준다.
@Slf4j
public class SimpleCompletableObserver implements CompletableObserver {

    private Disposable disposable;

    @Override
    public void onSubscribe(@NonNull Disposable d) {
        log.info("subscribe");
    }

    @Override
    public void onComplete() {
        log.info("complete");
    }

    @Override
    public void onError(@NonNull Throwable e) {
        log.error("error: {}", e.getMessage());
    }
}
이런 식으로 구성이 되어 있고
@Slf4j
public class CompletableExample {

    public static void main(String[] args) {
        getCompletion()
                .subscribe(new SimpleCompletableObserver());
    }

    private static Completable getCompletion(){
        return Completable.create(completableEmitter -> {
            Thread.sleep(1000);
            completableEmitter.onComplete();
        });
    }
}
이렇게 사용한다고 한다.
자세한 부분까지는 모르겠다.
'백엔드 > 리액티브 프로그래밍' 카테고리의 다른 글
| JAVA IO (0) | 2024.03.18 |
|---|---|
| Mutiny (0) | 2024.03.14 |
| Project reactor (0) | 2024.03.14 |
| HotPublisher 구현 (0) | 2024.03.13 |
| ColdPublisher 구현 (0) | 2024.03.13 |